Homemade Pappardelle Pasta Recipe (Just 3 Ingredients)
This post may contain affiliate links. Please read our disclosure policy.
This authentic Italian Pappardelle Pasta Recipe is one of the simplest and most satisfying dishes you can make from scratch. With just three basic ingredients, you’ll create wide, silky ribbons of fresh egg pasta that are perfect for pairing with rich sauces or enjoying on their own. Let’s bring the joy of traditional pasta-making into your kitchen, one comforting bite at a time.
Next, try this creamy pappardelle pasta with mushrooms; you won’t be disappointed.

Quick Look at This Recipe
- Prep Time: about 45 minutes (make, knead, roll, and cut dough)
- Cook Time: 1-3 minutes
- Total Time: 75 minutes
- Servings: 8 people
- Dietary Info: Vegetarian, Dairy-Free, can be made Gluten-Free,
- Method: Traditional well method with flour and eggs mixed by hand on a board, then kneaded until smooth.
- Technique: Roll by hand or with a pasta machine until paper-thin, then cut into wide ribbons and dust with semolina.
- Flavor & Texture: Rich, eggy flavor with a tender bite and silky texture that’s perfect for soaking up hearty or creamy sauces.
Why you’ll love this family favorite!

Growing up in Italy, homemade pasta was a special occasion — not something we made every week. With two full-time working parents, fresh pasta was a weekend treat, a time for family and flour-dusted fun.
Now, I carry on that tradition with my own children, especially in the winter when we crave comfort. We make a day of it — rolling dough, sharing stories, and filling the kitchen with warmth.
I’m sharing this pappardelle pasta recipe to bring that same joy into your home. Whether it’s a cozy dinner, date night, or girls’ night in, fresh pasta always makes it feel special.
Pappardelle is perfect for hearty sauces — creamy or rich with meat. My best advice? Just practice. Feel the dough, play with thickness and width, and make it your own. Once you’ve got it down, you can learn how to make homemade ravioli next!
And a little fun fact — pappardelle comes from the Italian pappare, meaning “to gobble up.” Which is exactly what you’ll want to do.
Made With Amore,

“I never thought I would make my own pasta and now I’m hooked! My family loves it and it’s so rewarding and so delicious!! Thank you Elena for sharing all these beautiful recipes♡”
– Sylvia
Table of Contents
- Quick Look at This Recipe
- Why you’ll love this family favorite!
- Simple Ingredients
- How To Make Pappardelle Pasta
- Making Pappardelle Noodles Without a Pasta Machine
- Cooking Fresh Pappardelle Pasta
- Recipe Tip
- Pappardelle Pasta Recipe FAQs
- Best Ways to Store Fresh Pappardelle Pasta
- Delicious Sauce Pairings for Homemade Pappardelle
- More Italian Pasta Recipes to Try
- Homemade Pappardelle Pasta (Easy Fresh Pasta Recipe)
Simple Ingredients
Only a few simple ingredients are needed to make the most delicious homemade egg pasta. Quality is important since there aren’t many ingredients.
- Eggs: I suggest free-range eggs that have rich yellow or orange yolks. This will add rich and beautiful color and enhance the taste of your pasta. Make sure to remove them from the refrigerator in advance so they can come up to room temperature.
- Flour: Your best option is 00 flour is “00” flour, a type of Italian flour that’s extremely finely milled. It has an ultra-fine grind, which makes a tender, delicate dough for pasta. All purpose flour can be used, but it results in a chewier texture and may require a bit more liquid to achieve the right texture.
- Semolina. We use a bit of semolina in this pappardelle pasta recipe for dusting the pasta once it is finished to keep the pasta from sticking together. You can use flour, but it changes the cooking a bit and can make the pasta a little heavier in texture.
See the recipe card for quantities of each ingredient.
How To Make Pappardelle Pasta
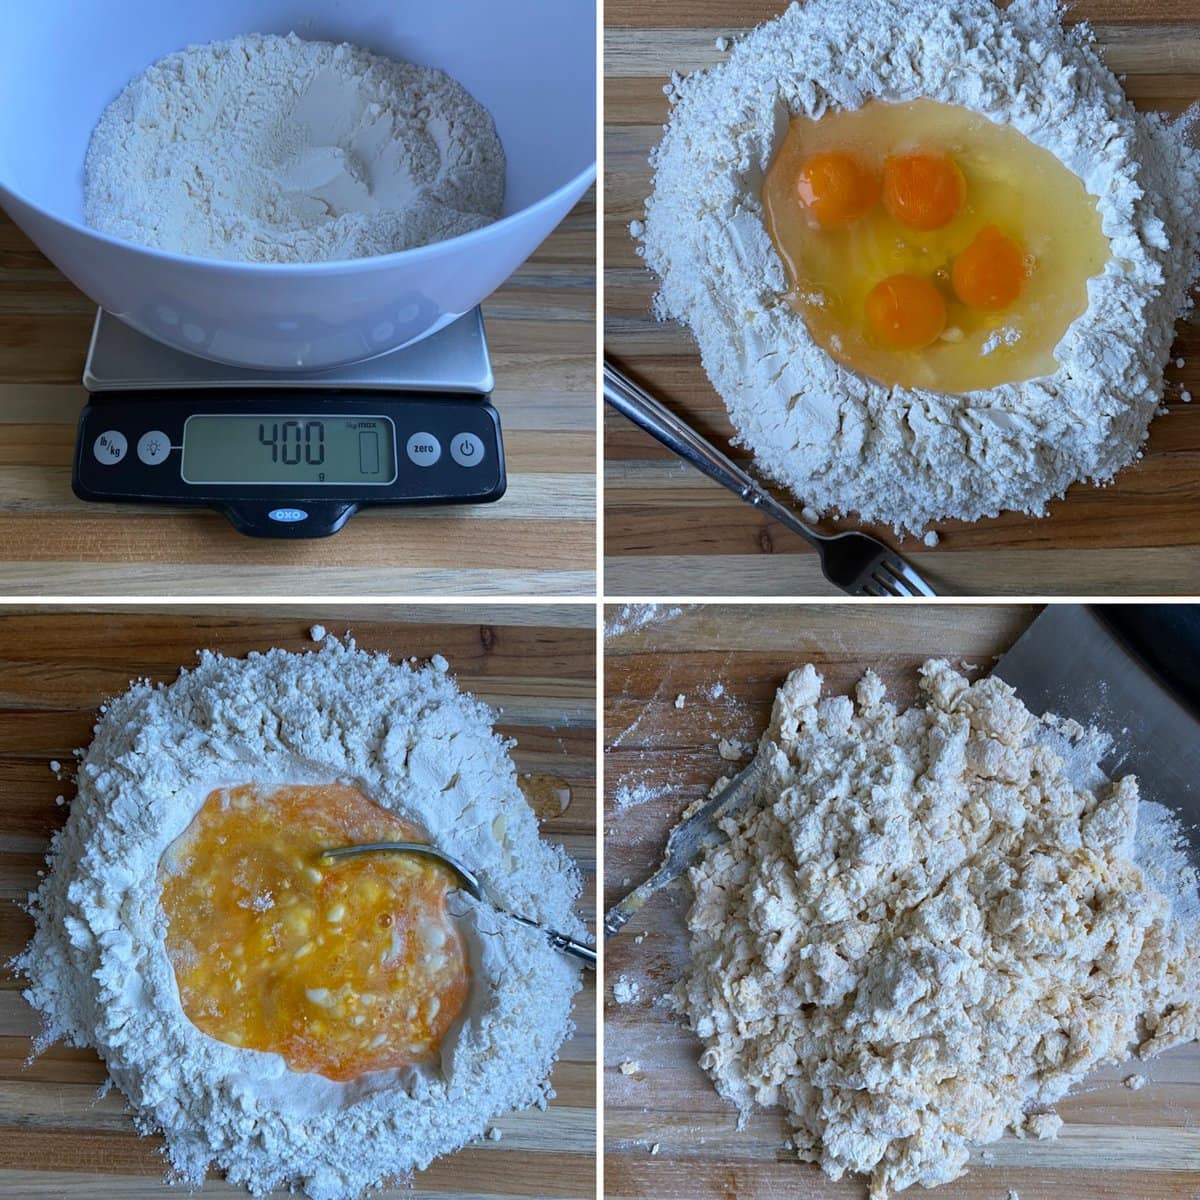
- Weigh your flour using the amount in the recipe card. Weighing the flour is more accurate than measuring with cups and will yield a dough that’s tender and perfectly hydrated dough. I like this inexpensive scale.
- Make a large well in the flour using the bottom of the bowl or your fist and pour your eggs into the middle of the well.
- Break each egg and start to scramble them.
- Slowly incorporate the flour with the eggs until a crumbly mixture is achieved.
My Pro Tip
If you don’t want to mix the eggs into the flour on the counter or cutting board, you can do it right in the mixing bowl. Use a fork and mix to incorporate. Once the dough reaches a crumbly mixture, move to the countertop to start kneading.
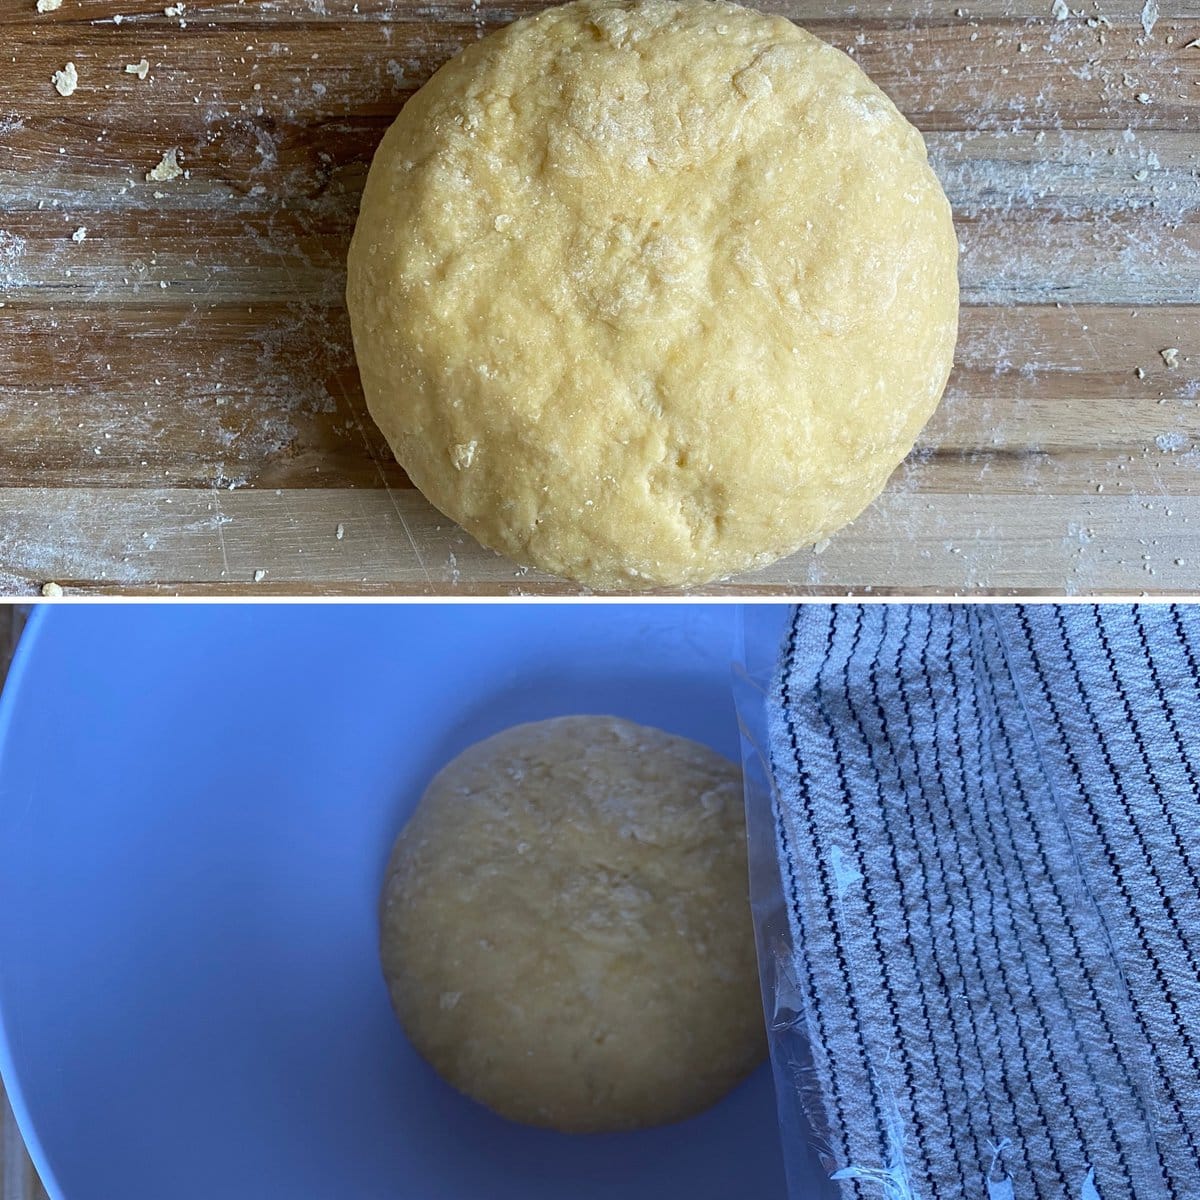
- Set a timer and knead the dough for about 10 minutes until a smooth dough ball forms. You can also place the dough in a stand mixer with a dough hook to knead.
- After kneading, you will need to rest the dough. Place the dough in a large clean bowl, cover it with plastic wrap, and let it rest for at least 30 minutes or up to overnight.
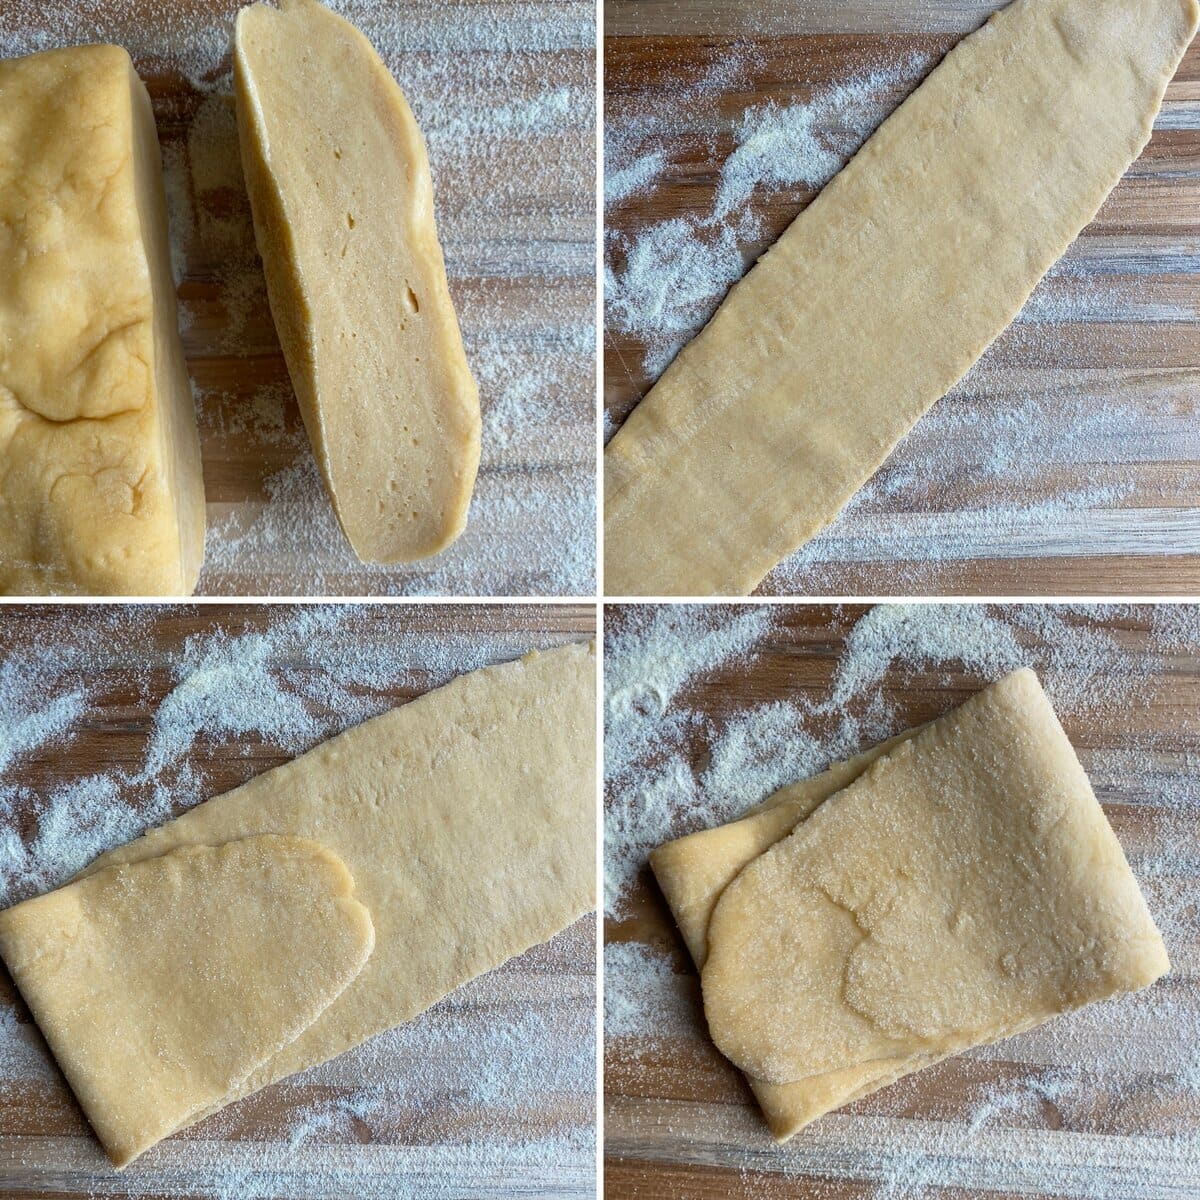
- After resting the dough and checking that it’s ready, cut the dough into fourths. You will work with one section at a time, so keep the others covered while you are working with it.
- Flatten the pasta dough a bit with your hands and run it through your pasta machine on setting #1 or the first setting.
- Fold one end of the dough in.
- Then fold the other to make a rectangle. Send it through the pasta maker again with setting #1. You can add a little semolina flour to keep it from sticking to the machine.
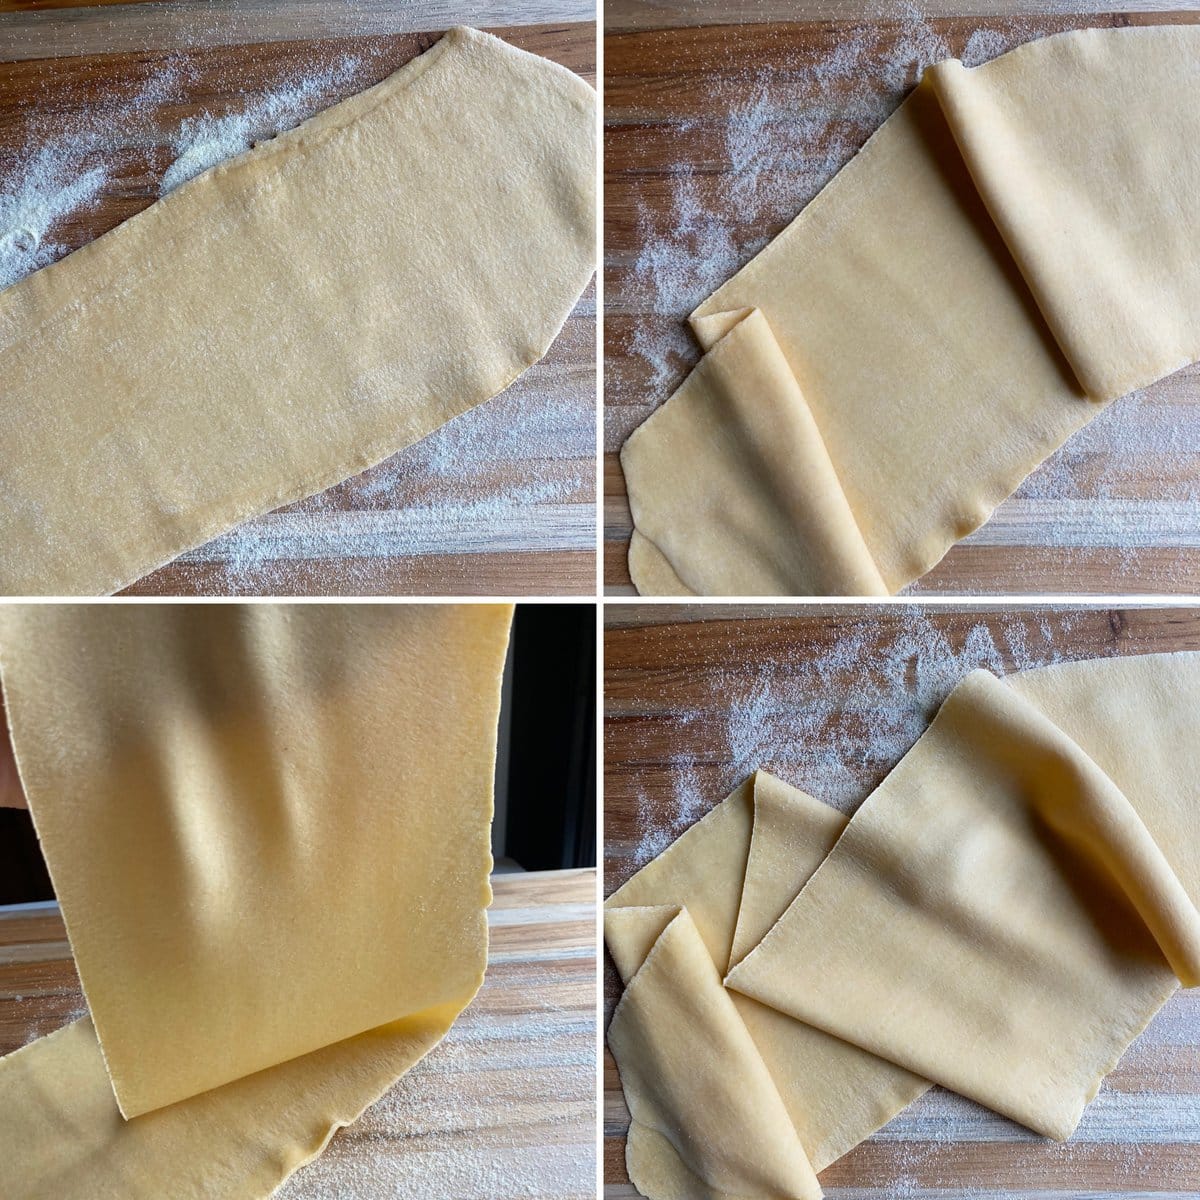
- Keep rolling out the dough with the pasta maker settings going from #1 all the way to #7 (no need to fold the dough after the first pass on #1). The images above show the different stages. As you work with it, dust both sides of the dough with a little semolina so it doesn’t stick in the pasta machine.
My Pro Tip
Use the Window Pane Test: You will know when it is thin enough by holding your hand to the light, and you are able to see your hand through the pasta sheet.
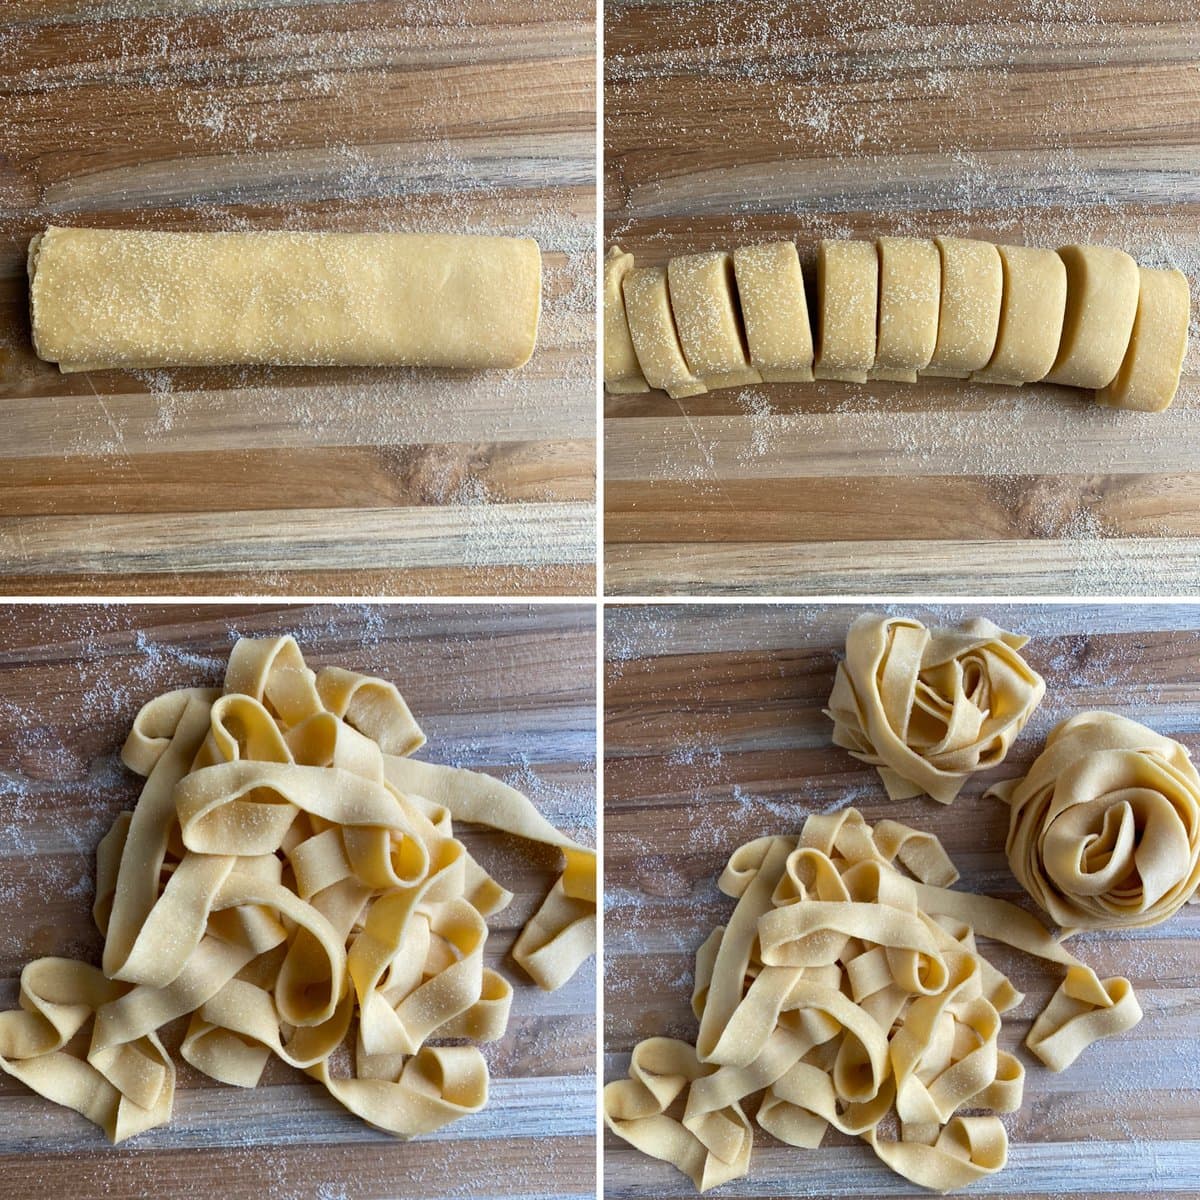
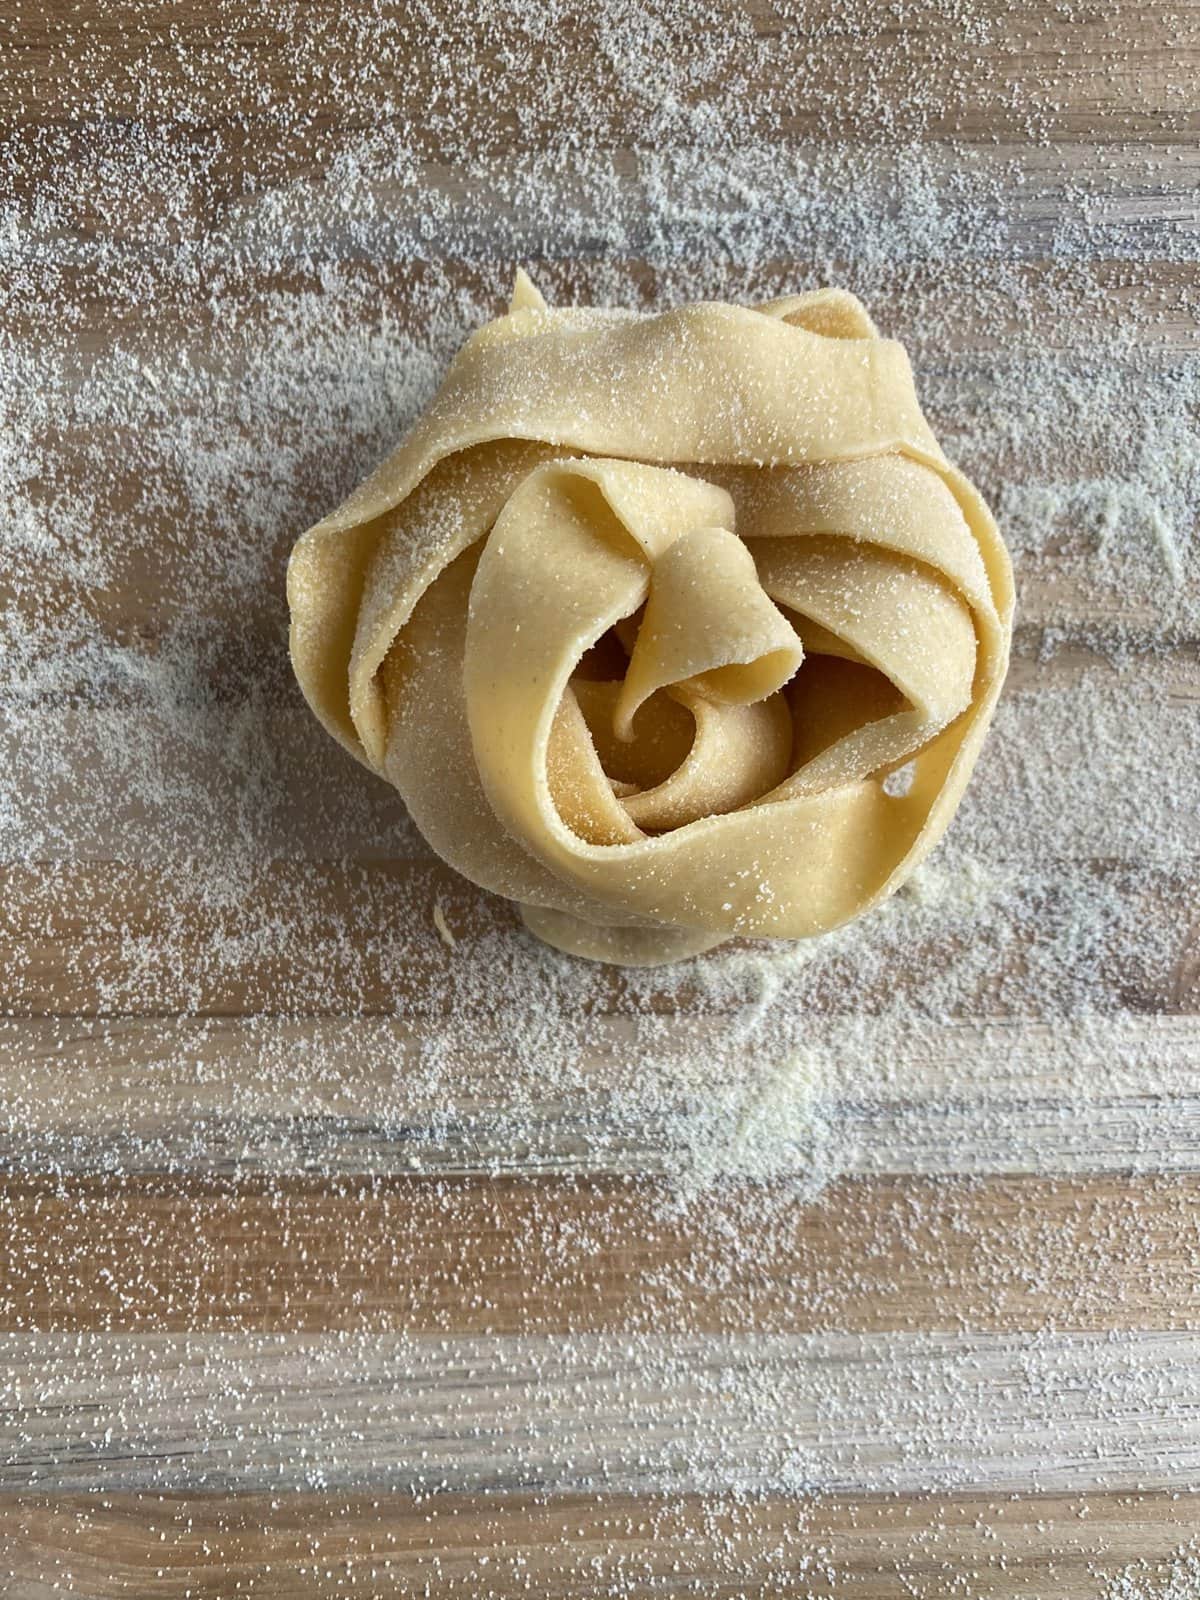
- Dust the top of the sheet of dough with semolina flour and loosely roll it into a cylinder.
- Use a sharp knife to cut the pasta dough into 3/4-inch-wide slices. You can adjust it wider or thinner depending on how you like it.
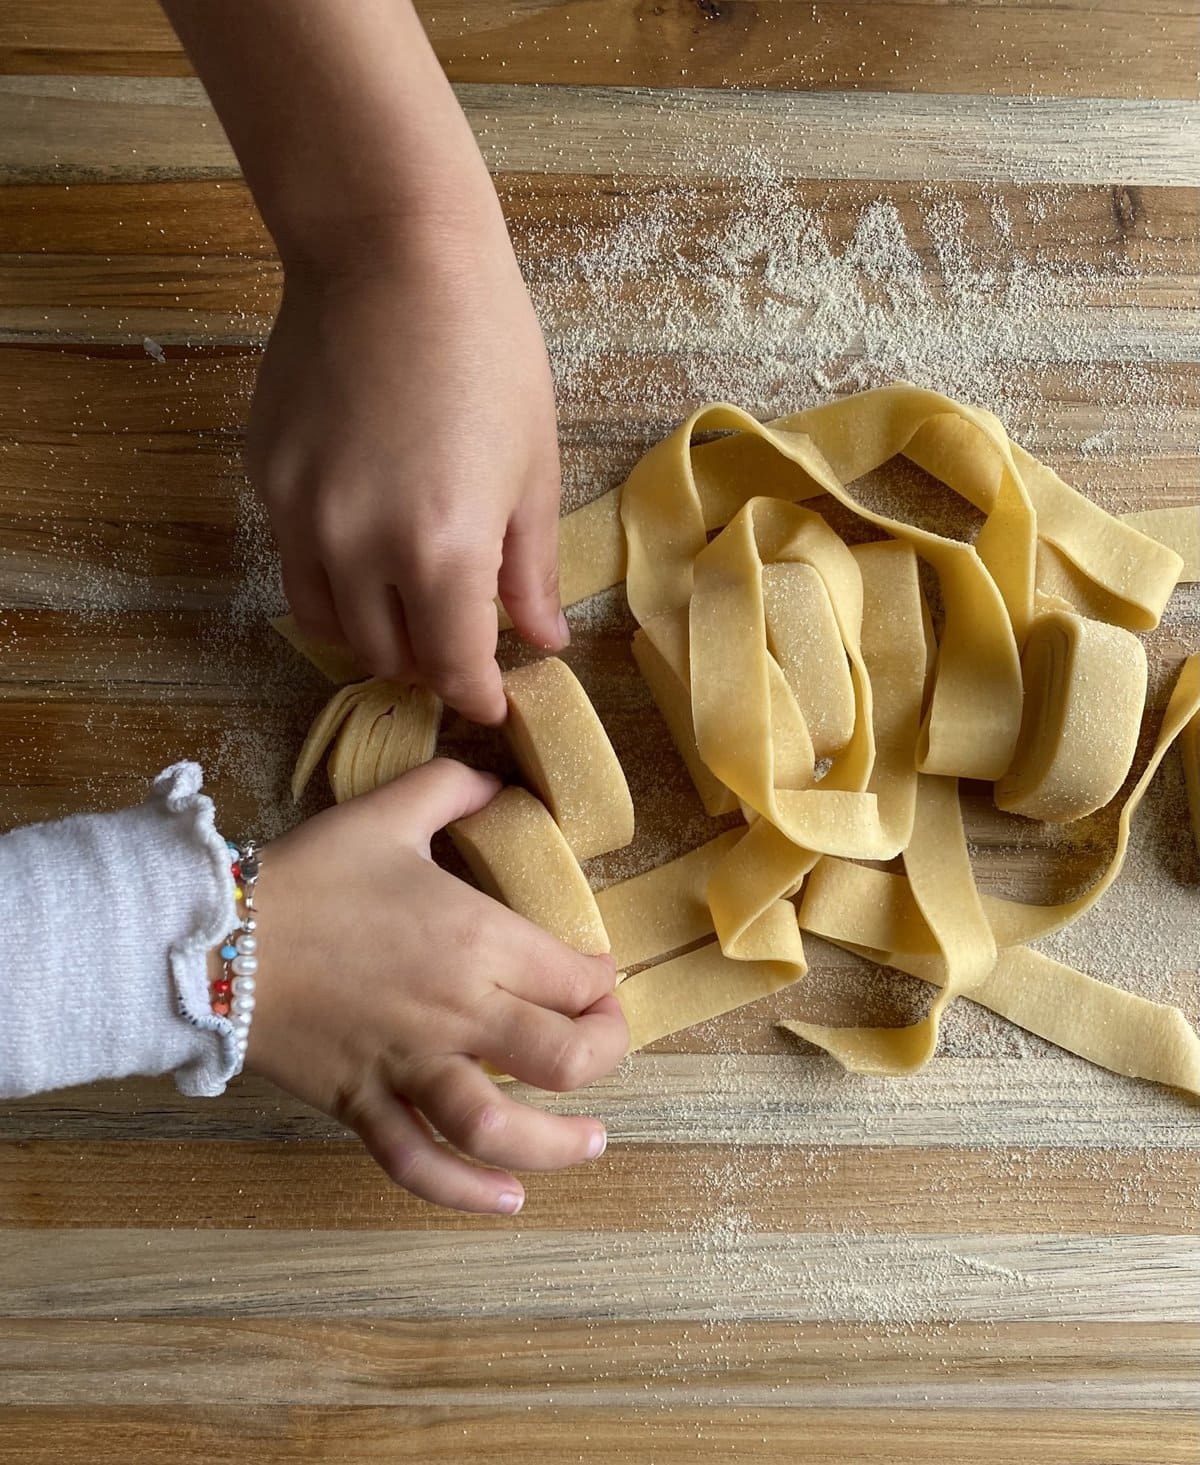
- Unwrap the pappardelle pasta and dust it with semolina. Gently toss it to separate the pieces. Place it on a sheet pan and cover with a tea towel until ready to cook.
- For storing in the freezer, you can make them into little nests or simply put them into a freezer-safe bag.
My Pro Tip
Make it a Fun Family Activity! Making homemade pappardelle pasta is therapeutic and satisfying, just like making this Neopolitan pizza dough and rye sourdough starter. It is a fun activity for families or as a date night project. There is something about mixing the dough with your hands, creating a delicious product, and then eating the fruits of your labor.
Making Pappardelle Noodles Without a Pasta Machine
If you don’t have a pasta machine, that’s ok, you can still make fresh pappardelle pasta. All you need is a rolling pin.
- Divide the dough into four sections and work with one at a time while keeping the others covered.
- Use semolina to dust the top and bottom to keep it from sticking. Keep rolling out the dough in a rectangular shape until you can see your hand on the other side when you hold it to the light.
- Cut the pasta as directed with instructions below, and repeat the rolling steps with the remaining dough. Cover unused dough with plastic wrap to keep it from drying.

Cooking Fresh Pappardelle Pasta
Cook the pappardelle noodles in a large pot of boiling salted water. You will need about 4 quarts of water for 1 pound of pasta. Fresh pasta takes considerably less time to cook than dried, usually 1 to 3 minutes, so watch it carefully.
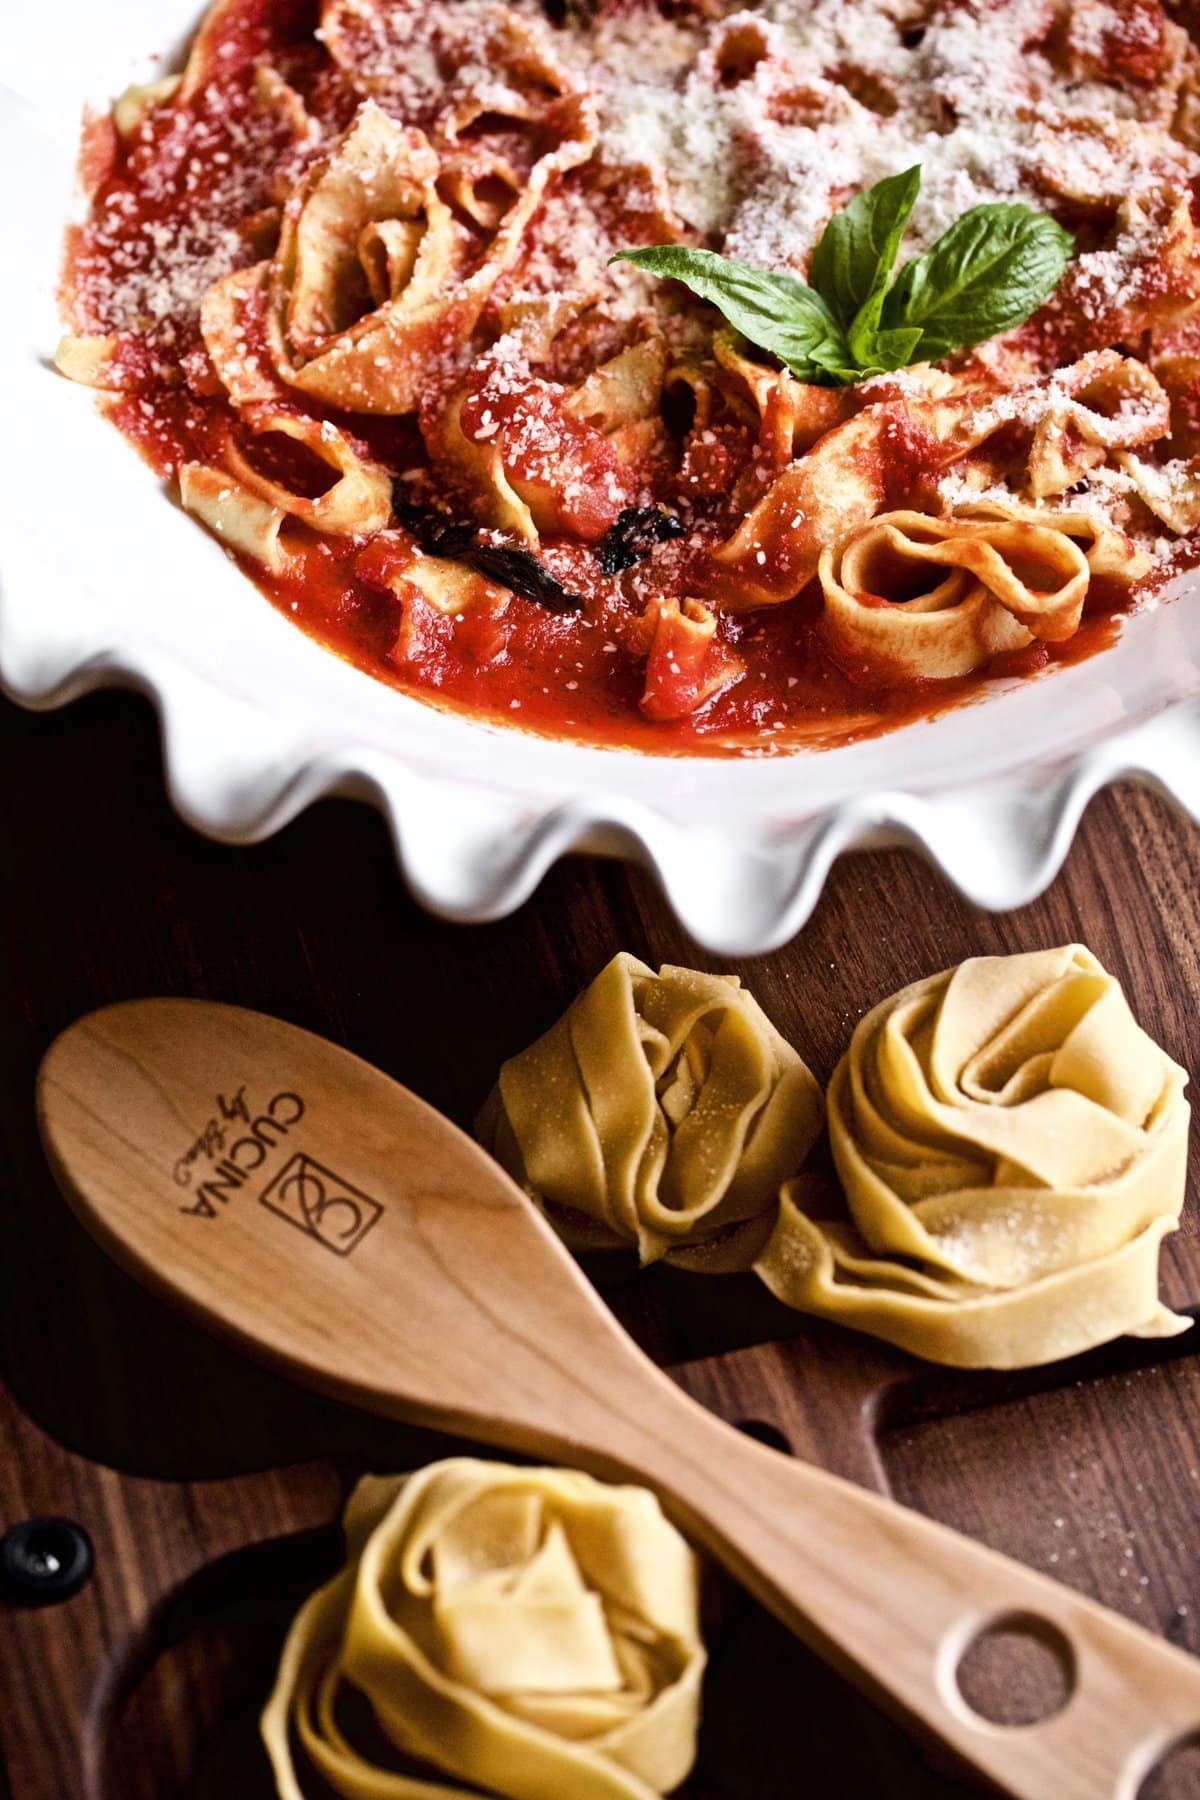
To test for doneness, remove a noodle with tongs or a pasta server spoon and take a bite. It should be tender with a slight bite. Once cooked, serve with your favorite sauce. You will love this recipe, especially with this black truffle cream sauce or even just some butter and Parmesan cheese.
My Pro Tip
Recipe Tip
- Rest the dough. Let the dough rest for 15-30 minutes in the fridge, or on the counter. During this time the water will be absorbed by the flour and the gluten strands will relax, giving a strong, pliable, roll-able dough.
- Spring back test. The easiest way to know if your dough has rested enough is to use the spring-back test. Press down on the dough after it has rested, and when it’s ready, it will bounce back ever so slightly to show the gluten has relaxed.
- Prevent sticking. Make sure you never feed the pappardelle pasta dough through the machine when it is sticky. Always make sure you sprinkle some extra semolina flour on top and bottom before you feed it through the machine. If you are using a rolling pin the same rule applies!
- Don’t overcook the pasta. You’ve worked so hard for this! Don’t ruin the fresh pasta by overcooking it. Fresh pasta takes considerably less time to cook than dried, usually 1 to 3 minutes, so watch it carefully. To test, remove a noodle with tongs or a long-handled fork and take a bite. Serve with your favorite sauce and Mangia! (Eat!)
Pappardelle Pasta Recipe FAQs
Semolina is coarser and won’t stick to the pasta as much as regular flour. Regular flour tends to cake on fresh pasta, while semolina keeps the pasta lighter and easier to digest. Also, when cooking floured pasta, you often end up with a cloudy-looking pasta water, which isn’t what you want when using the pasta water as a binder for the sauce.
Yes, pappardelle is traditionally made with egg. You can find recipes that use other ingredients, but the texture and color of the pasta will be very different from traditional pappardelle.
Not really! There are a few things I recommend having that make the process easier or more accurate. The basics include a wood cutting board or countertop for mixing, though you can technically use a bowl too, a fork, a sharp knife, some plastic wrap, and a lightweight towel. I also recommend a pasta machine for rolling the fresh pasta, but you can also do it by hand with just a rolling pin. A kitchen scale is highly recommended for weighing the ingredients, especially the flour, and a bench scraper makes cleanup and working with the pasta dough a bit easier, but it’s not required.
There are five key stages when making fresh pasta.
1. Raw egg and flour. This is when you break your egg in the flour well.
2. Scrambled egg in the flour well. At this point, you’ve scrambled your egg with a fork in the center of your flour well.
3. Cake batter stage. Mix the scrambled egg with SOME (not all) of the flour and beat until you create a cake batter-like thickness. After that, you will slowly incorporate more flour for the next stage.
4. Crumbly mixture of egg and flour. This is where you start to add more and more flour, a bit at a time, into the scrambled egg mixture, which makes a crumbly dough.
5. Unified dough ball. This is when the egg and flour are well incorporated and forms into a cohesive ball.
Yes, you can use a cup-4-cup gluten-free flour blend that has ingredients such as xanthan gum added to help the flour perform more like regular flour.
Absolutely! Follow all the directions for making and shaping the pasta, but do not cut the dough. Leave it in long, thin sheets and boil for a few minutes. Then they’re ready to use in a lasagna recipe like this spinach lasagna with ricotta.
Best Ways to Store Fresh Pappardelle Pasta
There are multiple ways to store fresh pasta after making this pappardelle recipe. Follow the directions below for storing and freezing uncooked, fresh pasta.
- Store in the refrigerator: You can store fresh homemade pasta in the refrigerator in an airtight container for a day. If you don’t plan to cook the pasta right away, it’s best to place it in the refrigerator until you’re ready.
- Freeze fresh pasta dough: Wrap the dough in plastic wrap and place it in an airtight container or freezer bag. The pasta dough will keep for up to a month. Thaw the dough overnight in your refrigerator before rolling, cutting it, and cooking it.
- Freeze fresh pasta: Toss the pasta in a little semolina to keep fresh pasta from sticking, then lay the pasta noodles in a single layer on a baking tray. Or, you can form the pasta noodles into little nests. The pasta dough will keep for up to a month.
- Dry and freeze: Let the pasta air dry for one hour, then put the semi-dry pasta in a freezer-safe plastic bag or airtight container. The frozen pasta will last for eight months.
My Pro Tip
Cooking Frozen Pasta. Place the frozen pasta straight from the freezer into boiling water to cook it. Do NOT thaw frozen pasta dough before cooking.
Source: Master Class
Delicious Sauce Pairings for Homemade Pappardelle
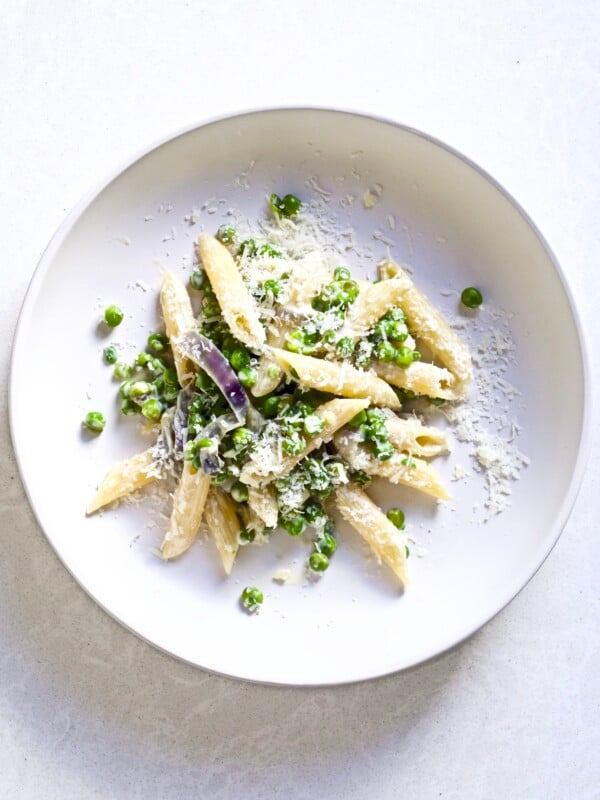
While you can enjoy this pappardelle pasta recipe in a range of delicious pasta recipes, pairing the thick, wide pasta ribbons with thick meaty sauces, vegetable sauces, pestos are my favorites.
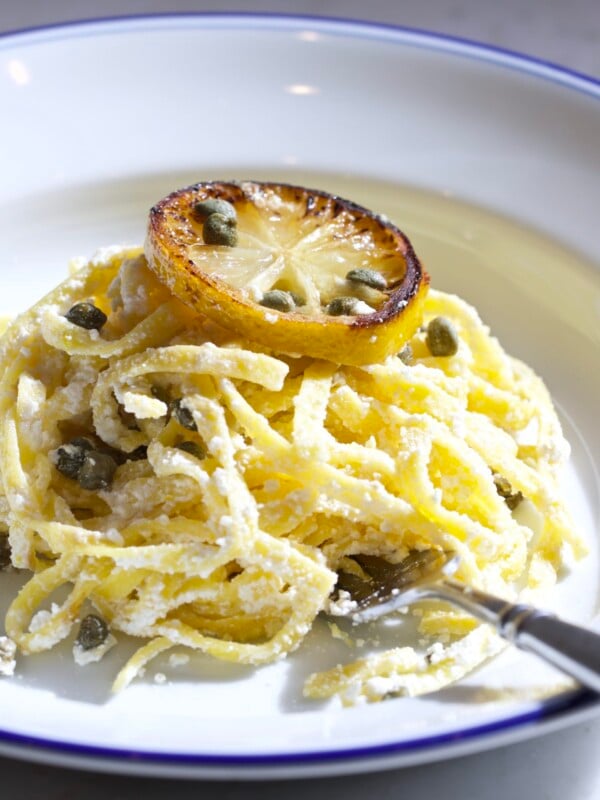
If you’re looking for meaty sauces, try this thick Italian ragu or a beef short rib ragu. This smoked salmon mascarpone and peas sauce and my amatriciana sauce with guanciale are meaty but not as heavy.
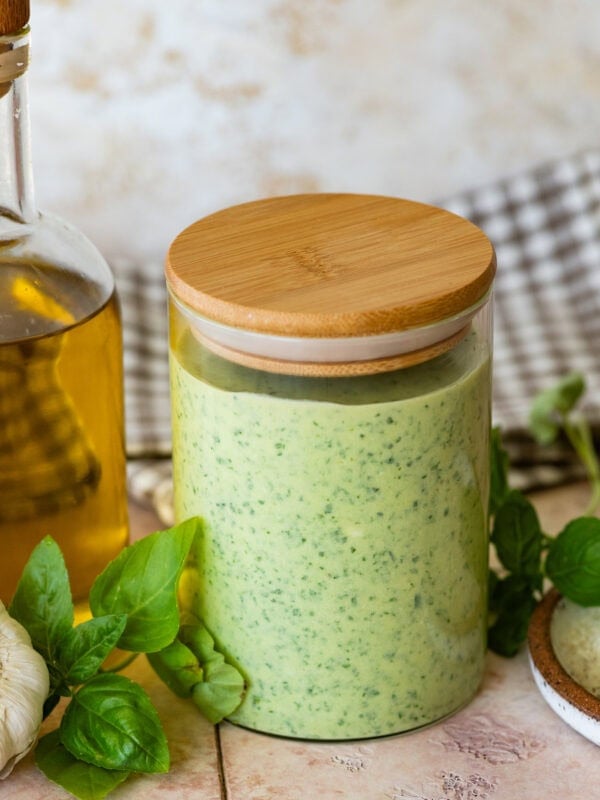
For vegetable-forward sauces, try my classic pomodoro sauce, homemade basil pesto, my no-cook ricotta and roasted pepper sauce, and this creamy mushroom and spinach sauce.
More Italian Pasta Recipes to Try

💙 MADE THIS RECIPE AND LOVED IT? 💙 Please leave a ⭐️STAR rating and COMMENT below- I love connecting with you! Tag me with your creations on Instagram and find me on Pinterest.
Homemade Pappardelle Pasta (Easy Fresh Pasta Recipe)

Ingredients
- 4 free-range eggs, room temperature
- 400 g "00" Flour, or plain all-purpose flour, highly recommend weighing flour, 14.10 ounces
- Semolina flour , for dusting pasta
Instructions
Make Dough
- Sift the flour on a large work surface and make a well in the center (I like to use the bottom of a bowl to make the well). Place the eggs in a bowl, then pour into the well; with a fork, break up the eggs (like you are making scrambled eggs), then gradually mix the wet ingredients into the flour mixture just until combined. Start a little at a time and create a cake batter consistency then incorporate more of the flour until a crumble consistency form. The dough may look dry and crumbly at this point. (See Notes for more)
- If you have a dough scraper you can use it to help you incorporate the ingredients.
- Knead by hand. Dust a wooden board or work surface with flour. Start kneading each piece, push the dough away from you with the heel of your hand, fold the dough over itself and turn it counterclockwise.
- Continue pushing, folding, and turning until the dough is smooth and elastic about 10 minutes. You can also knead it in a stand mixer.
- Let dough Rest. Pat the dough into a round ball. Flatten the top slightly with your hand, wrap it in plastic wrap and refrigerate for at least 30 minutes or overnight. You will know your dough is ready when it springs back after you push into the dough. I call this the "spring back test".
- Roll out the dough. Sprinkle a large cutting board or clean the work surface with semolina. Cut 1/4 of the rested dough ball and keep the other part covered with plastic wrap so it doesn't dry. Use the rolling pin method or pasta maker method roll below to roll the pasta.
Rolling Pin Method.
- Starting in the middle, push away from you with a rolling pin, easing up on the pressure as you approach the edge.
- Dust both sides of the dough with a little semolina so it doesn’t stick to the rolling pin and cutting board. Continue rolling the dough into a sheet, turning occasionally, until you can see your fingers through the bottom of the dough if you hold it to the light.
- Let the flat and rolled-out dough dry for about 10 minutes before cutting. You will repeat this step with all the pasta dough pieces.
Pasta Maker Method.
- If you have a pasta maker you can run it through the machine. Start with setting #1. Feed through the machine once then fold each side into the middle to form a rectangle. Put it through the machine again on setting #1.
- Dust both sides of the dough with a little semolina so it doesn’t stick in the pasta machine, and repeat as needed. Now, repeat feeding through the machine and changing the setting each time from #2, #3, #4, #5, #6, until you reach setting #7- OR- until you can see your fingers through the bottom of the dough if you hold it to the light.
- Let the flat and rolled-out dough dry for about 10 minutes before cutting. You will repeat this step with all the pasta dough pieces. (see photos in post for visual aid)
Cut and Cook
- Cut the pappardelle. Dust the top of the sheet of dough with semolina flour and loosely roll it into a cylinder. Using a sharp knife, cut into 3/4-inch-wide slices.
- Unwrap the pasta; dust with semolina and gently toss to separate. Place on a sheet pan and cover with a tea towel until ready to cook (or freeze in freezer bags for up to 2 months). You can make them into little nests to store them or simply put them into a freezer-safe bag.
- Cook fresh pasta noodles in a large pot of boiling salted water. (Use about 6 quarts of water for 1 pound of pasta.) Fresh pasta takes considerably less time to cook than dried, usually 1 to 3 minutes, so watch it carefully. To test, remove a noodle with tongs or a pasta server spoon and take a bite.
- Serve with your favorite sauce- I list my favorites in the recipe post. Mangia! (Eat!)
Notes
- Use “00” flour for a soft, elastic dough.
- Let the dough rest at least 30 minutes before rolling.
- Roll thin enough to see your hand through the dough.
- Dust with semolina to prevent sticking after cutting.
- Cook in salted water for just 1–3 minutes.
- Knead until the dough is smooth and springs back.
Nutrition
Nutrition information is automatically calculated, so should only be used as an approximation.


Fantastic! I love making homemade noodles. Bought the pasta maker you suggested on iG and have made several batches so far. I never want to go back to store bought because it tastes so much better.
YES! This is an easy recipe and so worth making! I am happy you love it!