This post may contain affiliate links. Please read our disclosure policy.
When I say easy, I mean you can have homemade Danish Rye bread in less than a week after learning to make this easy rye sourdough starter from scratch. After you make the starter, it will last you a lifetime, and I will teach you how to keep it alive in this step-by-step guide with all the tips and tricks you need. Bonus: You don’t have to worry about sourdough discard with this easy recipe. Make my sourdough rye bread with it.
Why You’ll Love This Family Recipe!

We’ve kept our 100% rye sourdough starter alive for over 20+ years! Why home bakers will love this recipe:
- It’s Simple: Just two ingredients and a few minutes of hands-on time each day.
- Beginner-Friendly: Rye flour makes fermentation faster and more reliable than wheat.
- Long-Lasting: Once you make this starter, it can last a lifetime with minimal care.
- Authentic Flavor: Build the rich, earthy flavor that gives Danish rye bread its signature taste.
- Step-by-Step Guidance: I’ll walk you through every step like we’re baking together in my kitchen. I included a helpful troubleshooting section, too!
This is the foundation of the loaves of rye sourdough bread my family enjoys every week—and now, you can too!
Made With AmorE,

What is a Rye Sourdough Starter?
Rye flour is the best choice for starting a sourdough culture—especially for beginners—because it ferments faster and more reliably than whole wheat flour or white flour. Its natural enzymes break down starches into sugars that feed wild yeast and good bacteria, helping your starter grow strong with less effort (and less gluten). It’s filled with nutrients and good for you! This is one of the easiest sourdough recipes.
Table of Contents
Ingredients For Rye Sourdough Starter
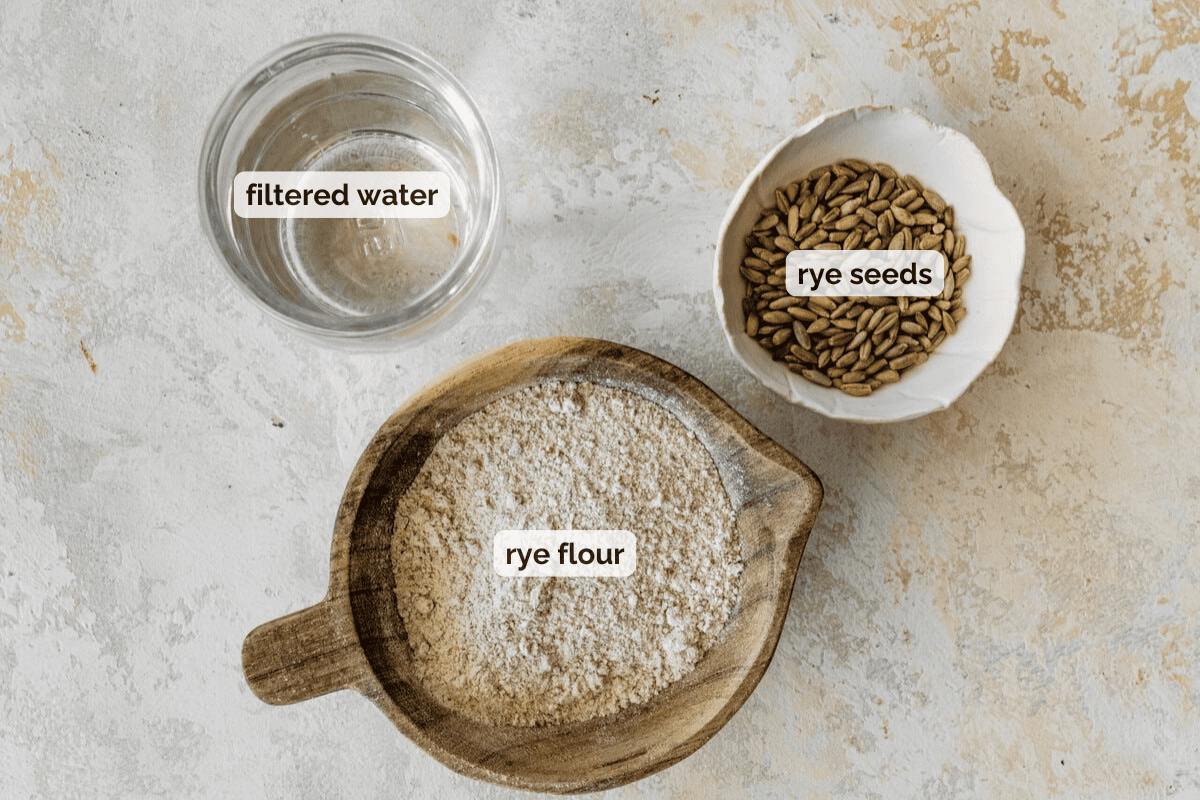
- Whole Rye Flour: Look for stone-ground or organic for the best microbial activity.
- Rye Seeds (optional): This helps the starter get going and gives extra flavor.
- Filtered or Non-Chlorinated Water: Chlorine in tap water can harm the wild yeast, so always use filtered water.
See the recipe card for exact quantities.
How to Feed Sourdough Starter Chart
If you are wondering how to care for a rye sourdough starter. This is a simple breakdown for you:
| Day | What to Do | Amount to Add | Consistency & Texture | Notes |
|---|---|---|---|---|
| Day 1 | Start your starter | 40g whole grain rye flour + 90 mL filtered water | Thick paste – like peanut butter or stiff pancake batter. Adjust with a splash of water if too dry. | Slightly looser as the mixture grows. Aim for thick, spoonable consistency. Adjust as needed. |
| Day 2 | Feed starter (no discard) | 40g rye flour + 40g water | Light, aerated paste that stirs smoothly. It should feel alive and resist slightly when stirred. | Slightly looser as the mixture grows. Aim for thick, spoonable consistency. Adjust as needed. |
| Day 3 | Feed starter (no discard) | 40g rye flour + 40g water | Slightly looser as mixture grows. Aim for thick, spoonable consistency. Adjust as needed. | Bubbles will appear. Stir once between feedings. |
| Day 4 | Feed starter (no discard) | 40g rye flour + 40g water | Light, aerated paste that stirs smoothly. Should feel alive and resist slightly when stirred. | Volume should begin increasing after each feed. |
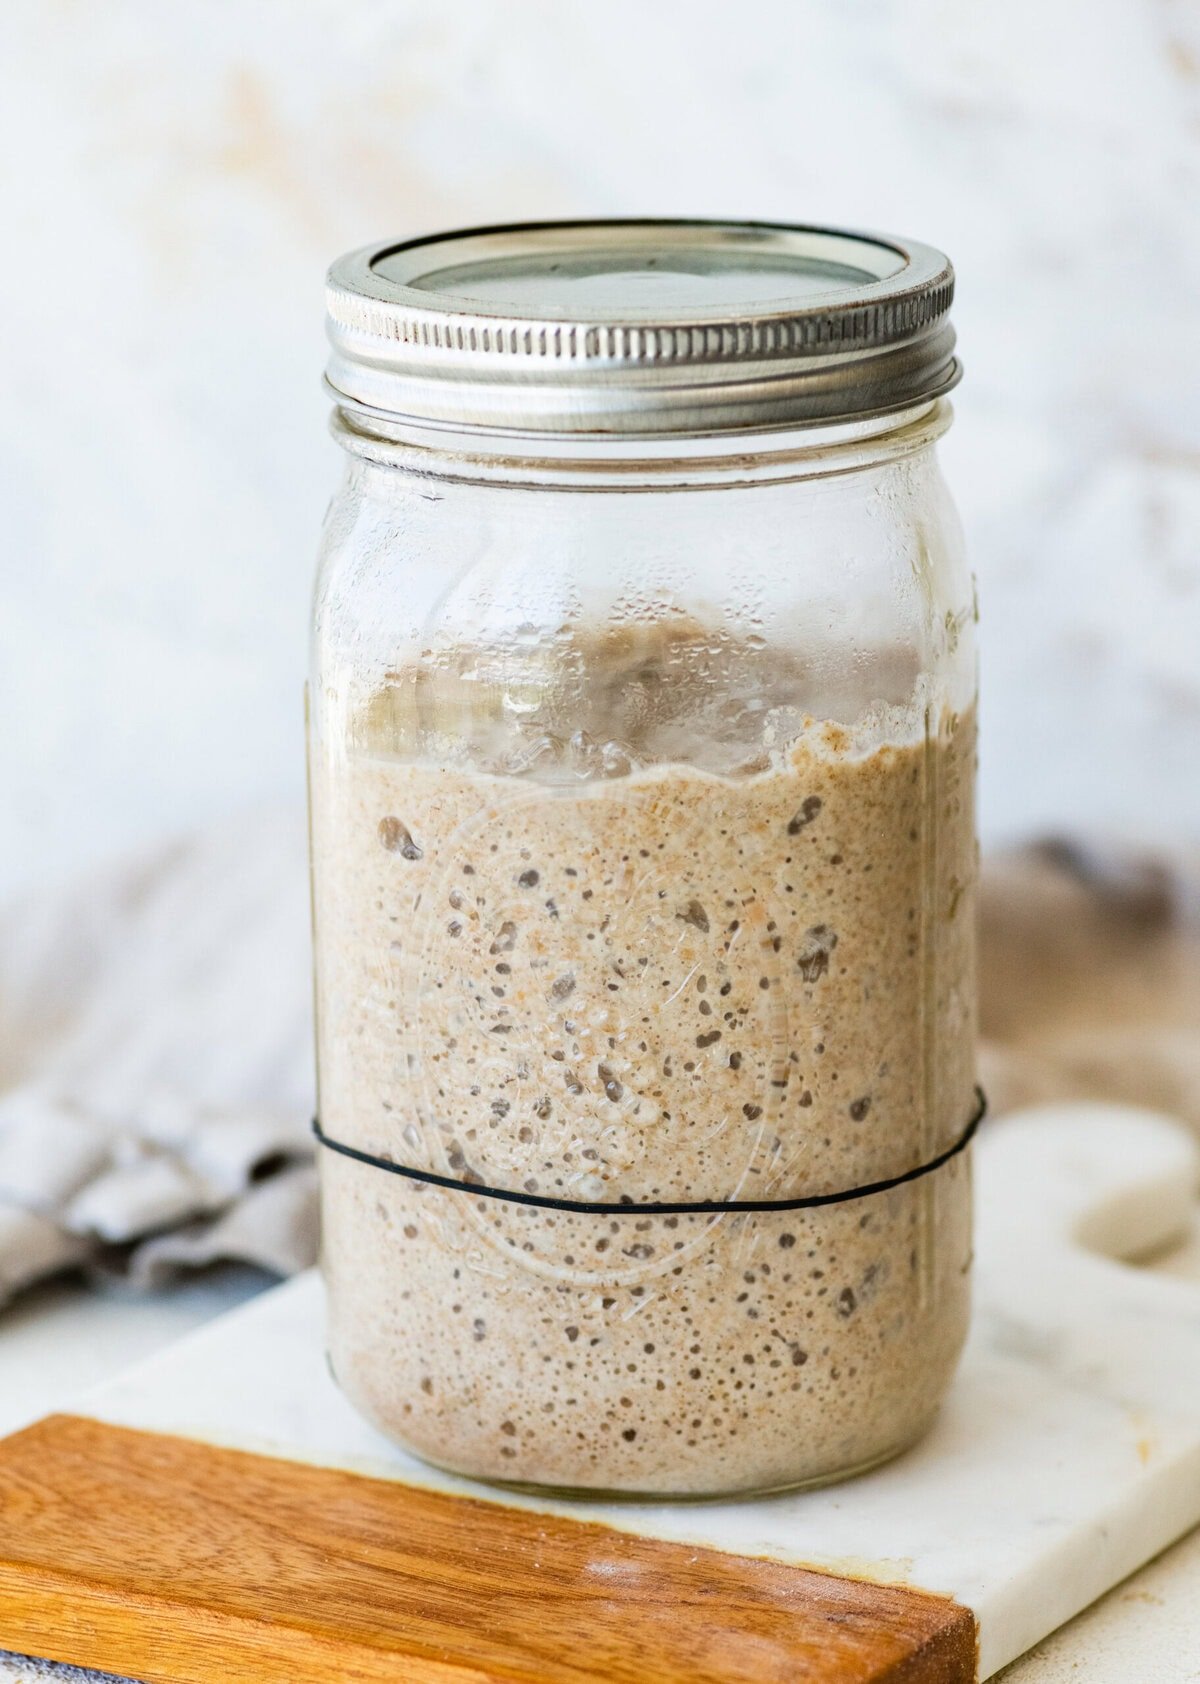
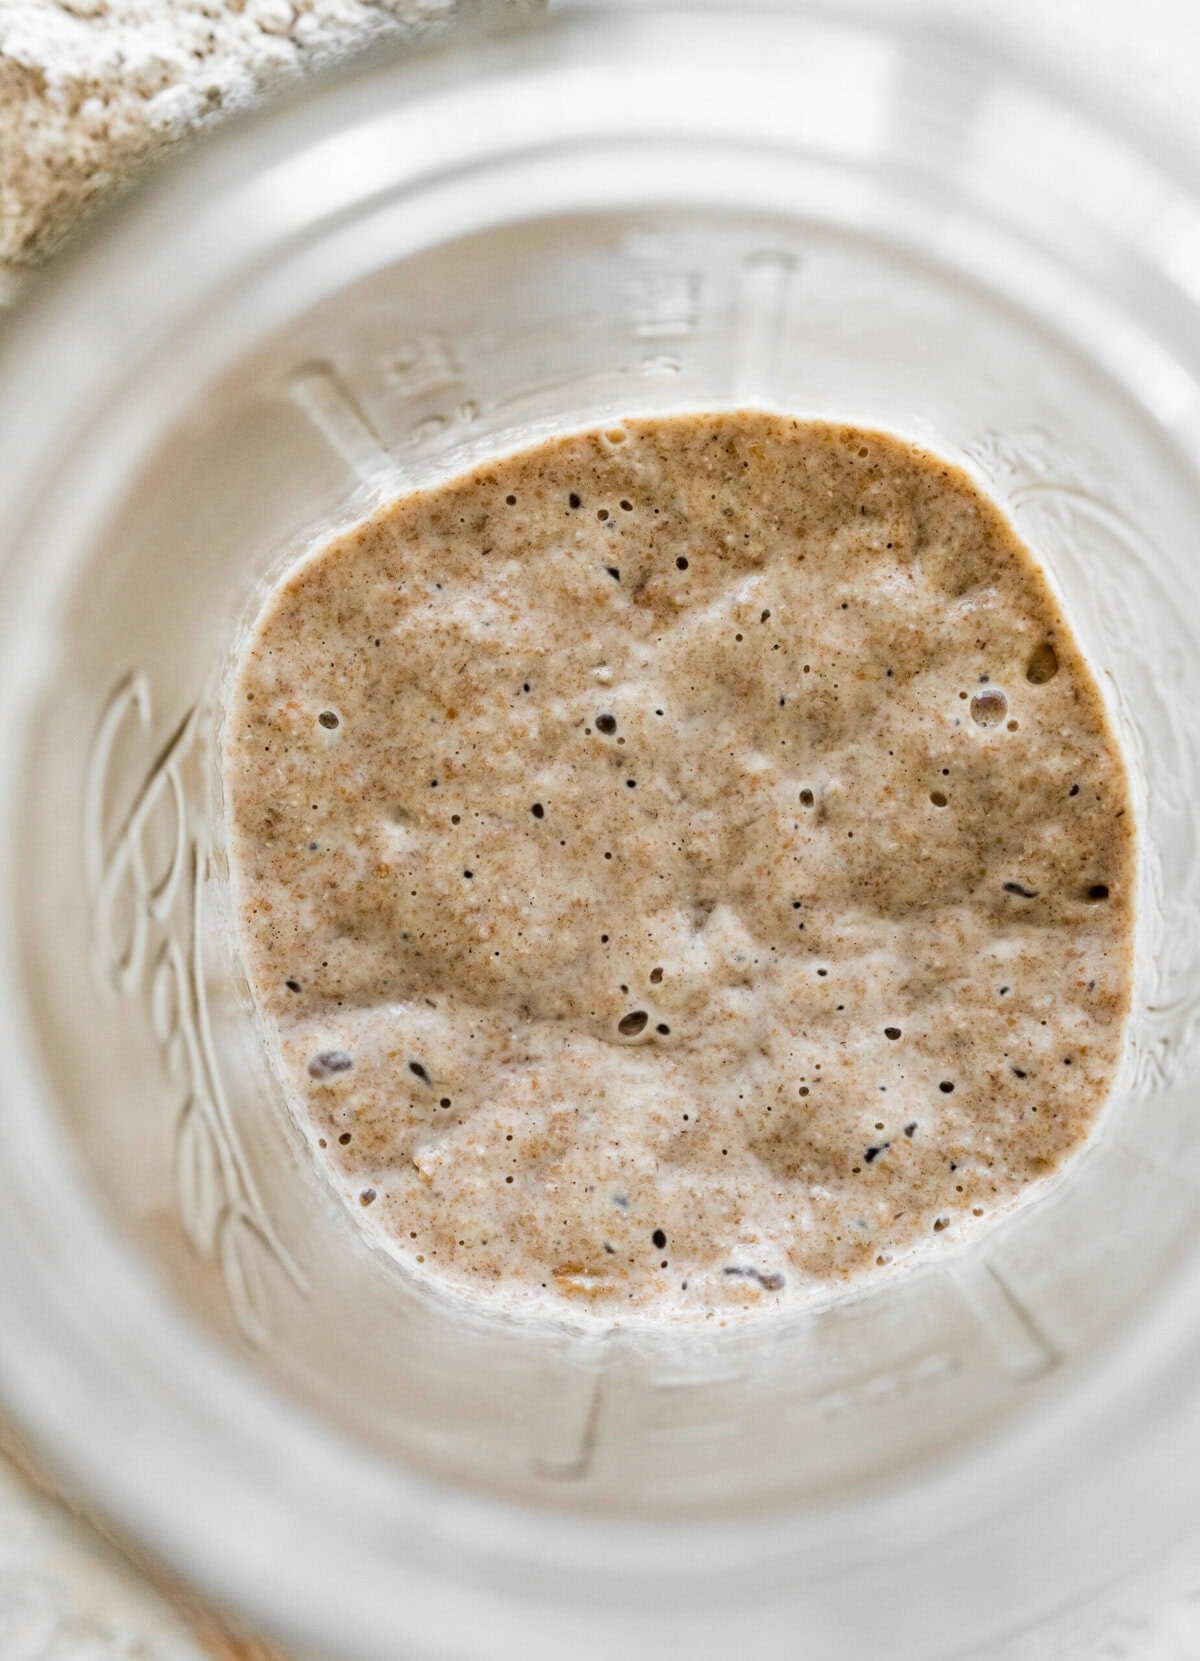
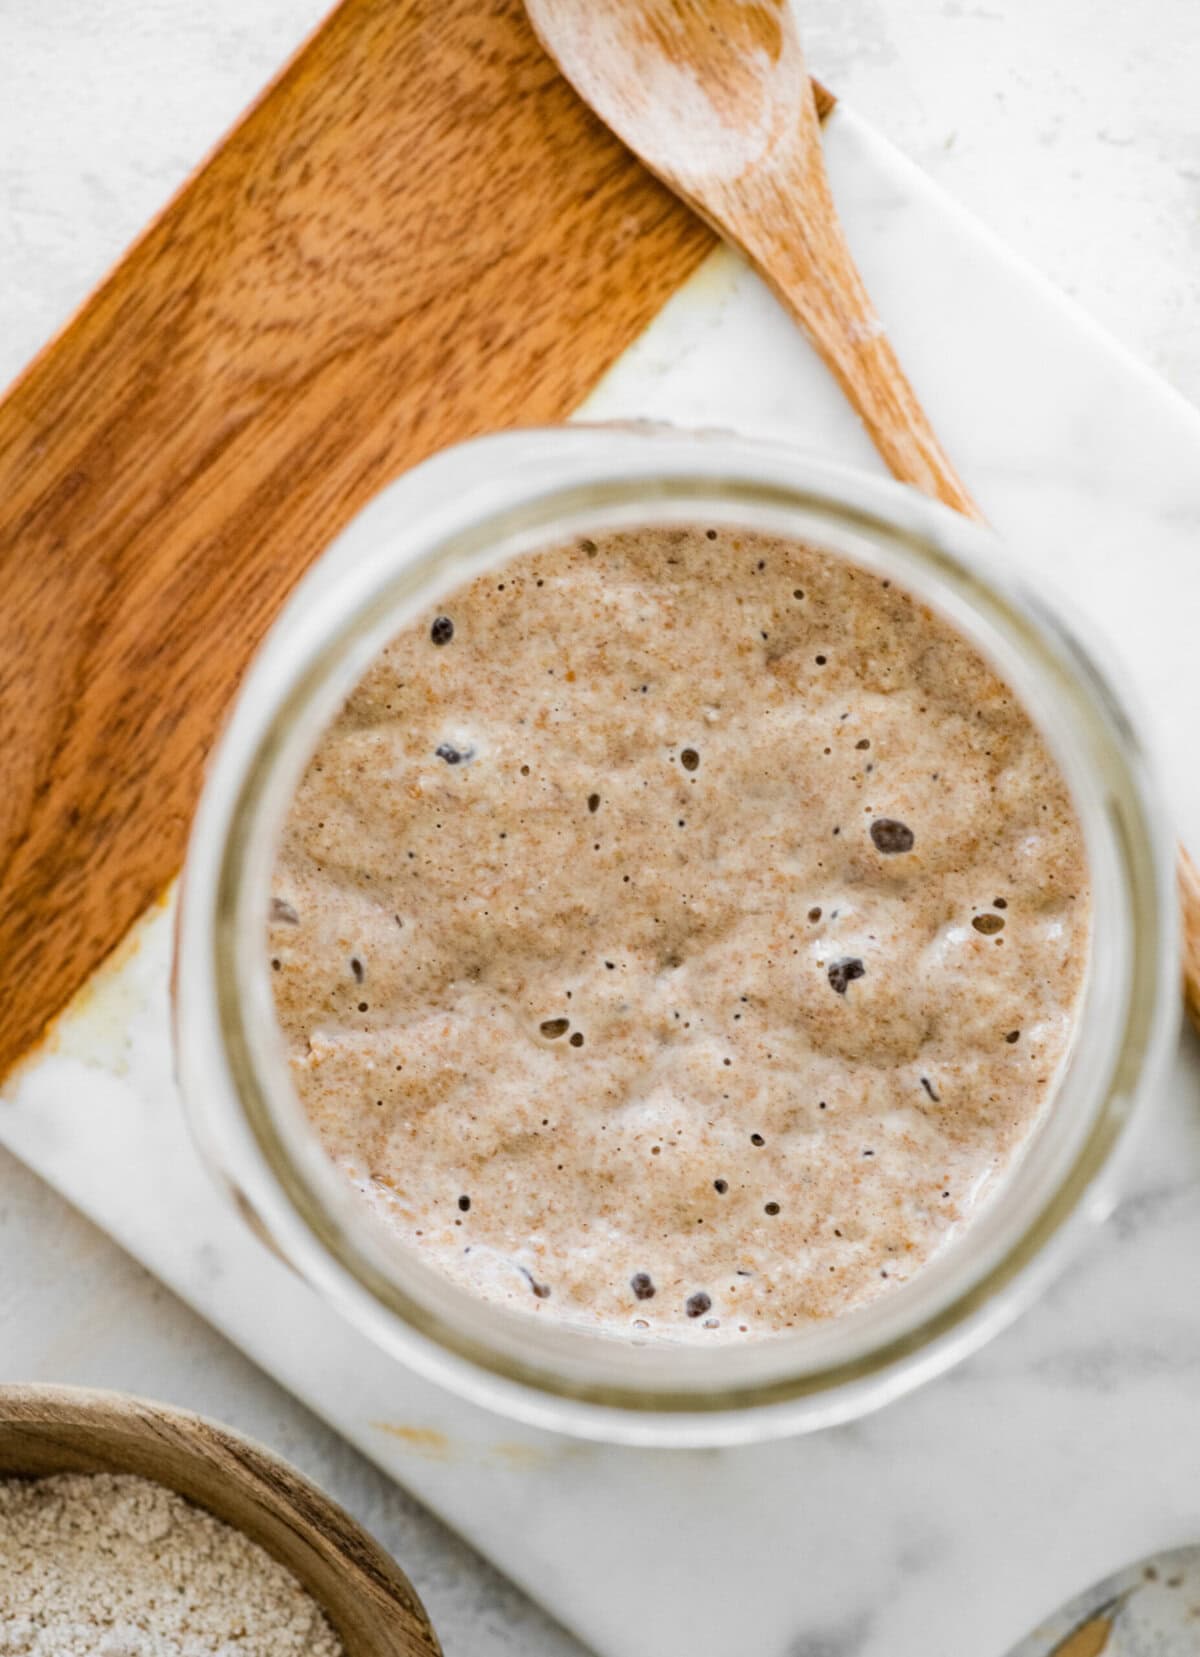
| Day 5 | Feed starter (no discard) | 40g rye flour + 40g water | Consistent thick batter. It should double or nearly double in size after feeding and have a pleasantly sour smell. | Ready to bake when doubling within 4–6 hours after feeding. |
How To Make Rye Sourdough Starter From Scratch
This is a step-by-step photo overview of the recipe; the full instructions are in the recipe card below. I highly recommend following the consistency and texture of the photos, as stated in the recipe; you may need to adjust the flour and water when feeding it. Make sure you start with a clean jar!

Step 1 – Mix Starter (Day 1)
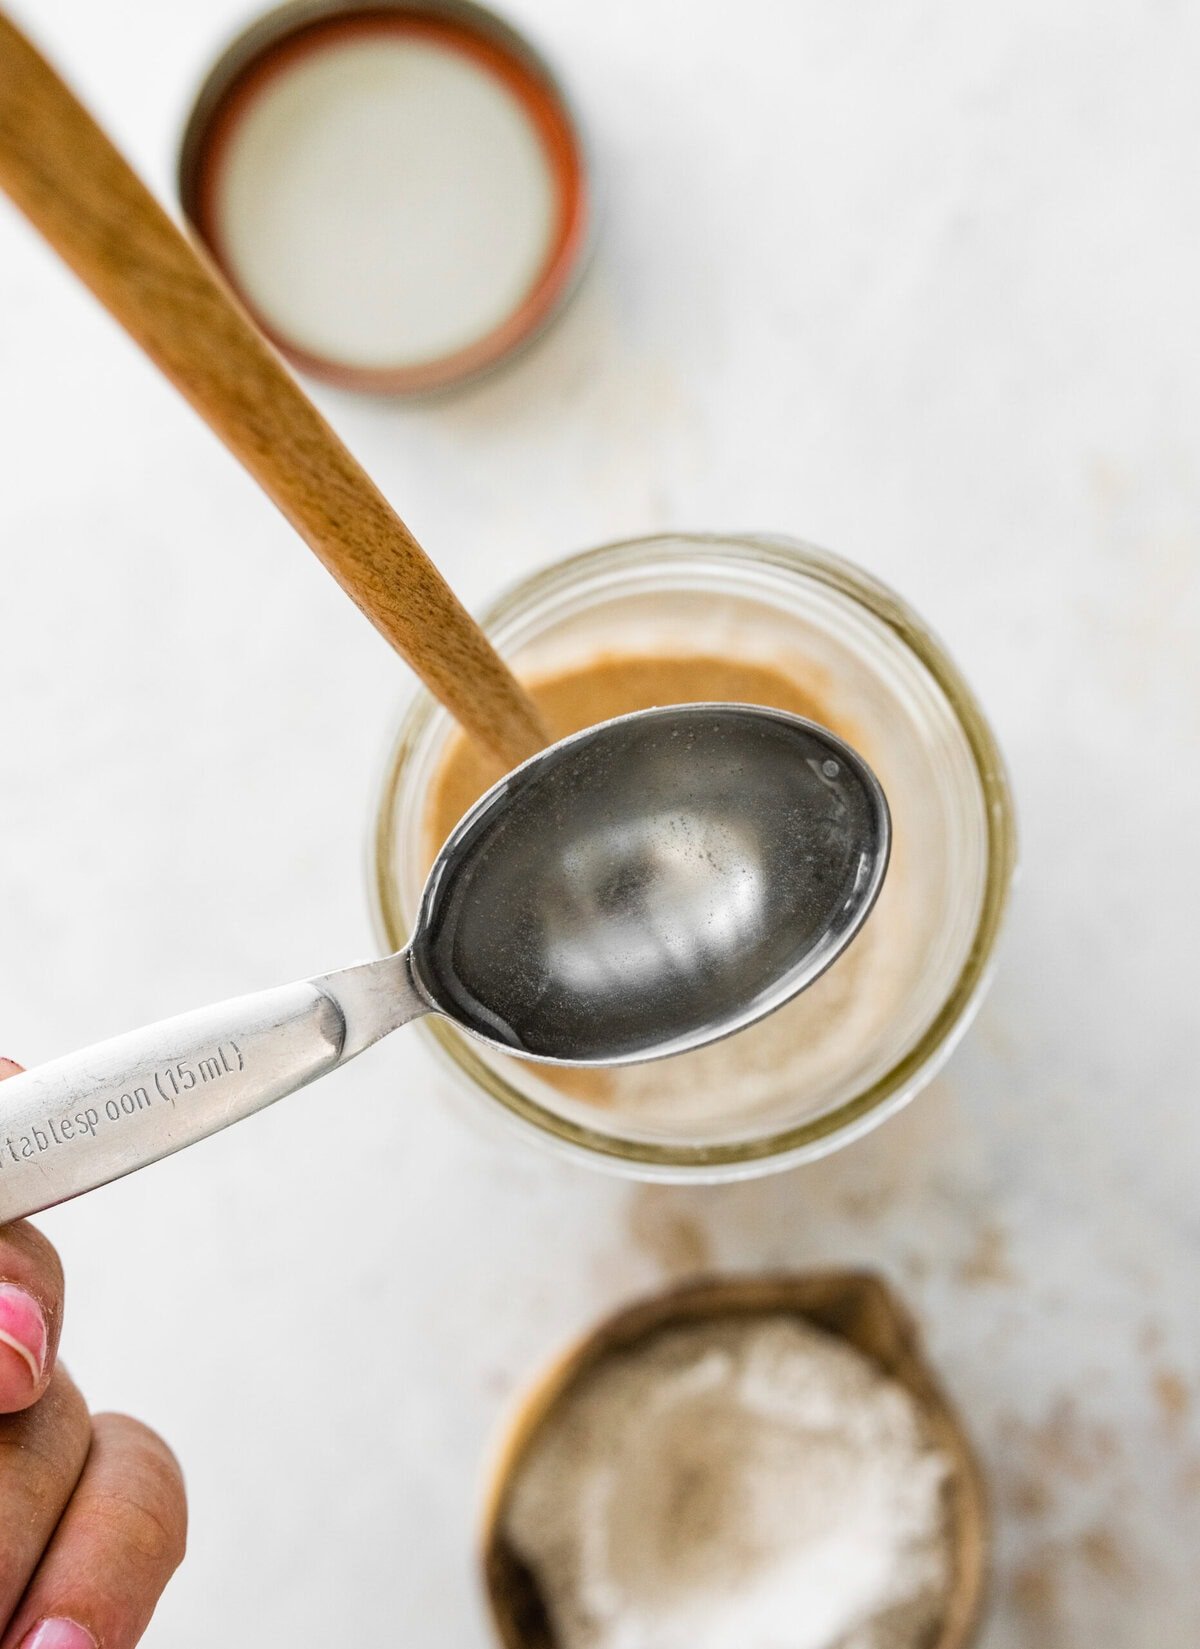
In a glass jar, combine 40g rye flour + 90 mL warm filtered water + 1 tablespoon rye seeds (optional). Stir until it forms a thick paste—like peanut butter. Cover loosely and rest in a warm spot on your counter overnight. I like to use a rubber band to see the growth, or you can mark the jar with a marker.
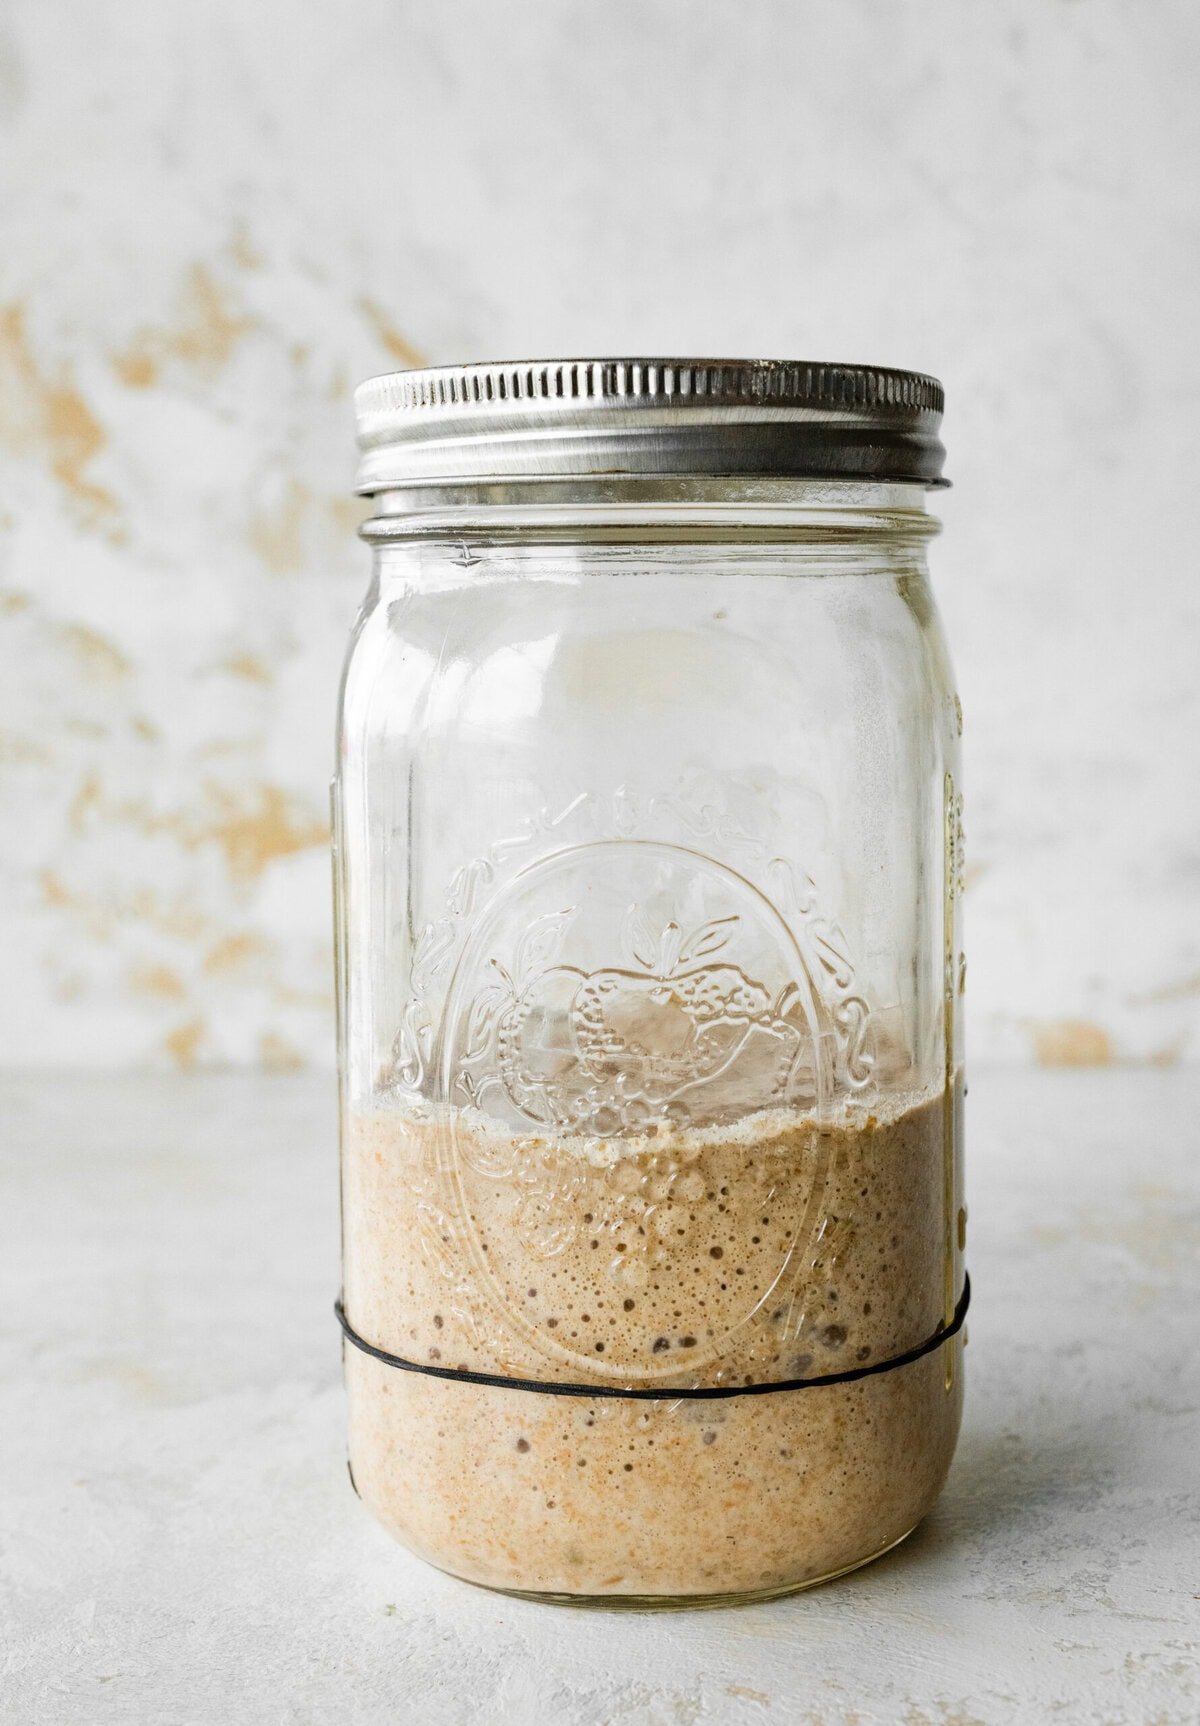
Step 2 – Check for Bubbles (Day 2)
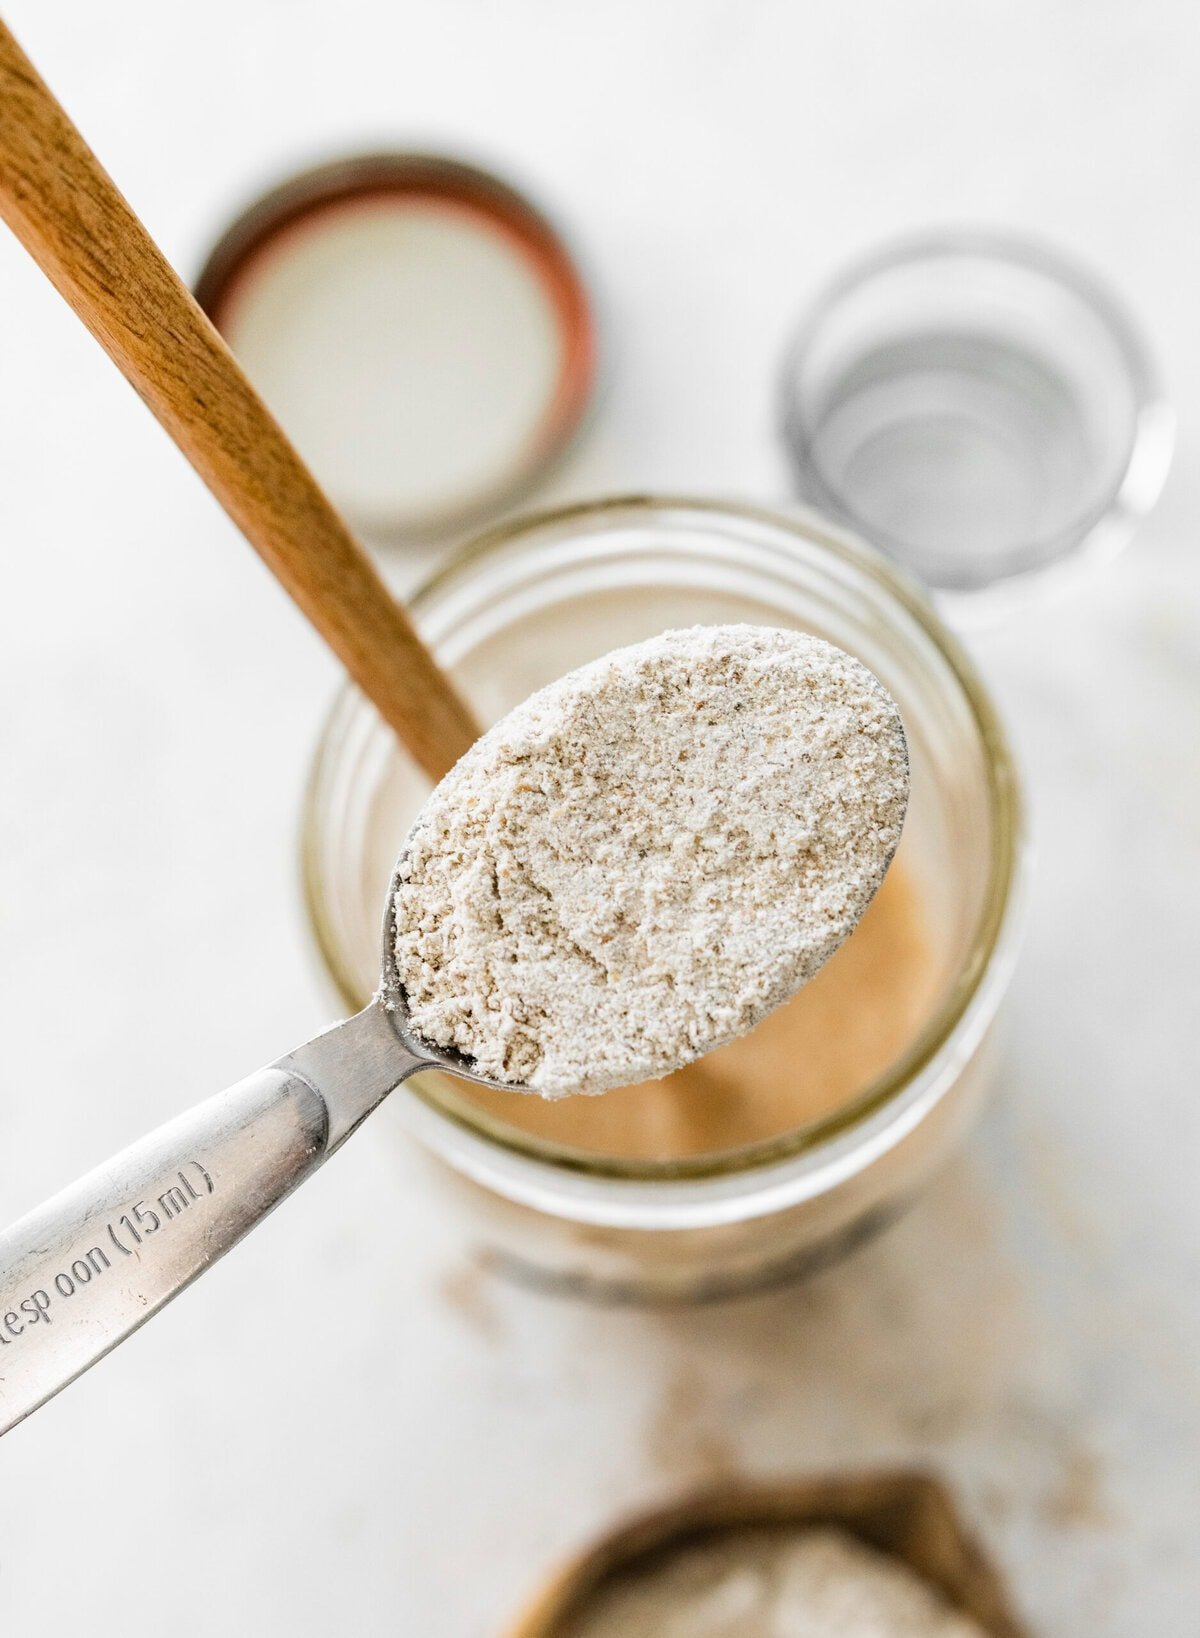
Look for small bubbles and a mild sour smell. Stir the mixture—it should feel like a thick paste. Add 1 tablespoon rye flour + 1 tablespoon warm water and stir again. Cover loosely.
Step 3 – Daily Feeding (Day 3)
Stir the starter. Feed it 1 tablespoon rye flour + 1 tablespoon warm water. Stir into a thick, spoonable consistency. Look for bubbles and a slightly aerated texture.
Step 4 – Starter Grows (Day 4)
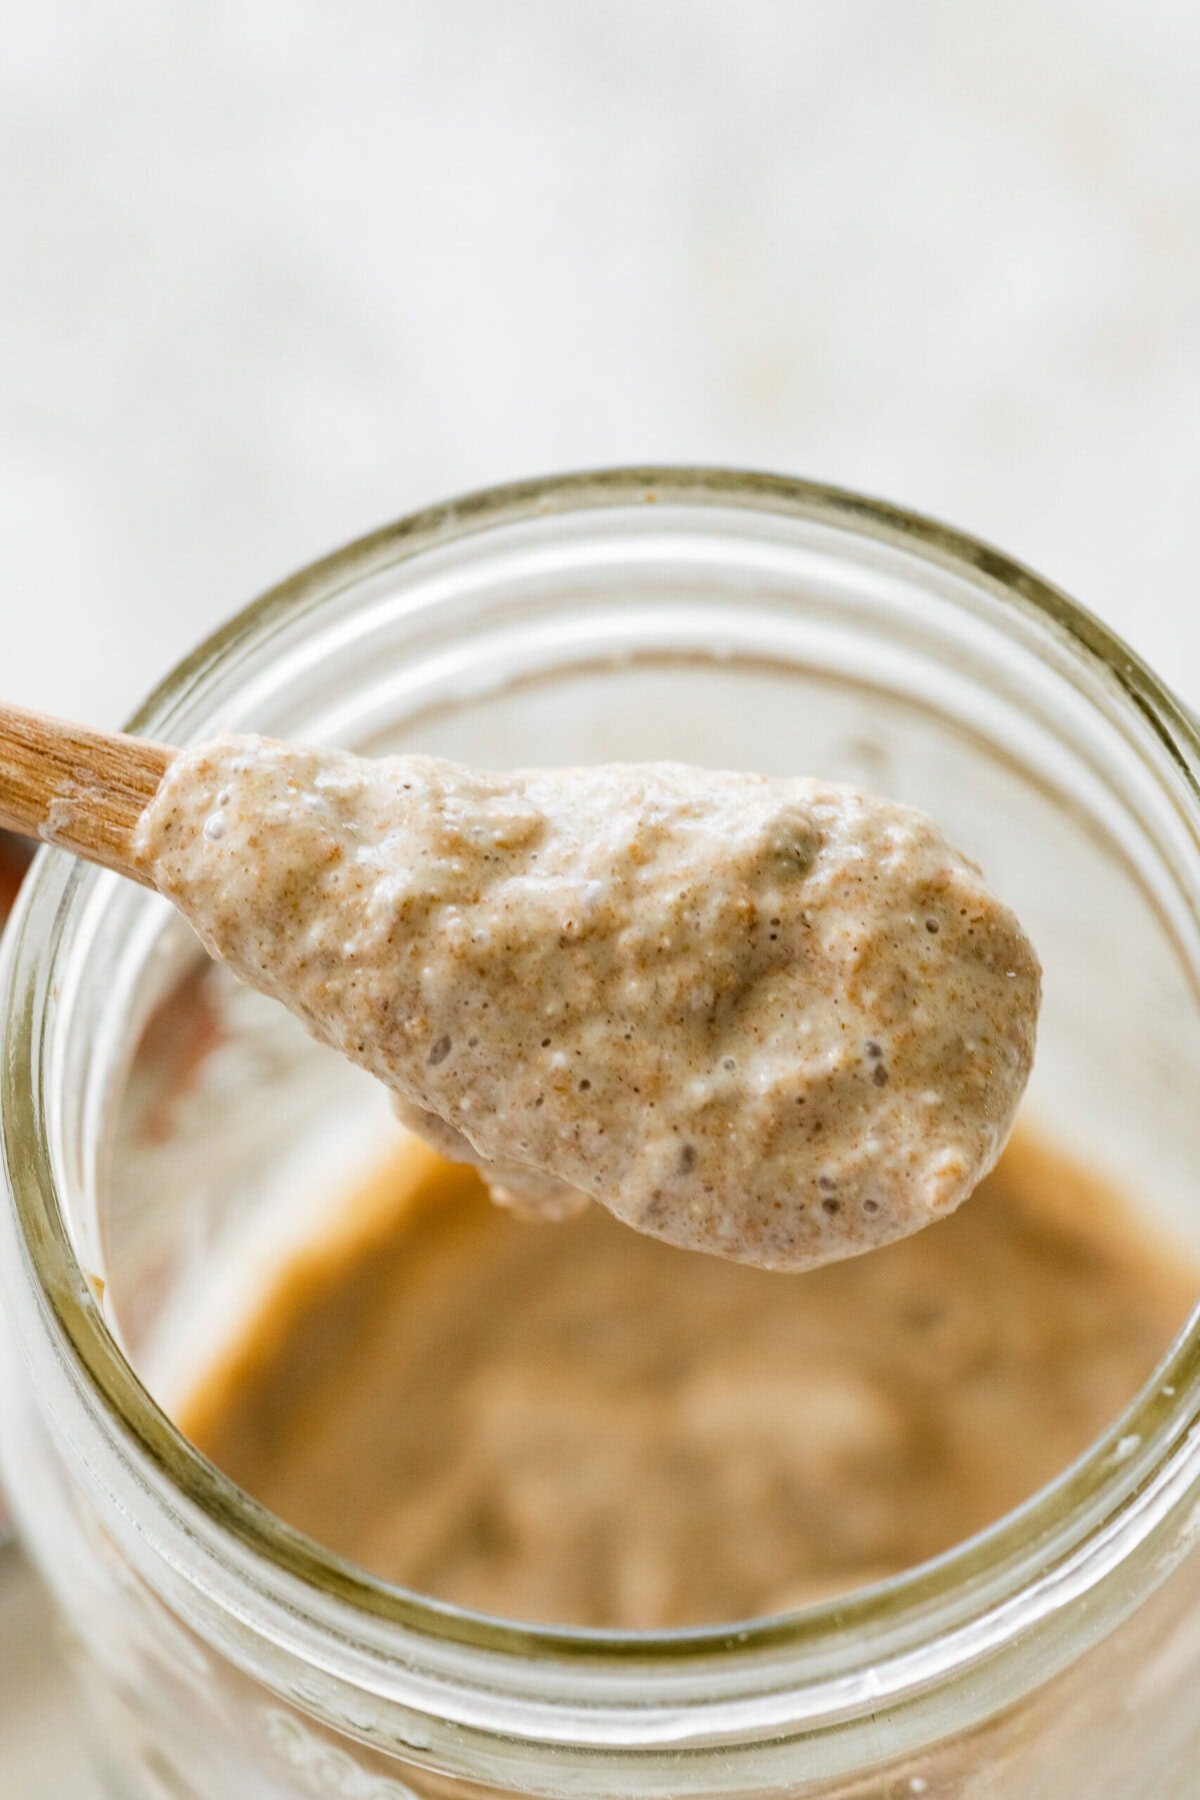
Repeat the same feeding: 1 tablespoon rye flour + 1 tablespoon warm water. Your starter should feel lighter when stirred and show visible bubbles. It should resemble a whipped batter.

Step 5 – Nearly Ready (Day 5)
Feed once more: 1 tablespoon rye flour + 1 tablespoon warm water. Your starter should now have a consistent, thick batter texture. It should double within 4–6 hours after feeding.
Step 6 – Look for Rise & Aroma
After each feeding, track how your starter rises. It should smell pleasantly sour and yeasty, and show bubbles from top to bottom.
Step 7 – Ready to Use!
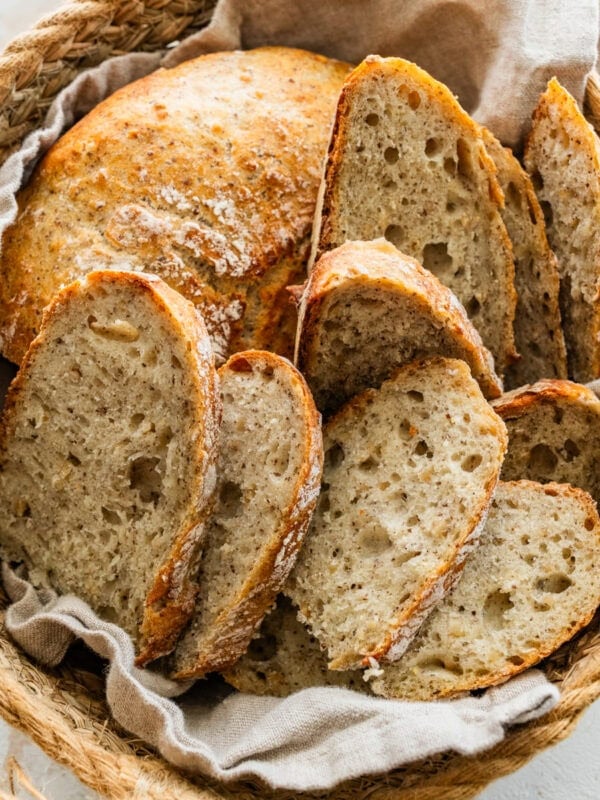
Once your starter consistently doubles and smells active, it’s ready to bake! Use it for rye bread or store it in the fridge until needed.
Step 8 – Maintain or Bake
Keep feeding if you’re ready to bake, or keep in the refrigerator and feed weekly to maintain your starter for future baking.
Troubleshooting Sourdough Starter Problems
Even with rye’s forgiving nature, starters can sometimes struggle. Don’t worry—here are my expert solutions for the most common issues:
❌No Bubbles or Growth? If your starter looks flat after 48 hours:
- Increase feeding frequency (twice daily).
- Move to a warmer spot (ideal range: 25°C / 77°F).
- Pro Tip: Stir your starter between feedings to add oxygen and encourage fermentation.
- Why did my starter suddenly collapse after rising? This is often part of the starter’s life cycle: an early surge (Day 3–4) followed by a lull (Day 5+) is common. Keep feeding, and with consistency, activity should stabilize. It’s best to use as soon as it is at the peak and looks like the top photo in this post.
❌Too Runny or Too Thick?
- Too Runny? Reduce water slightly at your next feeding.
- Too Thick? Add a splash more water until it stirs smoothly but holds shape. Rye absorbs more water, so slight hydration adjustments are completely normal.
❌Bad Smell?
A healthy starter should smell pleasantly sour, slightly fruity, or yeasty.
- If you smell nail polish remover, rotten eggs, or anything harsh, discard and restart. This indicates unwanted bacteria.
- Mold on the surface (fuzzy or pink/green spots)? Start over.
My Pro Tip
Using, Maintaining, & Scaling Your Rye Starter
Now that your rye sourdough starter is active and thriving, here’s how to care for it long-term:
When Your Starter Is Ready to Bake:
Once your starter consistently doubles (or triples) in size after feeding and passes the float test, it’s ready to use in baking. This usually happens around Day 7.
Use it to make:
- My Danish Sourdough Rye Bread.
- Pancakes, crackers, and more.
Maintaining Your Starter
- Daily Baking? Feed once a day at room temperature.
- Occasional Baking? Store in the fridge and feed once weekly.
When refrigerated, bring to room temperature and use. You also can, but do not need to, feed 1–2 times before baking to reactivate.
FAQ’s
If your starter isn’t growing and has a layer of grey liquid on top, discard the liquid. Do this to refresh your sluggish starter:
Feed twice daily for 1–2 days
Use warmer water (~85°F / 29°C)
Keep it in a warm spot (70–75°F / 21–24°C)
Switch to whole-grain rye flour for all feedings
Yes, slightly. Rye flour encourages more lactic acid bacteria, giving your starter a deeper, tangier flavor compared to wheat.
Look for consistent rising after feedings, strong bubbles, and a slightly tangy aroma. The texture should be like a thick, airy batter that resists slightly when stirred.
Here are some common reasons your rye starter is not growing:
Too cold: move it to a warmer spot.
Water quality: Use filtered or non-chlorinated water.
Infrequent feeding: switch to twice daily for a boost.
Use organic whole grain rye flour for the best results.
Not always. Rye starters tend to be denser and may not float reliably, even when active. Instead, rely on visual cues: doubling in volume and bubbling post-feed are better signs of readiness.
Bread Recipes


💙 MADE THIS RECIPE AND LOVED IT? 💙 Please leave a ⭐️STAR rating and COMMENT below- I love connecting with you! Tag me with your creations on Instagram and find me on Pinterest.
Rye Sourdough Starter Recipe

Equipment
Ingredients
- 40 g organic whole grain rye flour, plus more flour to feed the starter each day.
- 90 mL filtered water, lukewarm water (about 85–90°F or 29–32°C). Plus more water to feed the starter each day.
- 1 tablespoon rye seeds, rinsed with water, optional, but helps introduce more wild yeast
Instructions
Day 1: Build the Base
- In your jar, combine: 40g rye flour, 90mL filtered lukewarm water, 1 tablespoon rye seeds (optional).
- Stir well using a wooden spoon until you have a thick paste—think peanut butter or stiff pancake batter. If your mixture feels too dry, add a splash more water, one teaspoon at a time.
- Scrape down the sides of the jar and loosely cover with a cloth or silicone lid.
- Place your jar in a warm spot (ideally 72–75°F / 22–24°C).
- Let it rest overnight (about 8–10 hours). This is where the wild yeast begins to work!
Days 2–5: Feed and Grow
- Each day, repeat the same feeding routine—no discarding needed:
- Stir the starter well to aerate.
- Add:
- 1 tablespoon rye flour (~10–12g)
- 1 tablespoon warm, filtered water (~15mL)
- Stir until fully combined.
- By now, your starter should feel like a thick, spoonable paste—adjust as needed:
- If too dry/stiff: add a splash of water.
- If too runny: add a sprinkle of flour. See the step-by-step photos in the recipe post for how it should look each day.
- Cover loosely and return to its warm resting spot after each feeding.
- What to Expect Each Day:
Day 2:
- Starter may feel denser but should mix easily. You will see small bubbles or a mild sour aroma.
Day 3:
- Mixture should feel slightly looser and more aerated when stirred. Look for bubbles and subtle rise between feedings.
Day 4:
- Starter should feel light and airy when stirred—almost like whipped batter. Bubbles should be visible throughout, and a pleasant sour smell should develop.
Day 5:
- Texture should be a consistent thick batter that resists slightly when stirred. After feeding, the starter should double in size within 4–6 hours, signaling it’s strong and active. The aroma will be pleasantly sour and yeasty.
Ready to Bake Or Store!
- Once your starter consistently doubles after feeding and shows strong bubbling activity, it’s ready to bake. You can use it immediately or store it:
- Short-Term Storage: Keep your starter in the fridge, feeding once a week.
- Before Baking: When refrigerated, bring to room temperature and use in my Sourdough Rye Bread Recipe. You also can, but do not need to, feed 1–2 times before baking to reactivate.
Notes
-
- Increase feeding frequency (twice daily).
-
- Move to a warmer spot (ideal range: 25°C / 77°F).
-
- Pro Tip: Stir your starter between feedings to add oxygen and encourage fermentation.
-
- Too Runny? Reduce water slightly at your next feeding.
-
- Too Thick? Add a splash more water until it stirs smoothly but holds shape. Rye absorbs more water, so slight hydration adjustments are completely normal.
-
- If you smell nail polish remover, rotten eggs, or anything harsh, discard and restart. This indicates unwanted bacteria.
-
- Mold on the surface (fuzzy or pink/green spots)? Start over.
-
- My Danish Sourdough Rye Bread.
-
- Pancakes, crackers, and more.
-
- Daily Baking? Feed once a day at room temperature.
-
- Occasional Baking? Store in the fridge and feed once weekly.
- Spread 1 cup or more of active starter (leaven) in a thin layer on a baking tray lines with parchment paper.
- Dust with rye flour and let dry in a cool dry place for about 48 hours, or until fully dry.
- Break into pieces and store in a zip-top bag in the fridge.
- *How do I reactivate sourdough starter if I don’t use for more than 1 week?
and 4 tablespoons of water, mix well and let it sit for 1 -2 hours prior to starting the bread.
Nutrition
Nutrition information is automatically calculated, so should only be used as an approximation.


I am starting my rye sourdough starter today, but you post has me very confused. The table says to add 40g rye flour on consecutive days, but the instructions below that say only 1 tablespoon of flour is added each day after day 1. So which is it?
Hi! It is about 1 heaping tablespoon a day. Let me know how it goes! The bread is so delicious.
I just started the starter for this bread. Do I put it in the refrigerator at all while I am feeding it over the 5 days? Or do I feed it leave it overnight and put it in the fridge sunbathe day and take out and feed again at night and repeat? Thanks.
You can leave it on the counter the first days as you are feeding it, but after you make the bread and refeed- you’ll keep that as your mother starter in the fridge until you use again! Enjoy.
help! lol you have never led me wrong before but I am STRUGGLING with my starter. it doesn’t seem to be rising and I’m getting very few bubbles, I’ve tried stirring more frequently, I’ve tried adding feedings, and I’ve moved it to warmer places in my home I just can’t seem to get it to do anything..it’s not moldy and I think smells right but it’s just not growing and it’s been 7 days now .should I just start over?
This is THE ONLY recipe you need to get you on your rye sourdough journey. So easy to start and maintain!