Homemade Cannoli (Authentic Sicilian Recipe)
Updated May 15, 2025, Published Oct 29, 2021
This post may contain affiliate links. Please read our disclosure policy.
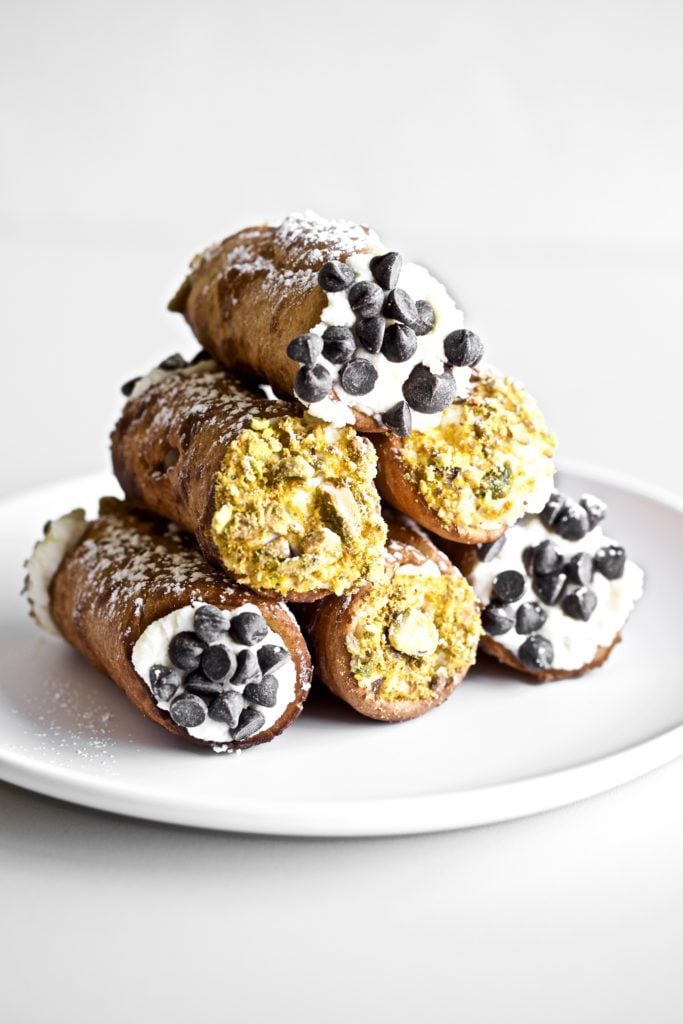
Holy Cannoli! This is the BEST Authentic Sicilian Cannoli Recipe! It comes straight from Sicilia, Italy, from my friend Lili. See the step-by-step photos of the entire process! This is a special recipe loved by everyone in our family. I know you will love it too!
If you love authentic Italian desserts, you will also love Sweet Ricotta Pie, Classic Italian Tiramisu (without alcohol), Zeppole Recipe (Easy Italian Donuts), Chiacchiere di Carnevale Recipe (Italian Fried Pastries), Authentic Italian Wedding Cookies (Anginetti), and Bomboloni Recipe (Italian Donuts with Cream Filling).
Why You’ll Love This Recipe
Who doesn’t love Italian cannoli? The crunchy fried pastry shell is filled with creamy sweet ricotta filling dipped in various fun toppings to decorate the ends.
You will be surprised by how easily this popular Italian dessert comes together! This recipe is straight from Sicily, the motherland of cannoli.
My dear friend Lilli shares this family recipe with all of you! I hope you love it as much as we do, just like our cannoli dip. Add this to your Italian ‘must-have’ recipes!
Table of Contents
Simple Ingredients
Cannoli Dough
- All-purpose flour
- Cocoa powder
- Confectioners sugar (granulated is fine as well)
- Pinch of salt
- Egg
- Butter
- Marsala wine, more if needed
- Vegetable or canola oil, for frying
- Egg, well beaten for egg wash
CANNOLI FILLING
- Ricotta Cheese
- Powdered sugar
- pinch of salt
Optional decorations for the ends:
- candied orange slices
- crushed pistachios
- chocolate chips
See the recipe card for quantities. See bottom of post for step-by-step photo instructions.
Equipment Needed
Here is the CANNOLI MOLD I use for making the shells. You can use these molds to make other pastries and even your own ice cream cones!
These are the PRE MADE SHELLS I recommend- no matter where you buy them, they are a little bit expensive because of the labor that goes into making and storing them since they break easily. This is the best deal I’ve found for the quality.
How To Make Cannoli
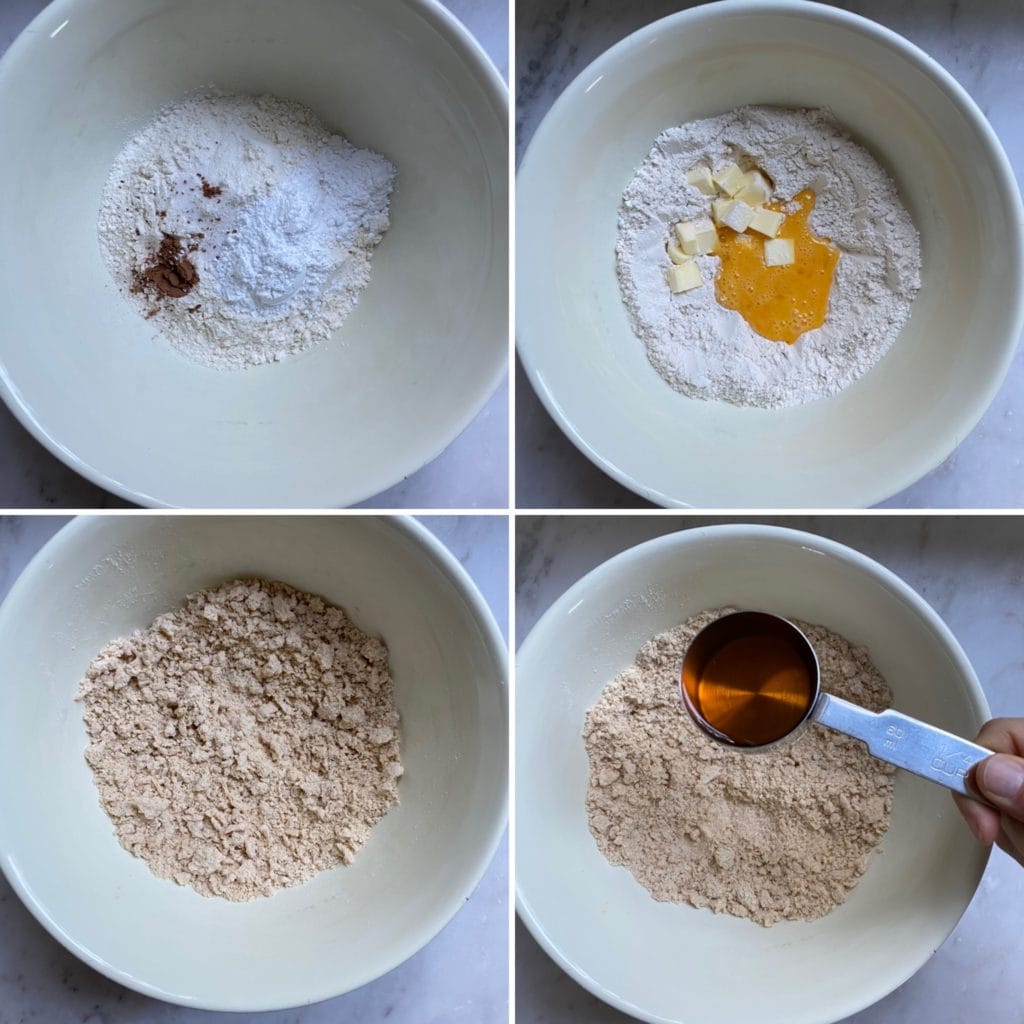
Top left to bottom right. Add dry ingredients to a mixing bowl and combine until incorporated. Add egg and butter and crumble by hand. Butter will remain in small chunks. Slowly add wine a little at a time and mix to form soft slightly sticky dough.
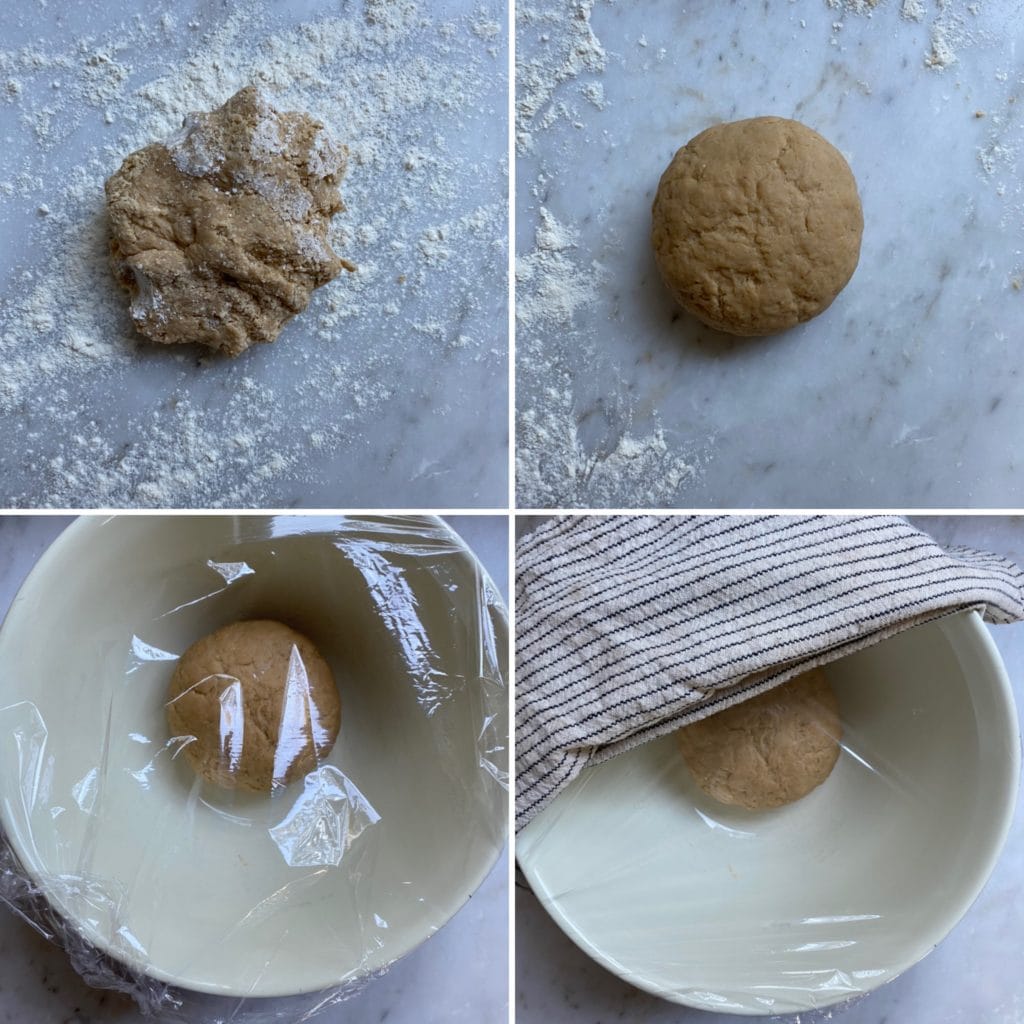
Top left to bottom right. After mixing the dough into a uniform mass move to a floured surface and knead for about 10 minutes. This will get the gluten working in the dough. Then, cover with plastic and a cloth and rest for at least 30 minutes.
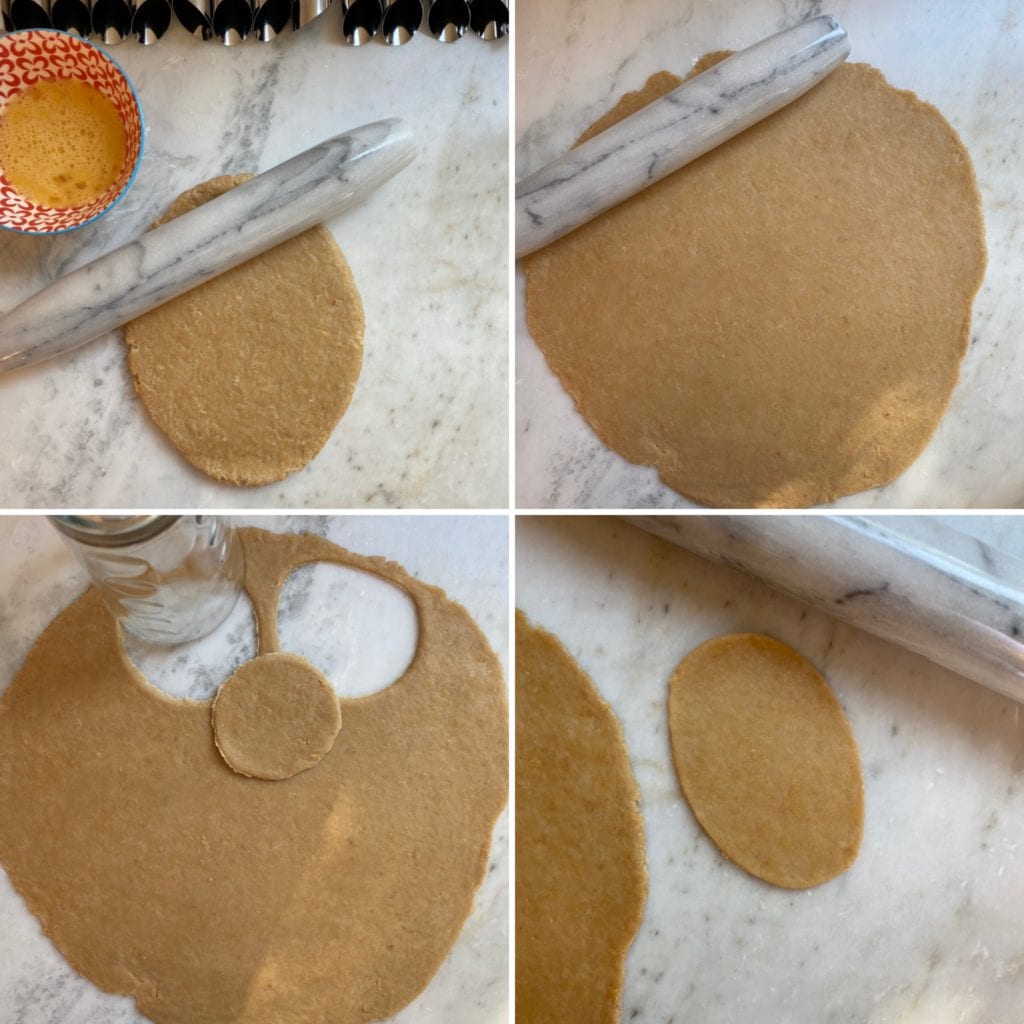
Top left to bottom right. Roll out the dough after it has rested. Whether you are using a pasta machine or rolling pin make sure your dough is thin- this will help it get the bubbles in the crust. You can roll it out a little more after you cut the round shape with a cup, if needed.
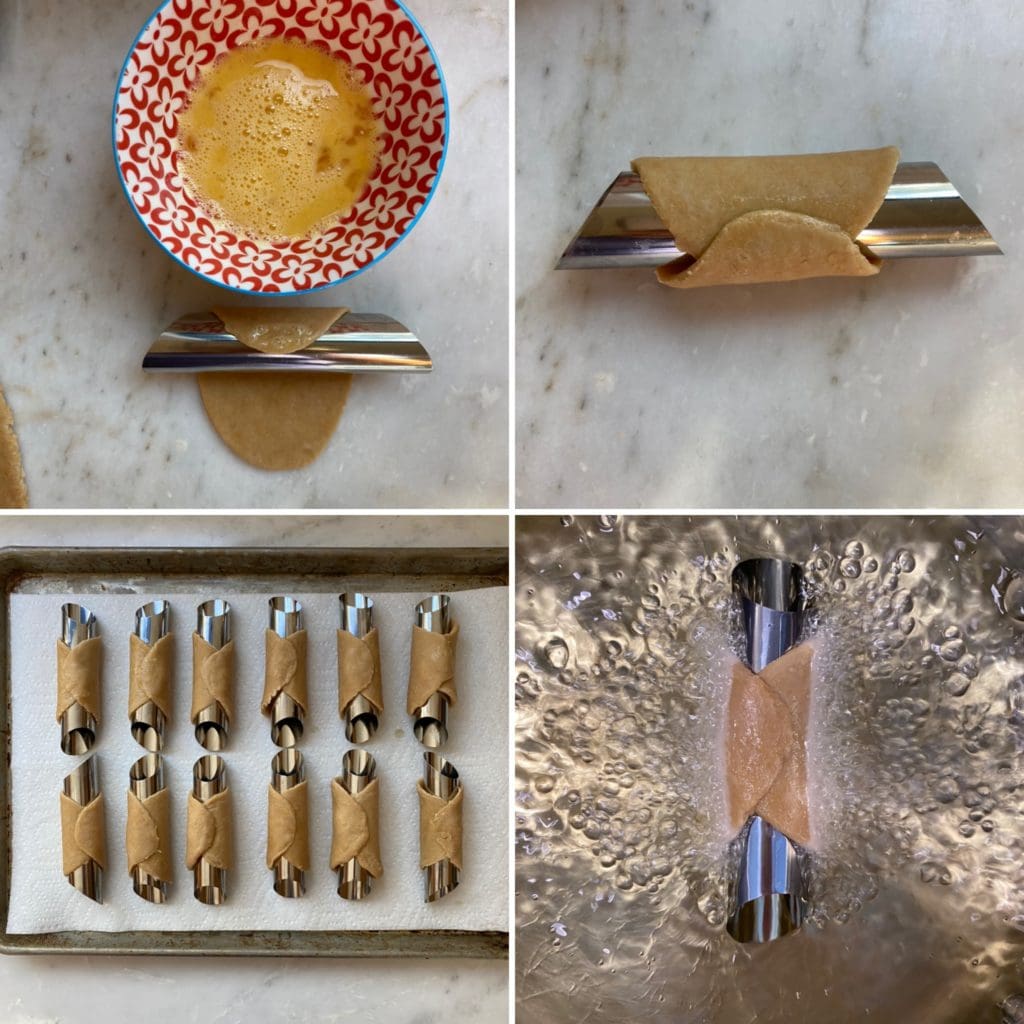
Top left to bottom right. Carefully wrap each dough circle around the cannoli form. Do not press it onto the form. You want a little wiggle room for the dough to puff up in the frying oil.
Make sure to use egg wash to press the edges of the dough together before frying, or it will come off of the form when it hits the hot oil!
Carefully fry the dough. Use tongs to handle the cannoli form.
Always start with just one to make the temperature is right and you get a feel for how it moves in the oil.
Add up to 4-6 at a time depending on your pot size.
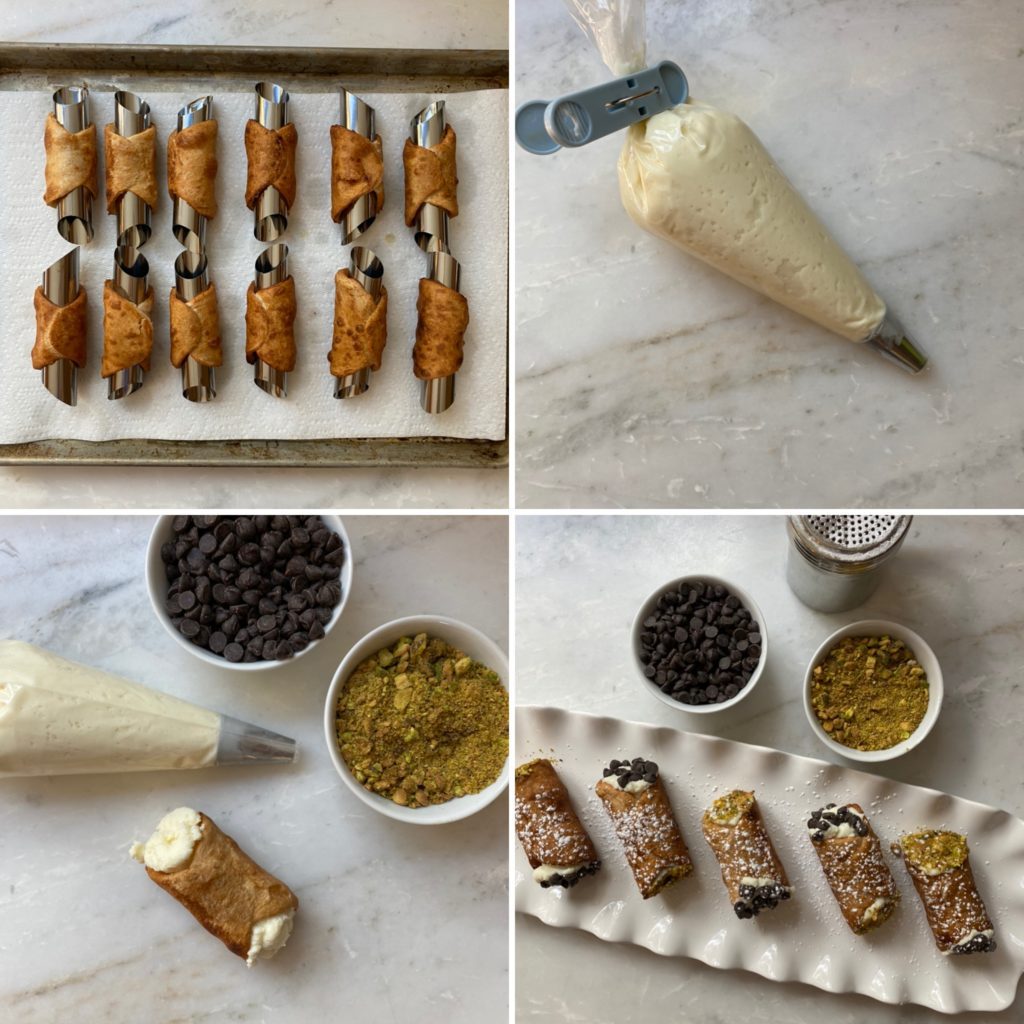
Top left to bottom right. Let the fried dough cool and take off molds. Do not fill the shells when they are hot!
Make the ricotta mixture for the filling while the dough cools. It is important that you strain the ricotta well or it will make the shells soggy (see tips above).
The filling in cannoli traditionally consists of ricotta that is sweetened with sugar or honey and sometimes a little cinnamon and vanilla extract.
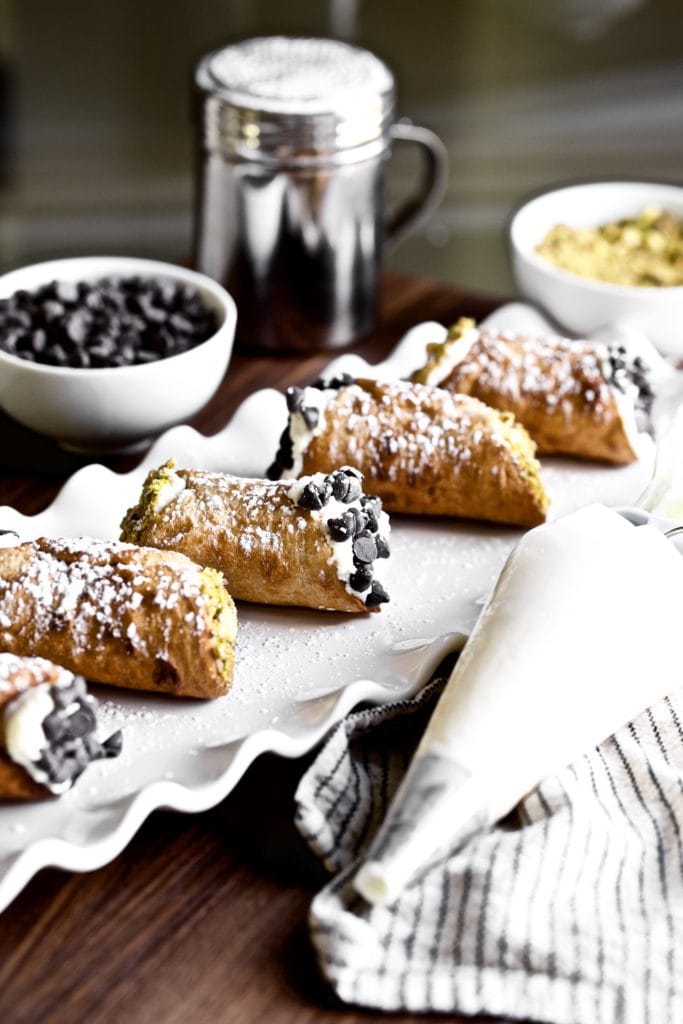
Fill shells with ricotta cream in a pastry bag (or a sandwich bag with the tip cut off).
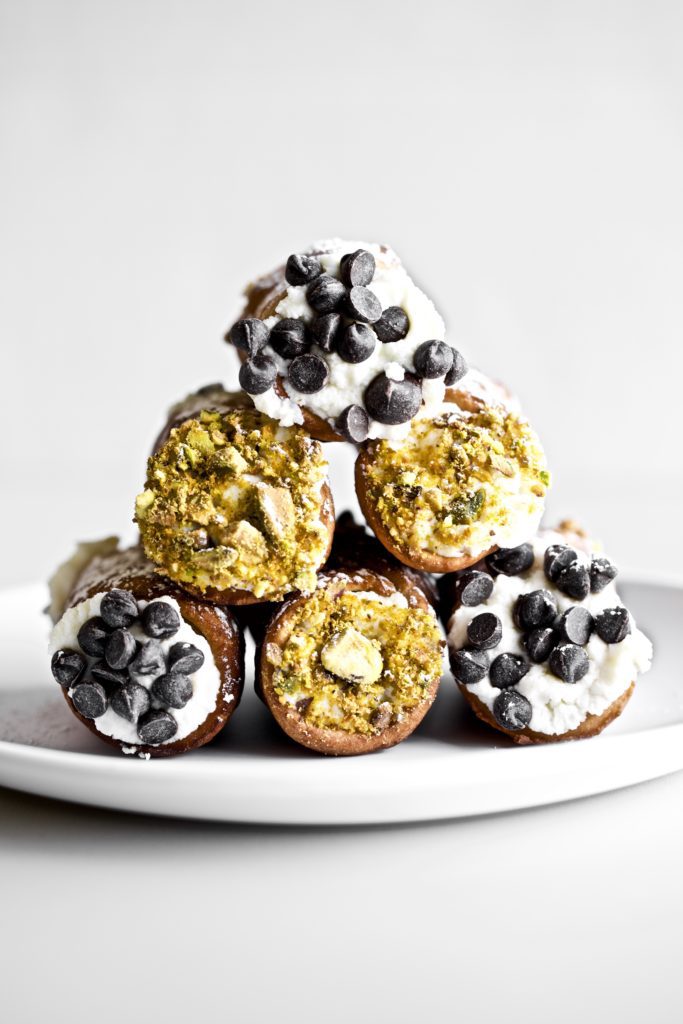
Dip the ends in your favorite toppings. I love crushed pistachios and chocolate shavings or chocolate chips. Enjoy!
FAQ
Cannoli are a classic and traditional dessert from Sicily. The singular form of cannoli is cannolo, a diminutive meaning ‘little tube’, from canna, ‘cane’ or ‘tube’.
The traditional cannoli originated in the Sicilian city of Palermo.
It is believed that the cannoli’s filling originated with the Saracens, an ancient Arabic population when they brought sugar cane to the region.
This popular dessert was then served at the popular celebration of carnivale, a festival celebration before lent. For festival goers, the cannoli became a symbol of fertility.
So, ricotta translates to recooked in Italian, and ricotta is called a whey cheese. When you make cheese, you separate milk into two distinct things- solids (curds) will be separated out and pressed to form cheese. The liquid that is left behind is called whey.
Most cheeses we know and love are made from the curds but, traditionally, ricotta is made from the very small bit of curd left behind in the whey.
Cheesemakers make cheese with the curds, and then repurpose the leftover whey to create ricotta.
Whey is heated—usually after a small addition of whole milk and some form of vinegar or citrus—and the remaining curds start to coagulate.
The curds will become larger and more solid, and eventually, the pot will be emptied into a portion of cheesecloth and strained.
Once the cheesecloth empties any remaining whey what’s left is ricotta.
Honestly, I’m an Italian purest, and it hard to think of cannoli without ricotta! However, I will provide you with some options:
Whipped cream cheese
Mascarpone
Cottage Cheese (this would be a ‘healthy version’)
Place a strainer (or colander) over a large bowl so that there is at least an inch or two of space under the strainer above the bowl.
Place a few layers of cheesecloth (or strong paper towels) over the strainer.
Spoon ricotta cheese on top of the cheesecloth and fold the cheesecloth around cheese to contain it. Leave it covered in the fridge for 4 hours overnight.
If you already prepared your cannoli filling following the recipe and it still turned out watery, you can still salvage the cream.
Drain the runny filling, thoroughly squeeze additional whole milk ricotta and add the dry cheese to the mixture.
If it needs a little extra sweetness, adjust by adding a bit more sugar.
Cannoli filled with smooth Italian pastry cream aren’t traditional but provide a delicious variation. Fill your crispy, sweet, cannoli tubes with these delicious creams:
Italian Chocolate Pastry Cream (Crema Pasticcera)
Italian Pastry Cream (Crema Pasticcera)
Yes, you can make cannoli ahead of time. Here is all you need to know:
Make the shells ahead of time. Fried cannoli shells store well both at room temperature and in the freezer.
If you’re not serving them within a few days, freeze the shells for maximum freshness.
Store in an air-tight container or zip lock bag at room temperature for two days, if longer, freeze in freezer bags.
Make the filling ahead of time. You can make the filling a day or two in advance and refrigerate it, but remember: Don’t fill the cannoli until just before serving time.
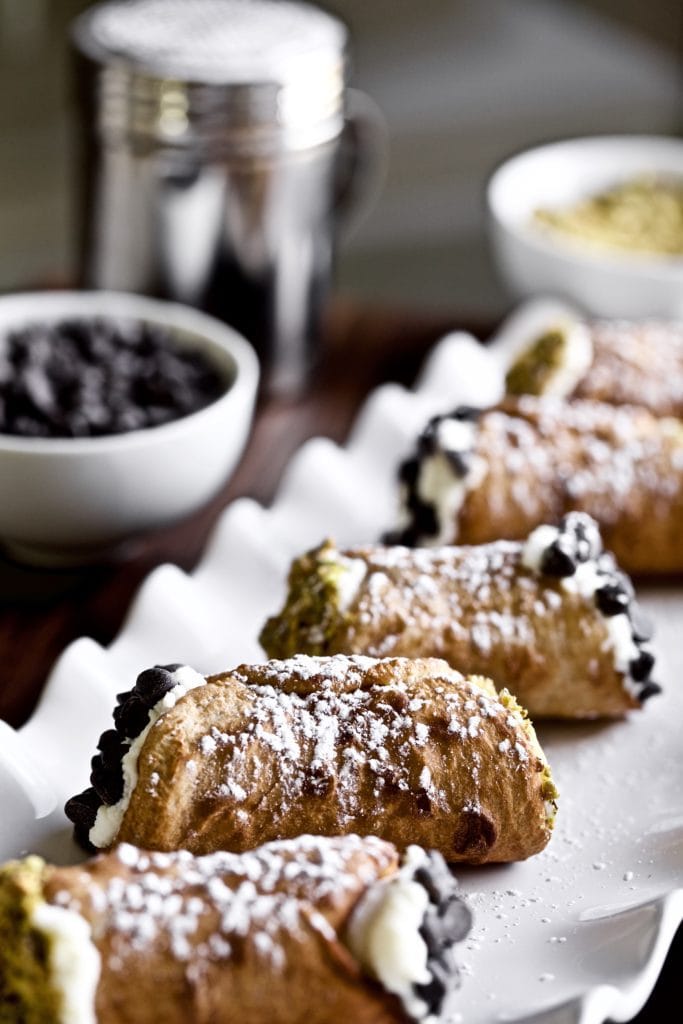
Expert Tips
- Fresh is best. As with other fried doughs, they are best when made fresh. Luckily, they store well in the fridge.
- Don’t pre-fill the shells. You can make the shells ahead of time, but do not fill them until ready to serve.
- Feel thedough. This dough is similar to pasta dough. It is firm and springs back slightly. For best results, you will want to roll your dough out reasonably thin- about 1/16-inch.
- This will make them thick enough to fry and still flaky. You can use a rolling pin or a pasta maker.
- Be careful when you fry. Your oil should stay at 375 F. If the dough gets too puffy it will retain oil and be too greasy. Use tongs to move the dough around and create an even fry.
- Use paper towels to remove shells. The mold will be very hot when you remove the shells for the next batch. Do not use your bare hands! Use a couple of paper towels to handle them.
- Fill the shells. Use a pastry bag to fill the cannoli with ricotta filling. If you don’t have a pastry bag, a plain old Ziploc bag with the tip cut off will do!
- Buy good quality whole milk ricotta cheese. Higher-quality ricotta has less additives and stabilizers. This ensures a smooth and creamy filling. If you’ve ever had very grainy ricotta, you know what I mean.
- Strain your ricotta well! This will ensure that the filling stays firm and doesn’t create a soggy crust.
- Whip it! Use an electric mixer to make the filling extra smooth.
- Use a plastic bag or pastry bag to fill the shells. This will cause less mess and ensure the filling stays inside the cannoli instead of touching the outer part of the shell.
- Not too sweet! Don’t add too much sugar, or it will loosen the ricotta and cause it to be runny.
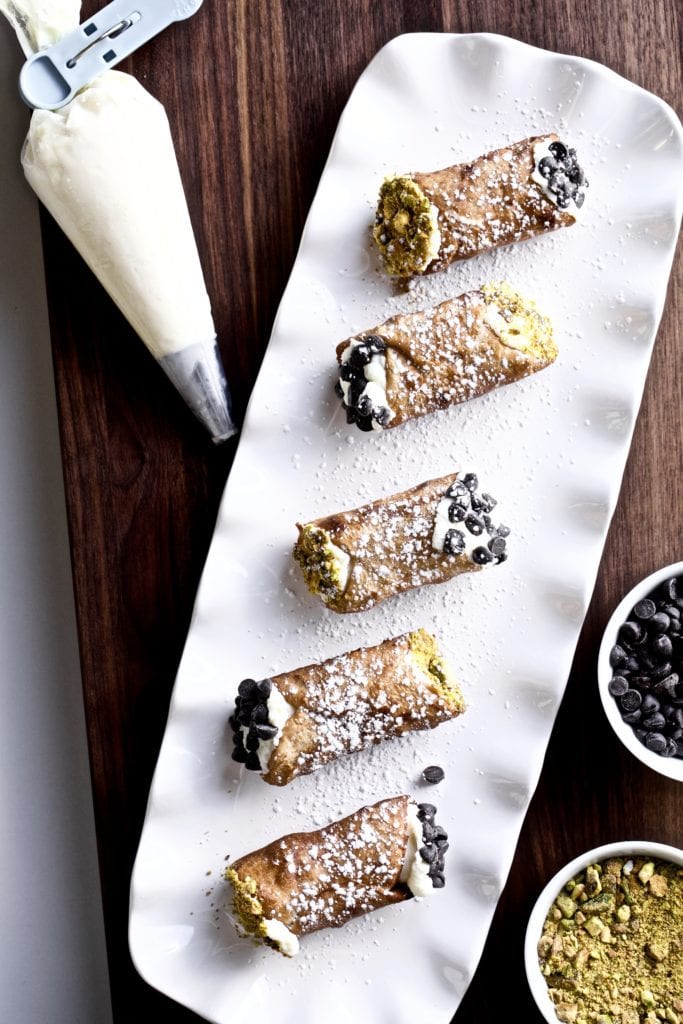
Optional Toppings
Feel free to be creative with what you dip in the ends of the cannoli it can make them unique and fun! The most traditional and authentic toppings for cannoli are:
- chocolate shavings or chunks
- candied orange peel or orange zest
- crushed pistachios
- marinated cherries
Storing Options
Cannoli are best enjoyed fresh! However, you can store them in the fridge for one or two days.
Made with Amore, Elena.
From My Cucina to Your Table. Mangia! Mangia! (Eat!)! You may also like: homemade ravioli!
More delicious Italian dessert recipes
Easy “Crack” Lemon Bars (Winning Recipe)
Easy Almond Sponge Cake with Italian Cream
Italian Crumble Cake with Jam Filling
Italian Crumble Cake Pastry Cream Filling
Kefir Honey Panna Cotta Italian Recipe (Easy)
Chiacchiere di Carnevale Recipe (Italian Fried Pastries)
Authentic Struffoli Recipe (Italian Honey Balls)
Traditional Panettone Recipe (Italian Christmas Cake
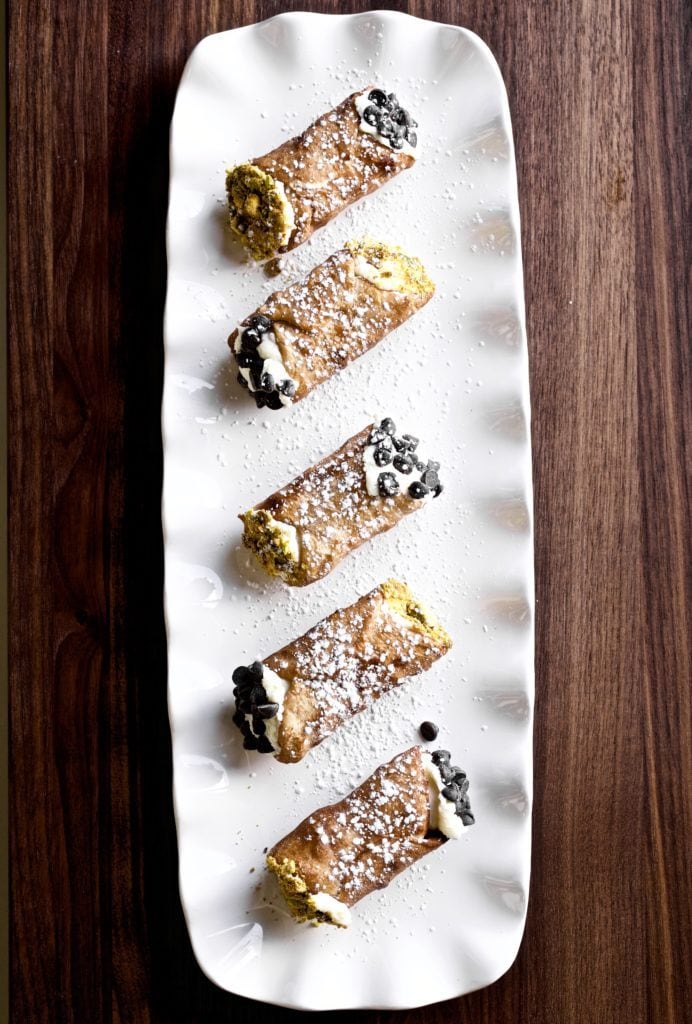
Try these delicious Authentic Sicilian Cannoli soon! They will make you feel as though you’re in a village in Sicily enjoying a sweet treat.
Don’t forget to leave a STAR rating and REVIEW after making the recipe! I look forward to hearing from you!
Cannoli Recipe

Ingredients
Cannoli Dough
- 2 cups 00 flour or all-purpose flour
- ¼ teaspoons cocoa powder
- 2 tablespoons confectioners sugar, granulated is fine as well
- 1 pinch salt
- 1 egg, well beaten
- ⅛ cup cold butter, cut in cubes
- ¼ cup Marsala wine, more if needed
- Vegetable or canola oil, for frying (about 8 cups)
- 1 egg, well beaten for egg wash to seal the dough around the cannoli form sticking
Cannoli Filling
- 3 cups ricotta cheese, stained (no liquid)
- ¾ cup powdered sugar, if you use granulated, it won’t be as smooth
- 1 pinch salt
- ½ cup mini chocolate chips, optional, but traditional, to put in the filling. I prefer without
Optional decorations for the ends:
- candied orange slices
- crushed pistachios
- chocolate chips
Instructions
Cannoli Shells
- In a large mixing bowl sift in flour, cocoa, powdered sugar and salt. Add egg and butter start to work with hands. Mix until crumbly and butter is in small pieces. Add marsala wine little by little until dough comes together. You may need to add a little extra wine here to create a soft doughy mixture.
- Take the dough out of the bowl and knead on a floured surface for an additional 10 minutes. Shape the well mixed dough into a ball and transfer to a bowl. Cover and let rest at room temperature at least 30 minutes and up to 2 hours.
- Heat a large pot with 1 1/2 inches vegetable oil to 345 – 355 degrees. Working with half the dough at a time (and keeping the other half covered in the bowl) roll the dough out very thinly onto a well-floured surface (nearly 1/16-inch). You can use a pasta machine to roll it out thin or a rolling pin will do.
- Using a 3 1/2 to 4-inch cookie cutter (or shape of a round glass cup), cut dough into rounds. Wrap dough circles around each cannoli mold, and brush about 3/4-inch of one end lightly with beaten egg (use a pastry brush or just your fingertip). Press the edge to the opposite side to seal the dough together around the cannoli form.
- Using metal tongs, carefully immerse the shell in preheated oil and fry until golden brown and crisp, about 1 – 2 minutes (be sure to watch oil temp so the oil doesn’t get too hot and burn shells. You can fry up to 6 at a time).
- Remove from oil using metal tongs to grasp the cannoli shell (let oil from inside forms drain back into pot), transfer to paper towels to drain. Use metal tongs to hold mold (or folded layers of paper towels) and wrap a paper towel around shell to carefully slide off of form.
- Let forms cool and repeat the process with the remaining dough circles. You can shake excess flour from the scraps, press them back together, cover in a bowl and let it relax at least 10 minutes, then reuse.
- Allow to cool on a wire rack then fill with cannoli filling and decorate as desired (with melted chocolate on edges, chopped pistachios, mini chocolate chips or dust tops with powdered sugar).
Cannoli Filling
- Whip the ricotta with a hand or a stand mixer, about 2-3 minutes. Sift the powdered sugar into the ricotta. Gently fold in the powdered sugar with a wooden spoon or spatula until smooth and combined. Then, fold in chocolate chips (if using).
- Transfer the filling into a piping bag fitted with a large round tip. Pipe filling into cooled cannoli shells. You can also cut off the tip with a spoon or a sandwich bag.
- Add the ricotta filling to a pastry bag. Squeeze it into the shells from each side, then dip in your desired topping (crushed pistachios, orange peel, or chocolate chips), and finish with a dusting of powdered sugar.
- For best results, fill your cannoli just before serving — or at the table in front of your guests!
Notes
- Fresh is best. As with other fried doughs, they are best when made fresh. Luckily, they store well in the fridge.
- Don’t pre-fill the shells. You can make the shells ahead of time, but do not fill them until ready to serve.
- Feel thedough. This dough is similar to pasta dough. It is firm and springs back slightly. For best results, you will want to roll your dough out reasonably thin- about 1/16-inch.
- This will make them thick enough to fry and still flaky. You can use a rolling pin or a pasta maker.
Nutrition
Nutrition information is automatically calculated, so should only be used as an approximation.




Do you recommend straining the ricotta overnight in the fridge or what the best way to do this.
Yes! That is a great way. Or you can wrap in a cheese cloth and strain it that way!
Simply amazing! We made for the first time and they came out perfect and even impressed Italian family members. Thank you for always having the best recipes. I always say Cucina Elena never lets me down. ❤️
Aww, thanks, Lisa! I am happy you love all the recipes! Yes, these cannoli are so special.