Homemade Ravioli
This post may contain affiliate links. Please read our disclosure policy.

Homemade Ravioli is a classic, from-scratch pasta dish that brings the heart of Italian cooking right into your kitchen. Tender homemade egg pasta is filled with a rich, savory blend of cheese and spinach, creating delicate pillows that are as beautiful as they are delicious. Perfect for a cozy weekend cooking project, this recipe is both rewarding to make and unforgettable to share at the table.
Here are some of my Favorite Dishes to Serve with Ravioli!


Quick Look: Homemade Ravioli
- Prep Time: 45 minutes
- Cook Time: 15 minutes
- Total Time: 60 minutes
- Servings: 6 people
- Dietary Info: Vegetarian
- Method: Fresh pasta dough rolled, filled, sealed, and boiled
- Technique: Make a simple egg pasta dough, roll thin sheets, pipe or spoon spinach and cheese filling, seal tightly into ravioli, then boil until tender and finish with sauce of choice
- Flavor/Texture: Tender, savory, delicate
The Beauty of Making Ravioli at Home

Homemade pasta and ravioli filling are so much easier to make than most people expect, and I love turning it into a fun kitchen moment with friends or family. There’s something special about gathering around the table (or kitchen counter) and shaping fresh ravioli together, it really becomes an experience, not just a meal. The last time we made them, there were three generations of women in the kitchen working side by side, and it’s a memory I’ll always cherish. It truly is a labor of love, but the silky pasta and simple sauce at the end make it completely worth it, and I hope it becomes a tradition in your home too.
Enjoy with my Pink Sauce or Sugo al Pomodoro.
Made With Amore,

“The best pasta we’ve ever made and so simple!! My kids rave about our Italian nights now and love to help us make the dish! Can’t say enough good things about Elena and her recipes!”
– Marren
Table of Contents
Simple Ingredients
It takes only a few ingredients and a bit of time to get this ravioli on your table!
- Pasta Dough: The foundation of the ravioli, creating tender, silky pasta that holds the filling perfectly
- Ricotta Cheese And Parmesan: A creamy, rich combination that forms the savory base of the filling
- Spinach: Adds freshness, color, and a mild earthy flavor when properly steamed and drained
- Egg: Helps bind the filling together for a smooth, cohesive texture
- Salt And Pepper: Simple seasoning that enhances and balances the flavor of the filling
See recipe card for full information on ingredients and quantities.
Variations & Substitutions
- Butternut Squash Filling: A naturally sweet, seasonal option that pairs beautifully with butter or sage-based sauces. Check out my Butternut Squash Ravioli!
- Prosciutto And Cheese Filling: A savory, salty filling with rich depth and bold Italian flavor.
- Ricotta And Mushroom Filling: Earthy mushrooms combined with creamy ricotta for a hearty, balanced option. Try my Mushroom Cream Sauce!
- Mixed Cheese Filling: A blend of cheeses for an extra creamy, rich, and indulgent ravioli filling.
How To Make Homemade Ravioli
Fresh pasta filled with a rich center and cooked to perfection, homemade ravioli brings authentic Italian comfort straight to your table. Follow the step-by step photos and see the recipe card at the bottom for a printable version.
Make the Dough

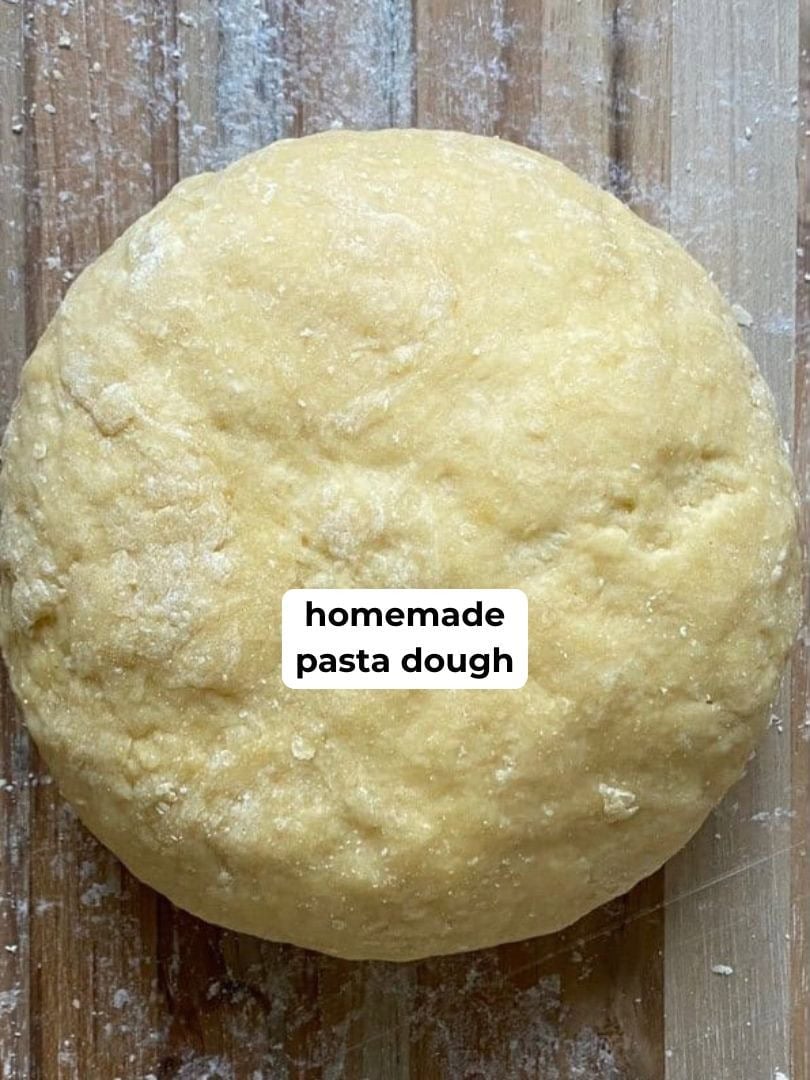
- My Homemade Pasta Recipe walks you through the entire process. You will follow this egg pasta dough exactly except for cutting it into strips.
Make the Filling

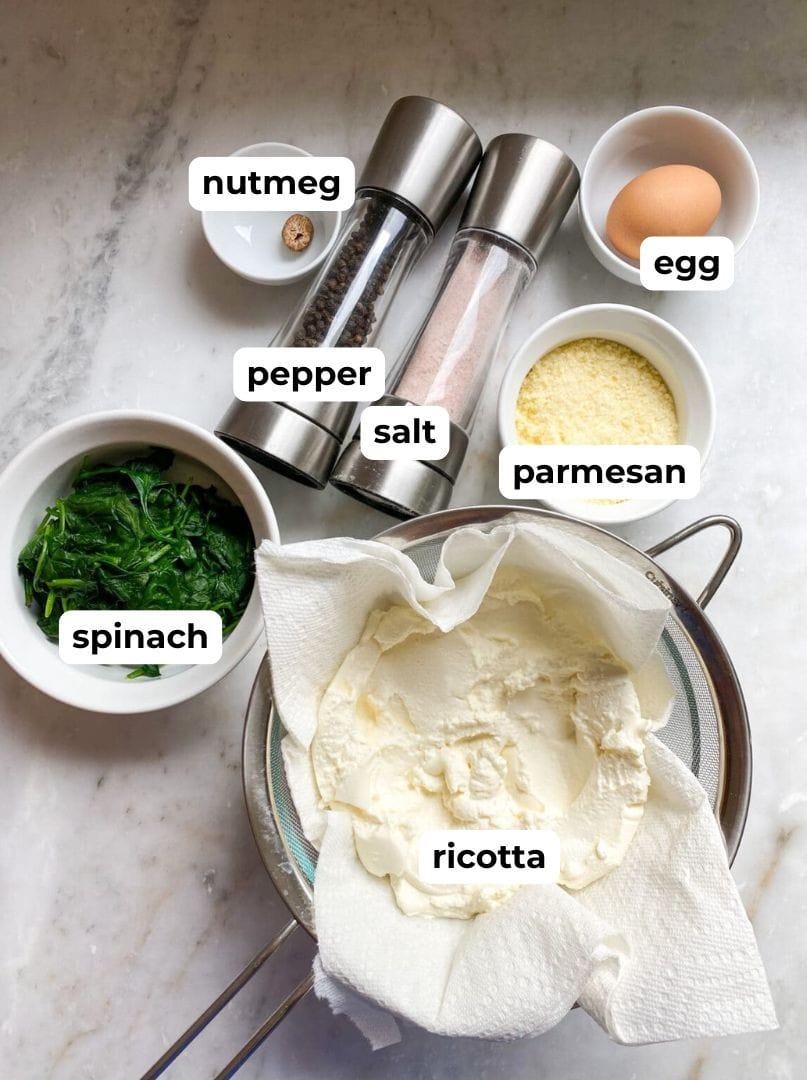
- Drain the ricotta to remove the liquid. Set a fine-mesh strainer lined with cheesecloth or a couple of paper towels over a bowl. Add the ricotta and allow it to strain out excess liquid for 30 minutes (up to overnight covered in the fridge) as you continue with the prep.
- Steam or blanch the spinach and remove liquid.
- Finely chop the spinach.
- In a medium bowl, add the chopped spinach with ricotta cheese, egg, Parmigiano cheese, and nutmeg.
- Combine. Season with salt and pepper to taste. Set aside.
Fill and Cut the Ravioli
This method uses a ravioli maker. See the FAQs section for more methods.

- After the pasta dough rests and you’ve made the filling, divide the dough into four parts. Roll each piece in pasta machine to 6-7 setting or desired thickness (not too thin). TIP: Only roll dough one section at a time and cover the rest of the dough with plastic wrap as you fill the pasta sheets with filling, or the dough will dry.
- Place your prepared pasta sheet on top of the ravioli maker in a single layer. The dough will hang over the edges. Place the plastic holder with indent over the pasta sheet.
- Using light pressure, press down on the dough. This creates little pockets for the filling.
- Fill the ravioli with a small mound of filling. Use one heaping teaspoon per ravioli.
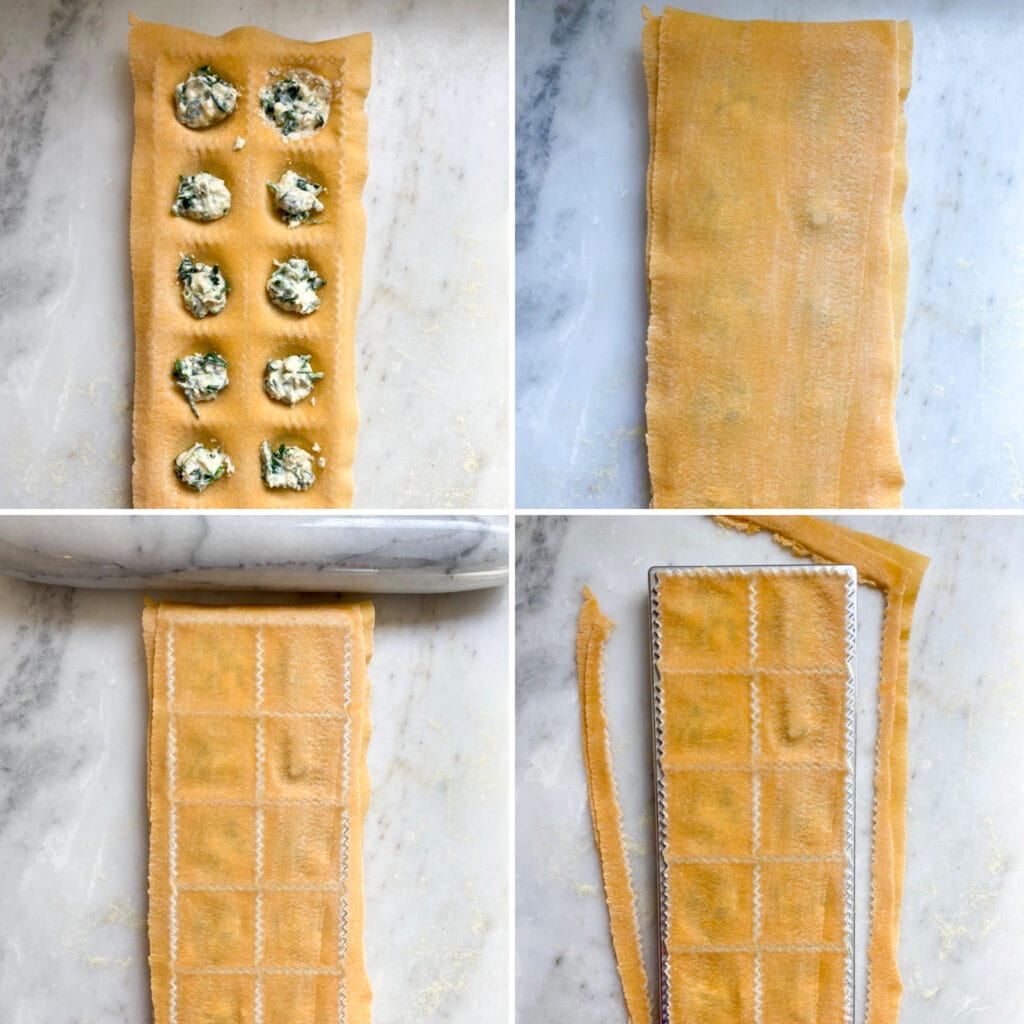
- Do not overfill or they will be hard to seal and spill out the sides.
- Place the second sheet dough directly over the first.
- Get rid of air pockets by pressing down gently on the dough.
- With a rolling pin, press down gently and roll on top of the second pasta sheet to cut and seal the edges.
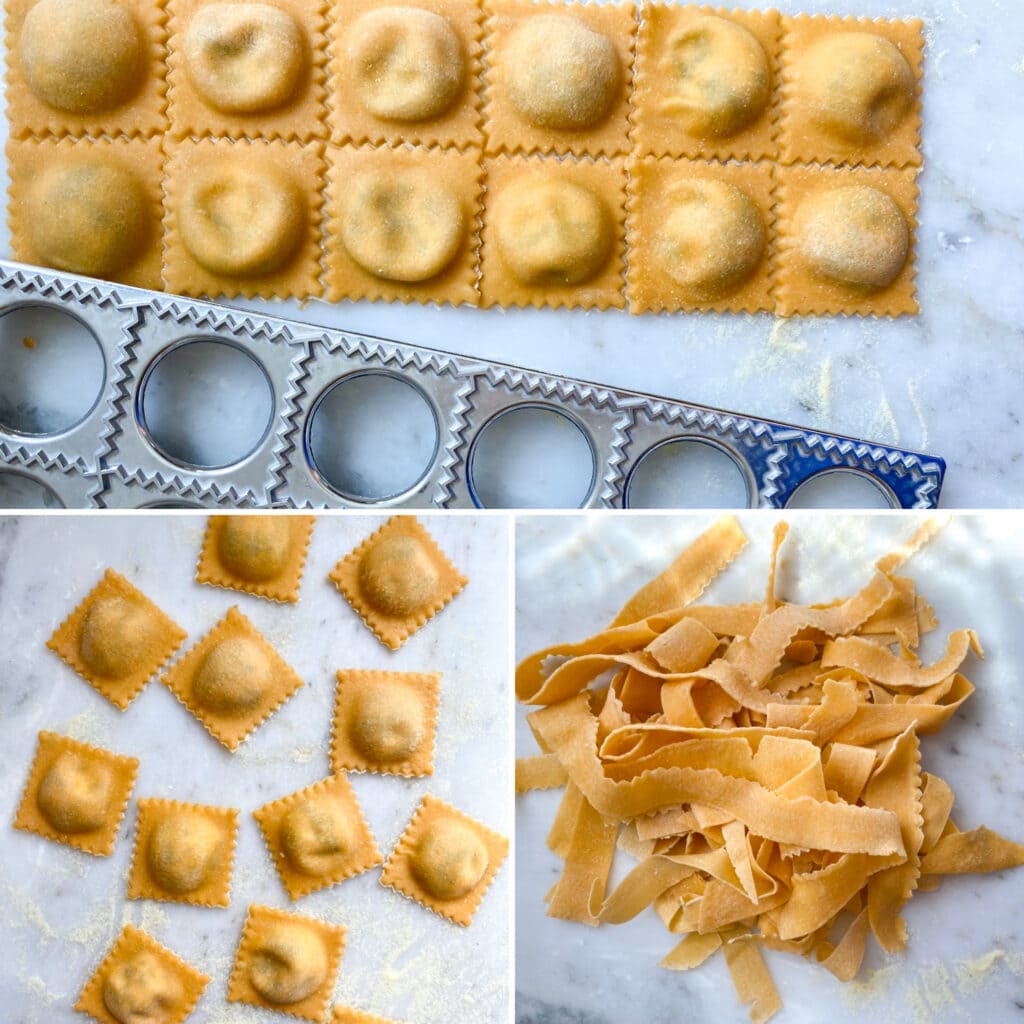
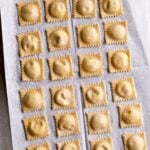
- When finished, turn over the ravioli maker and the individual ravioli will pop out sealed and cut! If they don’t come out, gently wiggle them until they come off from the mold.
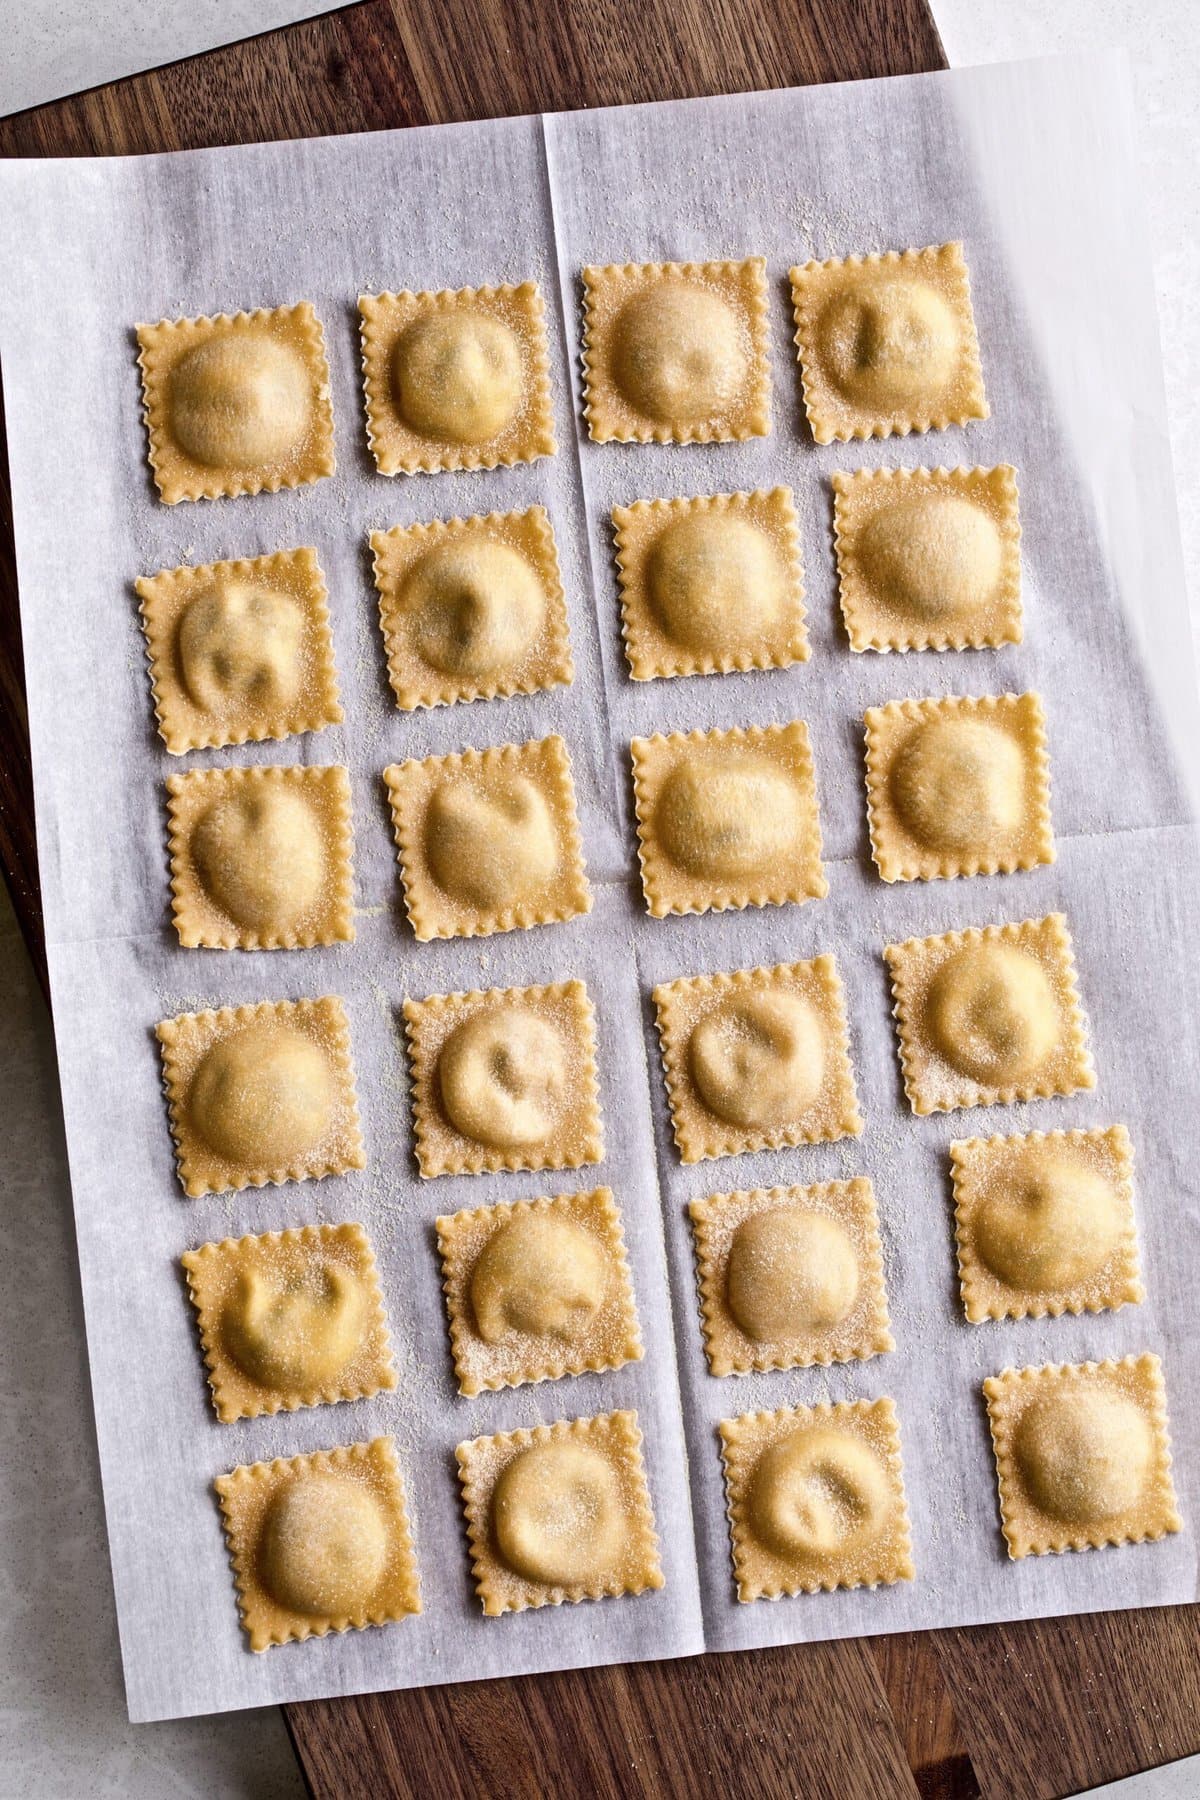
- Place the uncooked ravioli on a large baking sheet lined with parchment paper and semolina flour. Cover with a clean and light kitchen towel until ready to cook.
- Lastly, make your sauce of choice and boil ravioli in a large pot of salted water for about 3-5 minutes until they float to the top. Cook in batches. Coat with desired sauce and extra cheese.
Homemade Ravioli FAQs
If you aren’t eating the ravioli the same day it is best to freeze them right away. Sprinkle the ravioli with semolina flour. Lay them flat on a cookie sheet in an even layer and freeze. Once they are frozen transfer them to a freezer safe bag. Store for up to 3 months. Make sure to read How to Cook Ravioli from Frozen to ensure your ravioli tastes just as good the second time around!
Save your pasta scraps! Keep the scraps and boil until al dente and serve with butter and cheese or a simple sauce. You can keep them in a zip lock bag or an air tight container for 1 day in the fridge and up to 1 month or more in the freezer.
Lay one sheet of pasta on a semolina-dusted surface and spoon about 1 teaspoon of filling in small mounds, spacing them about 1 inch apart. Place the second sheet of dough on top, gently pressing around each mound to seal and remove any air, using an egg yolk wash if needed for a tighter seal. Use a ravioli stamp or cutter to cut out shapes, then transfer to a parchment-lined, semolina-dusted baking sheet and cook.
Lay one sheet of pasta on a semolina-dusted surface and place small spoons of filling about 1 inch apart, being careful not to overfill. Cover with the second sheet of dough, press around each mound to seal (using an egg yolk wash if needed), then cut into individual ravioli with the wheel. Transfer to a parchment-lined and semolina-dusted baking sheet and cook.
Serving Suggestions
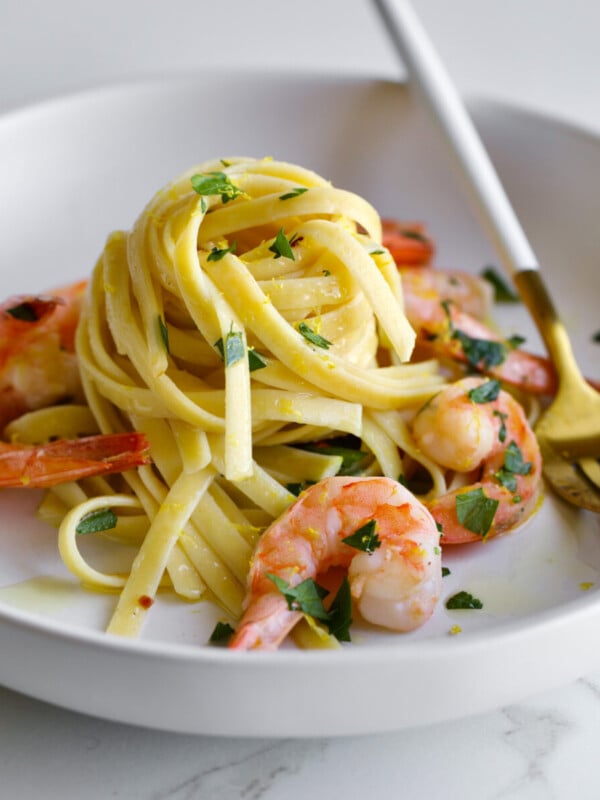
This homemade ravioli is best served with flavorful sauces that let the delicate pasta and filling shine. I love pairing it with best Italian Beef Short Rib Ragu or Meat Sauce for a hearty, comforting meal, while lighter options like Lemon Brown Butter Sauce or Garlic and Brown Butter Sage Sauce sauce add a fresh touch. To round out the table, serve alongside Breaded Chicken Cutlets and a crisp Pear Gorgonzola Salad. Finally, finish with simple Italian Apple Cake or a slice of classic Tiramisu for an authentic Italian-style meal.
My Pro Tips
Recipe Tips
- Make sure to have plenty of semolina flour. This stops the ravioli from sticking as you’re making them.
- Do not overfill the ravioli. It is tempting to overfill ravioli! Don’t do it. It will ruin the ravioli if they split.
- Drain your ricotta. Drain the filling when using ricotta and make sure it is not too runny or it will break through the pasta dough.
- Cook the ravioli in batches. Too many ravioli will lower the temperature, causing them to cook unevenly. Crowding will also cause them to stick to each other.
- Seal the ravioli well! This prevents the filling from bursting out in the boiling water.
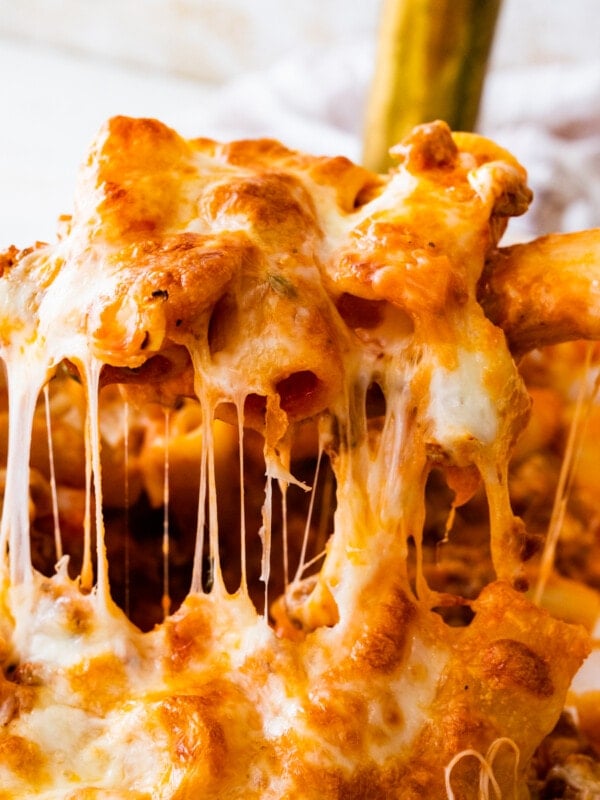
More Pasta Recipes


💙 MADE THIS RECIPE AND LOVED IT? 💙 Please leave a ⭐️STAR rating and COMMENT below- I love connecting with you! Tag me with your creations on Instagram and find me on Pinterest.
Ravioli Recipe

Ingredients
For the Dough
- 400 grams flour Caputo "00" Flour, also use all purpose flour
- 4 eggs
- Semolina flour for dusting
For the Filling (Enough to make about 50 ravioli)
- 1 cup whole milk ricotta cheese
- 10 ounces spinach, cleaned and trimmed
- 1 large egg
- 1 cup grated Parmigiano/Parmesan cheese
- ½ teaspoon freshly grated nutmeg
- Salt, to taste
- Freshly ground black pepper, to taste
Instructions
Make the Ravioli Dough
- Prepare the dough by following my Homemade Pasta Recipe. Set the dough aside to rest.
Make the Ravioli Filling
- Drain the ricotta to remove the liquid. Set a fine-mesh strainer lined with cheesecloth or a couple of paper towels over a bowl. Add the ricotta and allow it to strain out excess liquid for 30 minutes (up to overnight covered in the fridge) as you continue with the prep.
- Steam or blanch the spinach and remove liquid. Finely chop the spinach.
- In a medium bowl, combine the chopped spinach with ricotta cheese, egg, Parmigiano cheese, and nutmeg. Season with salt and pepper to taste. Set aside.
Make the Ravioli (Ravioli Maker Method)
- After the pasta dough rests and you've made the filling, divide the dough into four parts. Roll each piece in pasta machine to 6-7 setting or desired thickness (not too thin).
- TIP: Only roll dough one section at a time and cover the rest of the dough with plastic wrap as you fill the pasta sheets with filling, or the dough will dry.
- Place your prepared pasta sheet on top of the ravioli maker in a single layer. The dough will hang over the edges.
- Place the plastic holder with indent over the pasta sheet. Using light pressure press down on the dough. This creates little pockets for the filling.
- Fill the ravioli with a small mound of filling. Use one heaping teaspoon per ravioli. Do not overfill or they will be hard to seal and spill out the sides.
- Place the second sheet dough directly over the first. Get rid of air pockets by pressing down gently on the dough. With a rolling pin press down gently and roll on top of the second pasta sheet to cut and seal the edges.
- When finished, turn over the ravioli maker and the individual ravioli will pop out sealed and cut! If they don't come out, gently wiggle them until they come off from the mold.
- Place the uncooked ravioli on a large baking sheet lined with parchment paper and semolina flour. Cover with a clean and light kitchen towel until ready to cook.
- Make sauce of choice and boil ravioli in a large pot salted water for about 3-5 minutes until they float to the top. Cook in batches. Coat with desired sauce and extra cheese.
Notes
- Make sure to have plenty of semolina flour. This stops the ravioli from sticking as you’re making them.
- Do not overfill the ravioli. It is tempting to overfill ravioli! Don’t do it. It will ruin the ravioli if they split.
- Drain your ricotta. Drain the filling when using ricotta and make sure it is not too runny or it will break through the pasta dough.
- Cook the ravioli in batches. Too many ravioli will lower the temperature, causing them to cook unevenly. Crowding will also cause them to stick to each other.
- Seal the ravioli well! This prevents the filling from bursting out in the boiling water.
Nutrition
Nutrition information is automatically calculated, so should only be used as an approximation.


I really appreciated the simplicity the dish and the clear and concise instructions. I look forward to trying more of you recipes
So happy you loved the homemade ravioli. Yes, so many more recipes that I know you will love! Enjoy and keep me posted!
The best pasta we’ve ever made and so simple!! My kids rave about our Italian nights now and love to help us make the dish! Can’t say enough good things about Elena and her recipes!!
Yay! So happy this is a family tradition now.