Italian Bread Recipe (No Knead Crusty Bread)
This post may contain affiliate links. Please read our disclosure policy.
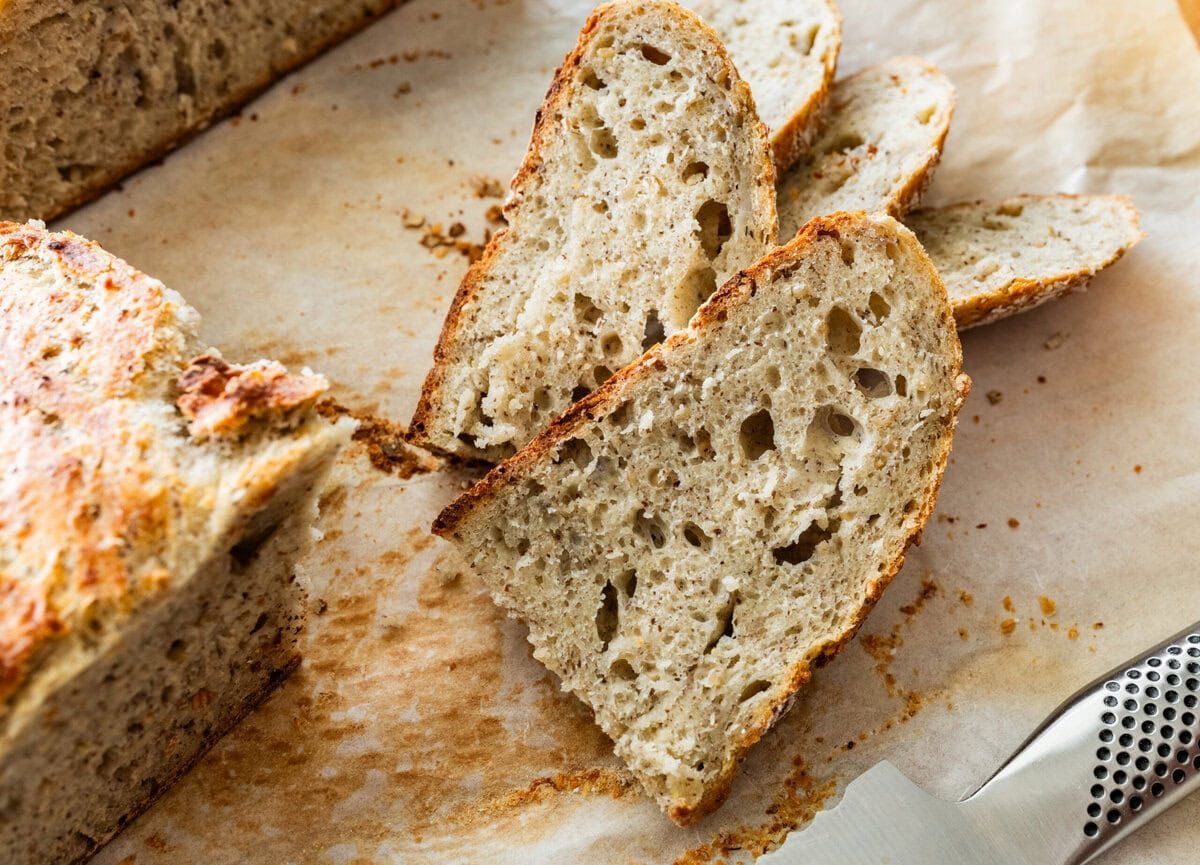
Discover the best easy Italian Bread Recipe! This simple recipe delivers incredible flavor with its crusty exterior, tender interior, and a subtle nuttiness from flax meal and steel-cut oats. It’s nourishing, beginner-friendly, and so dependable that many readers make it every single week.
If you want a homemade loaf that feels rustic, wholesome, and impossibly easy, this one will quickly become your go-to. For more delicious Italian-inspired breads, try my Italian ciabatta bread and no-knead focaccia bread.

Quick Look at This Recipe
- Prep Time: 10 minutes
- Rise Time: 2 hours or overnight
- Cook Time: 35 minutes
- Total Time: 2 hours and 45 minutes
- Servings: 12 slices
- Dietary Info: Naturally dairy-free and egg-free with a nutritional boost from flax and oats.
- Method: A simple, no-knead, one-bowl Italian bread recipe anyone can make.
- Technique: High hydration and a slow rise create great structure and a crisp crust.
- Flavor & Texture: Rustic, lightly nutty, soft inside, and perfectly crusty outside.
Why you’ll love this family favorite!

I grew up with simple, rustic loaves on the kitchen counter every day! More than twenty years ago, my mamma created this no-knead Italian bread recipe because she wanted a loaf that was crusty on the outside, soft on the inside, and a little more nourishing than the classic white ones she grew up with. She added a bit of oats and flax — nothing complicated, just those gentle mamma touches that give the bread extra tenderness and a subtle, nutty flavor.
We’ve been baking it weekly ever since. It’s one bowl, no kneading, and always reliable. It’s the kind of homemade Italian bread that fits easily into real life and fills the house with the most comforting aroma.
This Italian bread recipe even inspired our family’s “bread box,” a simple set of pantry staples and tools we keep ready so anyone can bake this loaf at a moment’s notice. Readers around the world now do the same, and it’s been such a joy to see this humble recipe become part of so many kitchens.
I hope it becomes a comforting staple in yours, too. Another beginner-friendly baking recipe is this rye sourdough starter! Use either bread to make our favorite porchetta sandwich or pair it with our chicken cacciatore and marry me shrimp.
Made With Amore,

“This bread is fantastic! My Family and I love it so much, we bake it every other day!!”
– Silvy
Table of Contents
- Quick Look at This Recipe
- Why you’ll love this family favorite!
- Simple Ingredients
- Substitutions and Variations
- How to Make Homemade Italian Bread (Step by Step)
- No Knead Bread Shaping Options
- Recipe Tips
- Crusty Italian Bread Recipe FAQs
- Storing and Reheating
- The Bread Box
- Serving Suggestions
- More Homemade Bread Recipes
- Italian Bread Recipe (Rustic and Easy)
Simple Ingredients
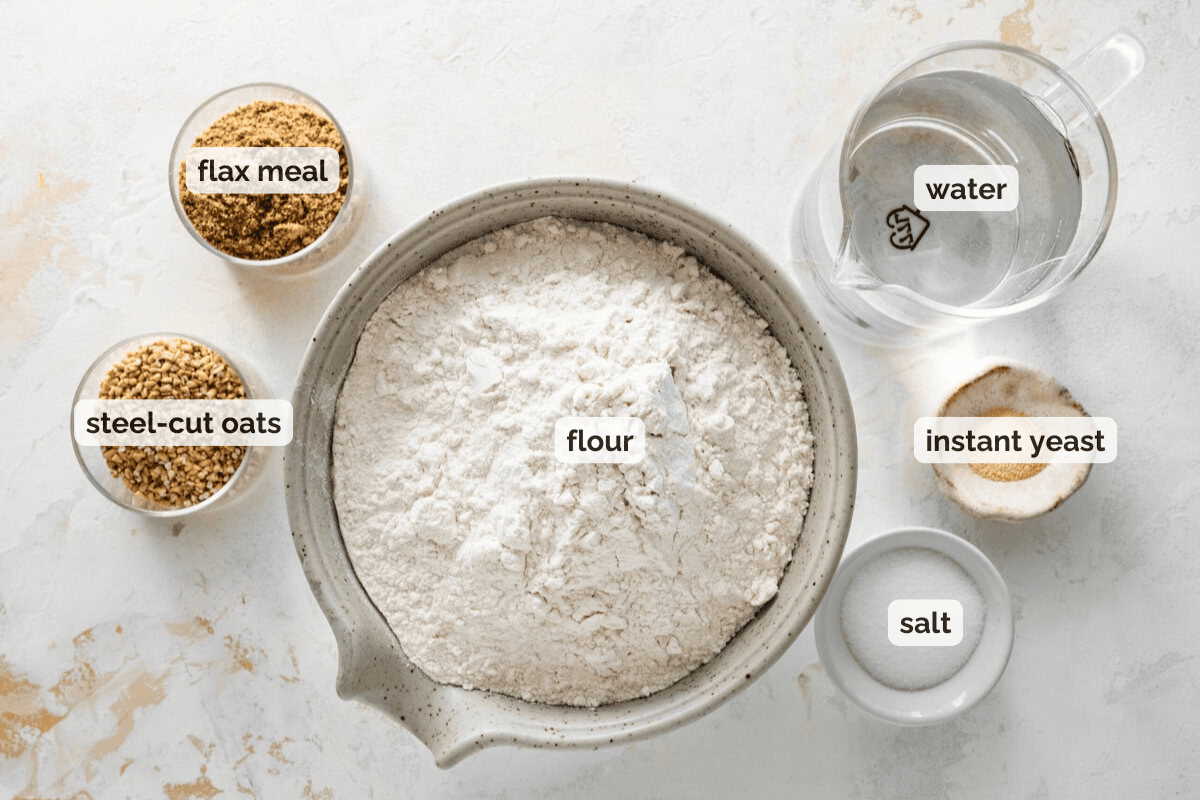
- All-Purpose Flour: The foundation of this Italian bread recipe. All-purpose flour keeps the loaf light and tender, while still giving you that rustic structure we love in Italian-style baking. No special flours needed, but this recipe works with bread flour too.
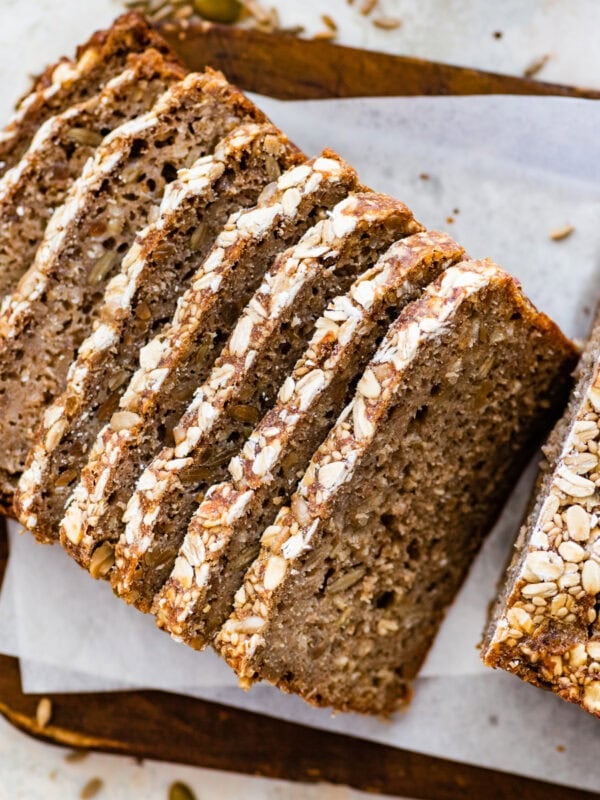
- Steel-Cut Oats: These add a gentle chew and extra nutrition without making the bread heavy. Because steel-cut oats are minimally processed, they hold their shape during baking and give the loaf a beautiful texture.
- Flax Meal: Flax meal adds warmth, softness, and a subtle nutty flavor while boosting the nutritional profile. It also helps the crumb stay tender longer, a trick that makes the loaf feel extra homemade.
- Instant Yeast: Perfect for no-knead bread because it activates quickly and reliably. You can also use it to make my authentic Roman pizza dough!
- Warm Water: Water temperature matters. Aim for warm (not hot) water to help the yeast activate without overproofing. Warm water also helps soften the oats slightly during the rise.
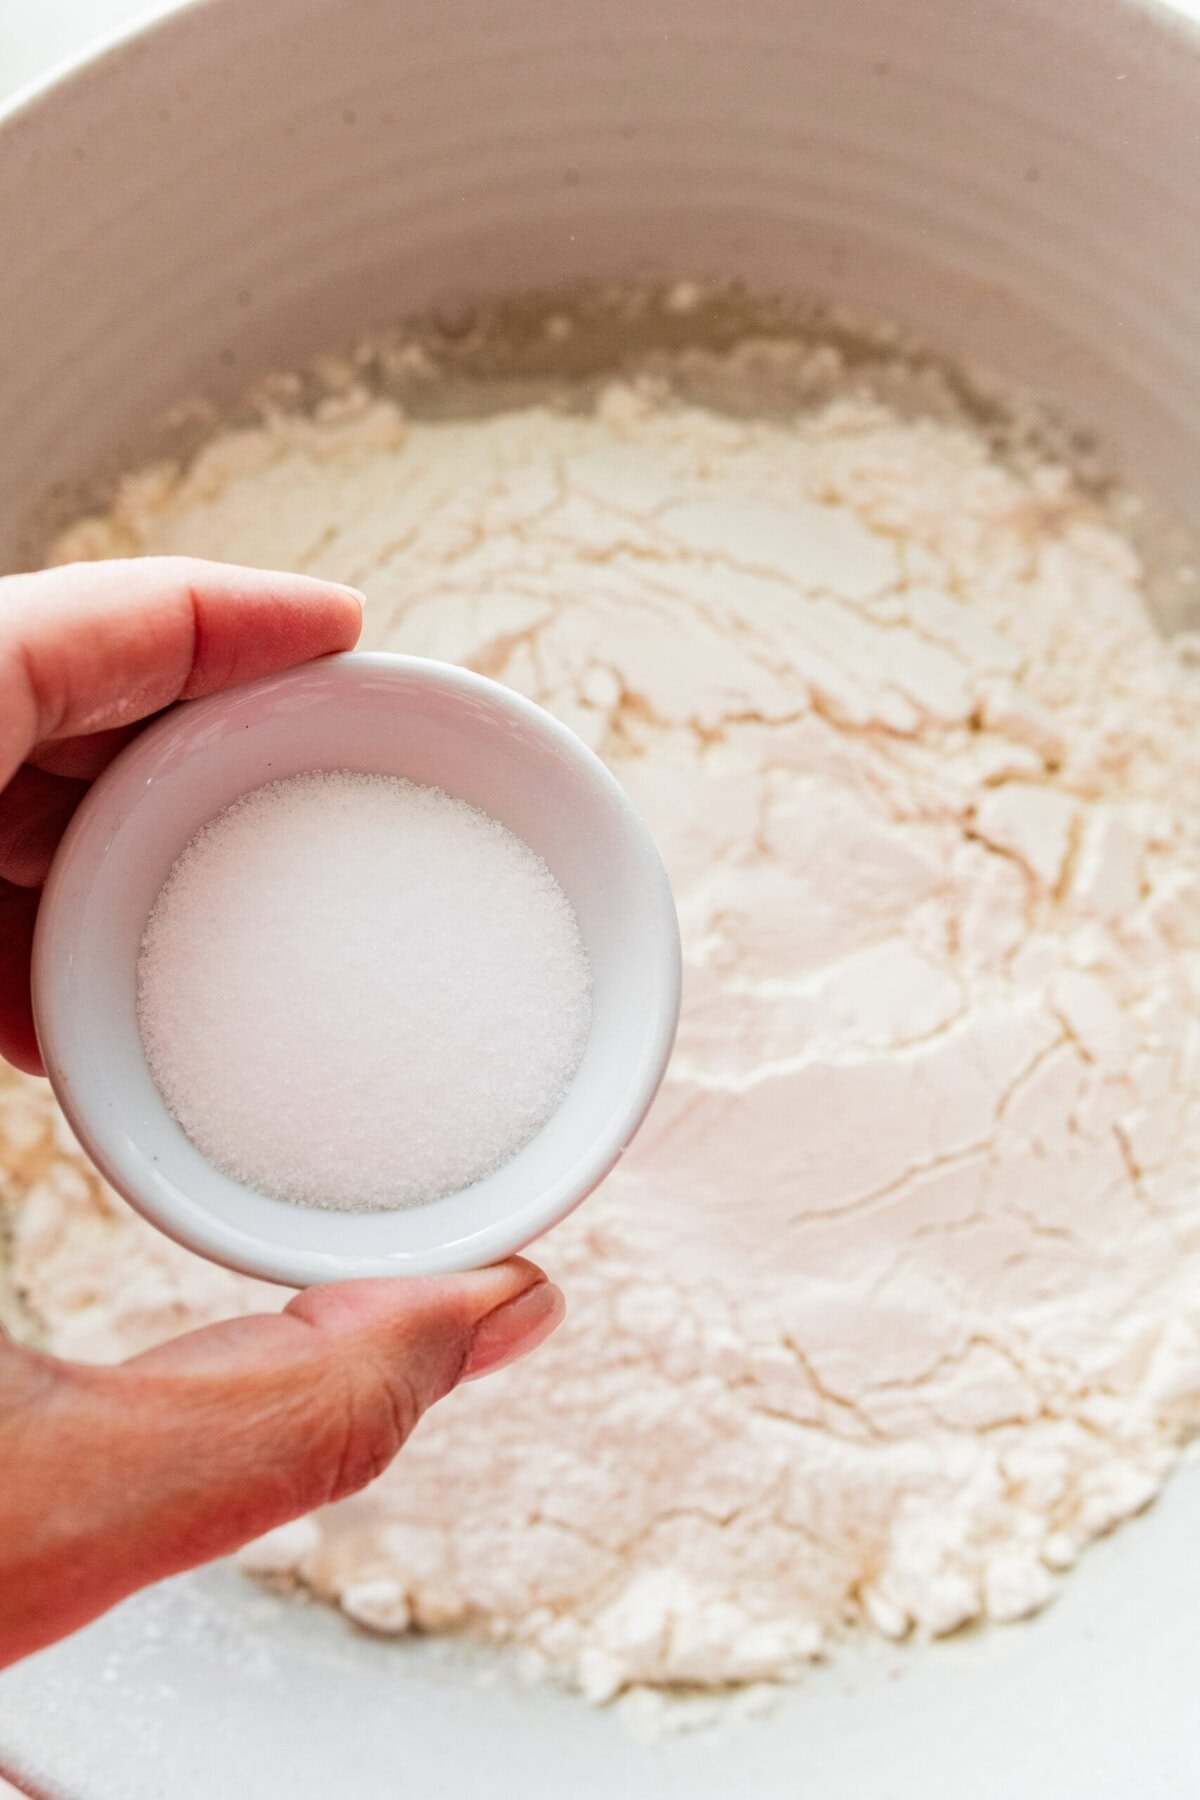
- Salt: Essential for flavor and structure. Salt strengthens the gluten network and enhances the natural sweetness of the grains. Don’t skip it! A bland loaf is a sad loaf!
See recipe card for full information on ingredients and quantities.
Substitutions and Variations
- Active Yeast Instead of Instant: You can use active yeast as well in this Italian bread recipe, but you will need to activate the yeast before you use it. To do this, mix ¼ cup of warm water (about 110°F – no hotter or you will kill the yeast) with a teaspoon of sugar and the same amount of yeast called for in the recipe, stir, and let it sit for 5-10 minutes. You will know the yeast is alive and ready to use when it starts to look foamy or bubbly. Then you can add the activated yeast to the dough, just like in this tomato focaccia recipe.
- Gluten-Free: Swap the flour for gluten-free flour blend like this Cup-4-Cup Multipurpose Flour. It’s important to weigh your flour when using a gluten-free flour blend.
- Optional Mix-Ins: You can add additional ingredients such as walnuts, raisins, or olives to your Italian bread just before shaping the loaves. The exact instructions are in the recipe card.
- Add a Topping: Sprinkle the Italian bread loaves with sesame seeds, pumpkin seeds, or poppy seeds after the second rise and just before baking.
How to Make Homemade Italian Bread (Step by Step)
This Italian bread recipe is so easy to make! You mix everything in a large bowl, let it rise, shape the dough, let it rise again, and bake!

- Dissolve the dried yeast in the warm water in a large mixing bowl. Mix in the steel-cut oats and the flax meal.
- Add the flour and salt to the yeast mixture.
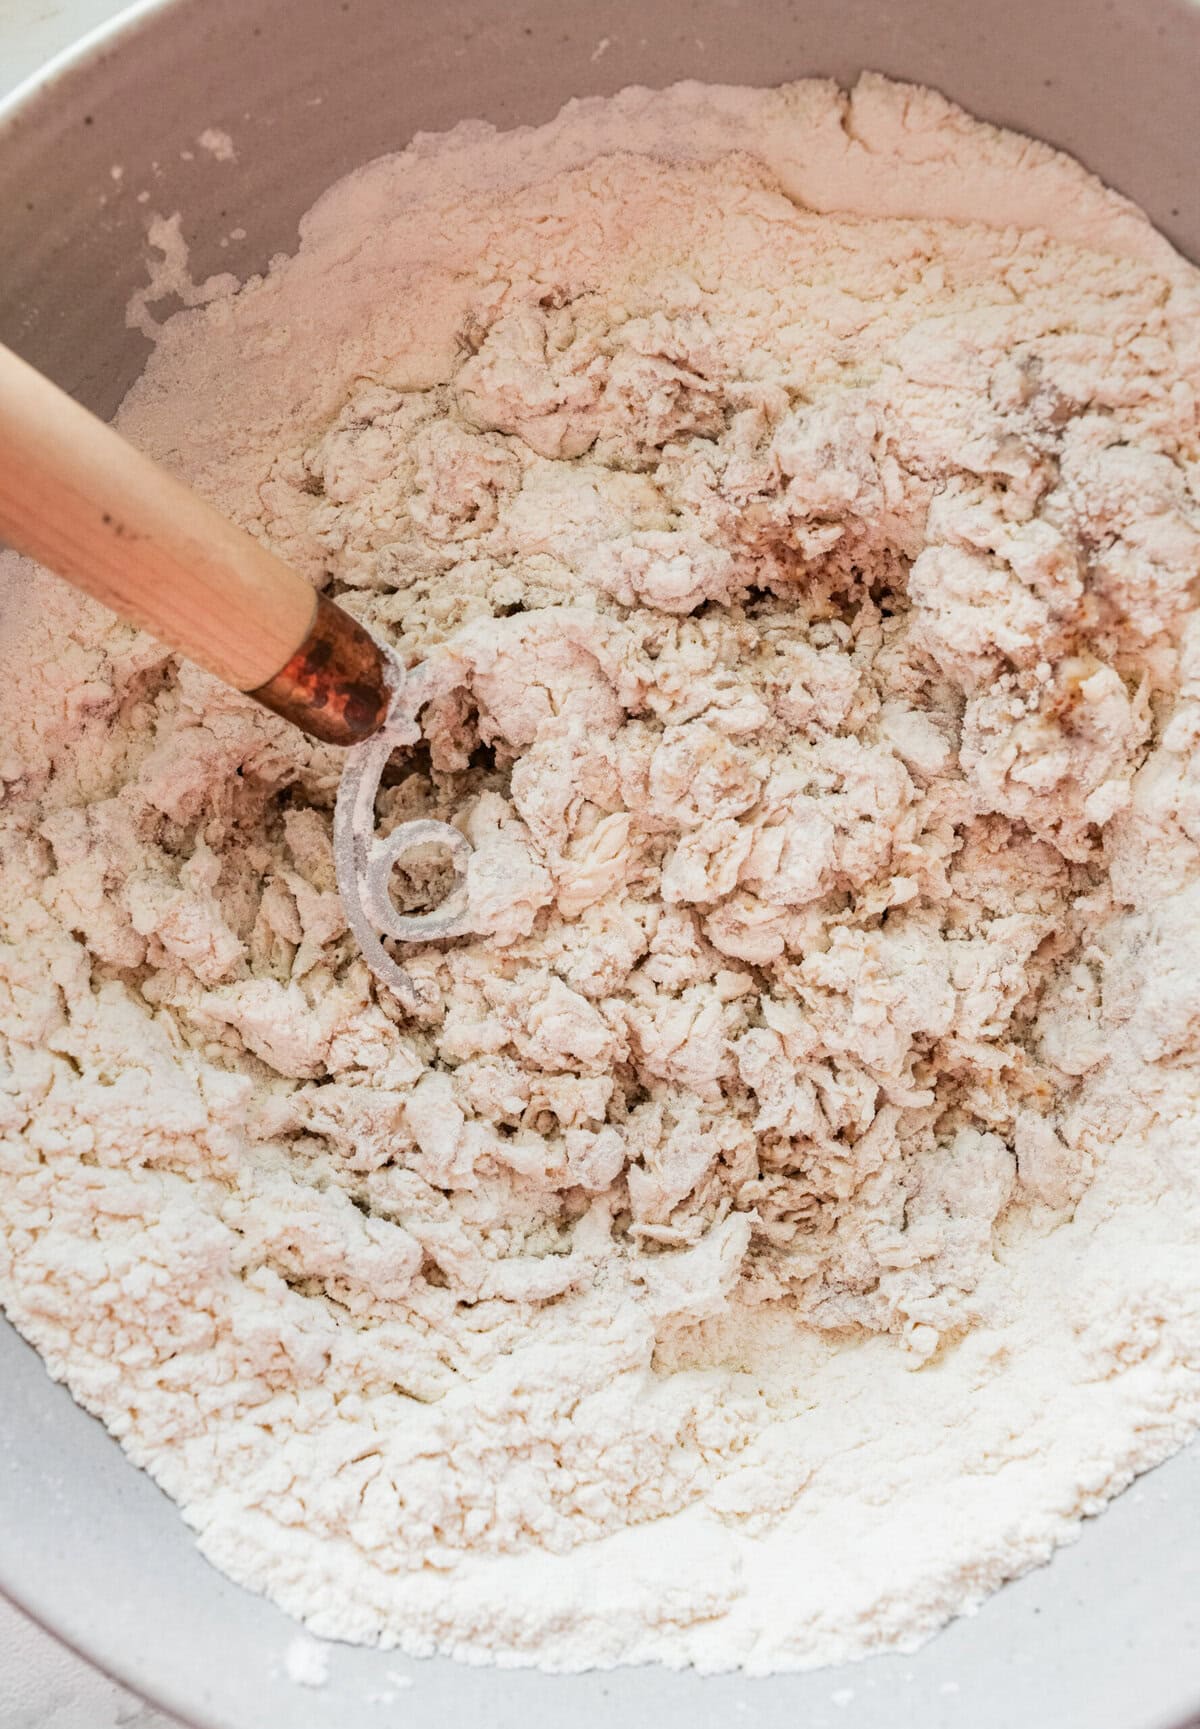
- Begin to mix with a wooden spoon or a dough hook for about 2-3 minutes. If after mixing, it seems dry, you may need to add a little more water.
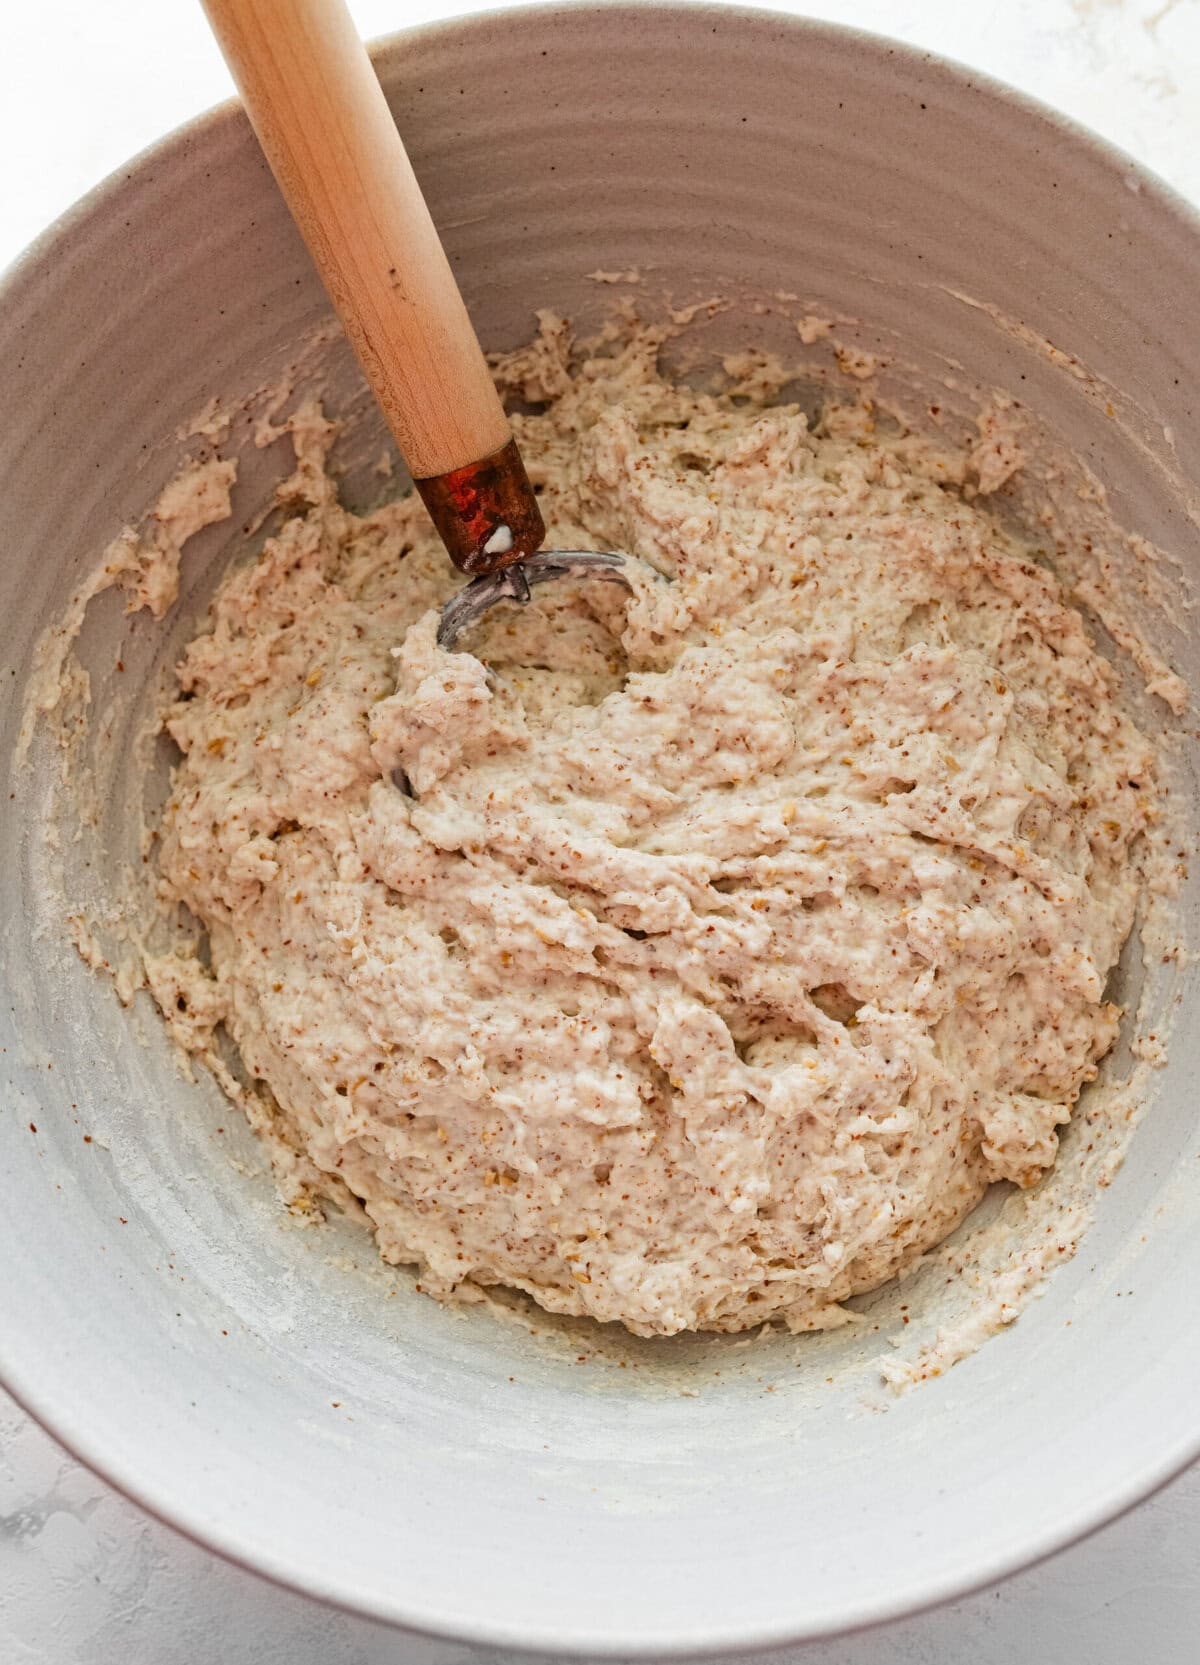
- When the dough is fully mixed, it will be sticky and slightly wet.
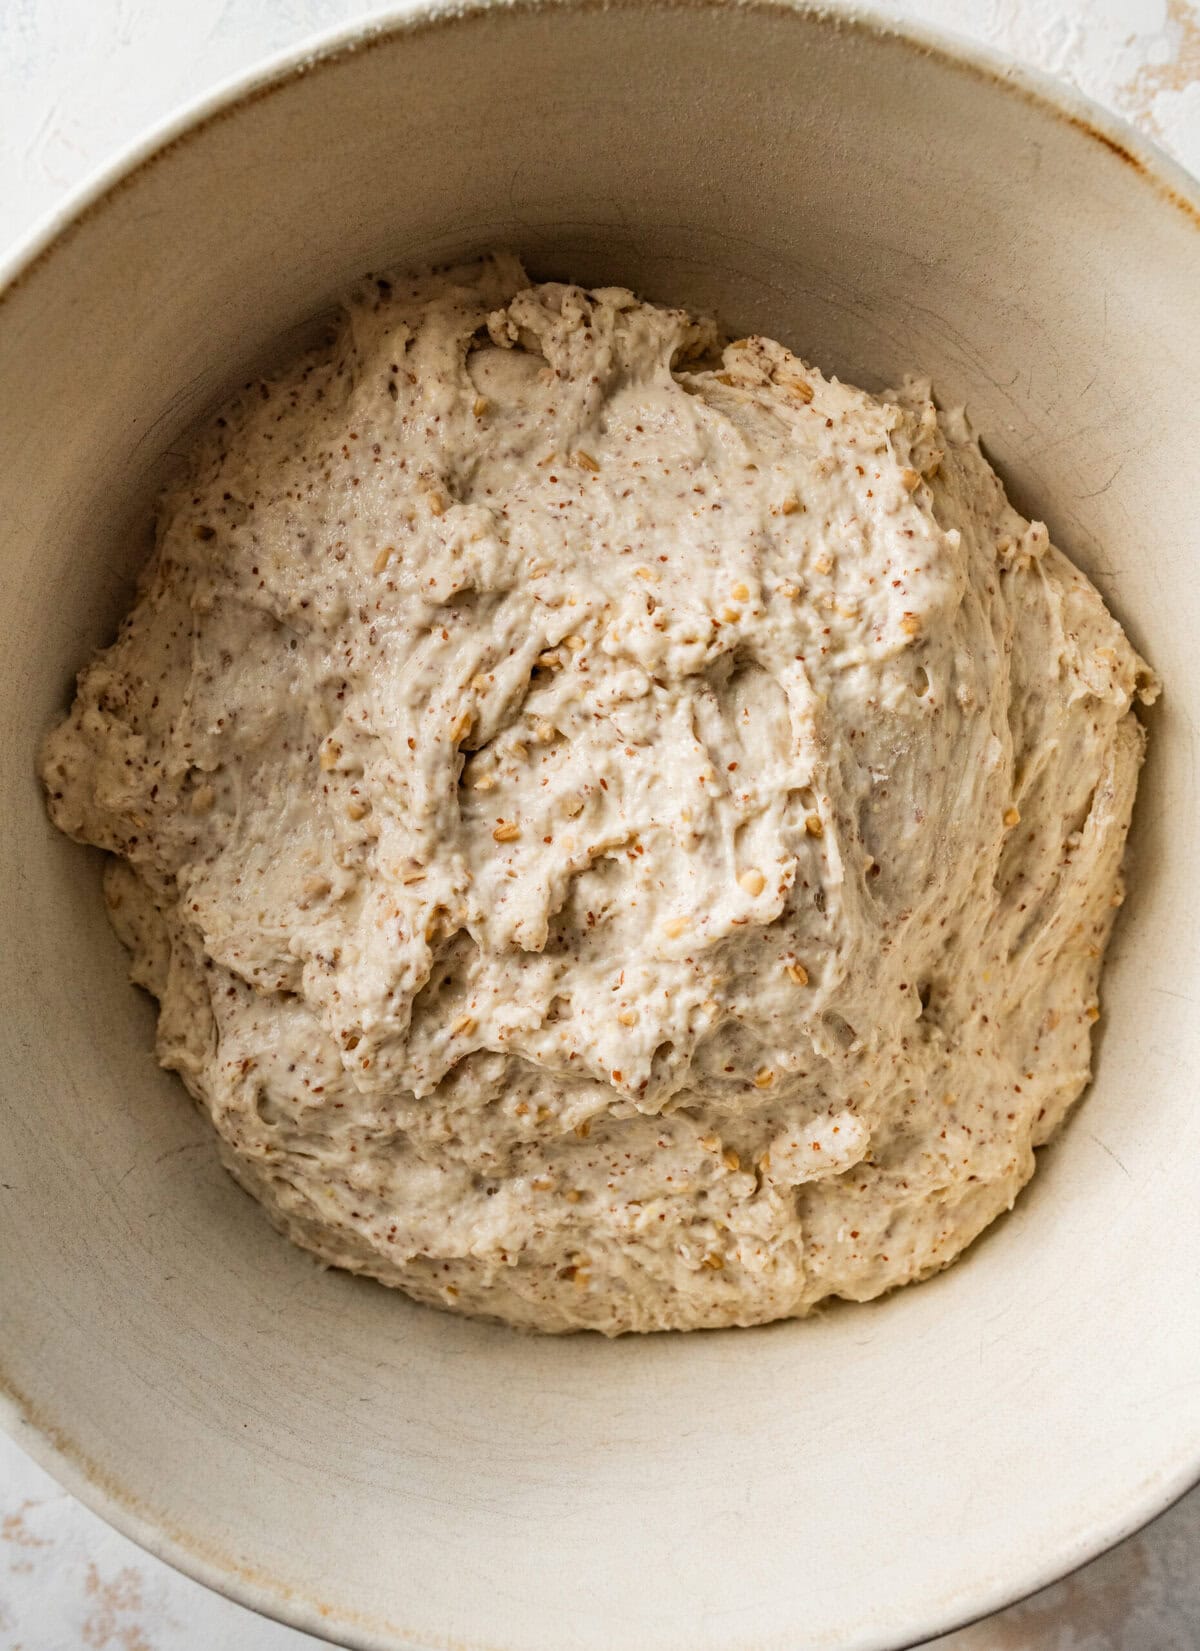
- Cover the bowl with Saran Wrap and let it rise on the kitchen counter for at least 8-12 hours, or do a slow rise overnight in the refrigerator. The dough will double in size.
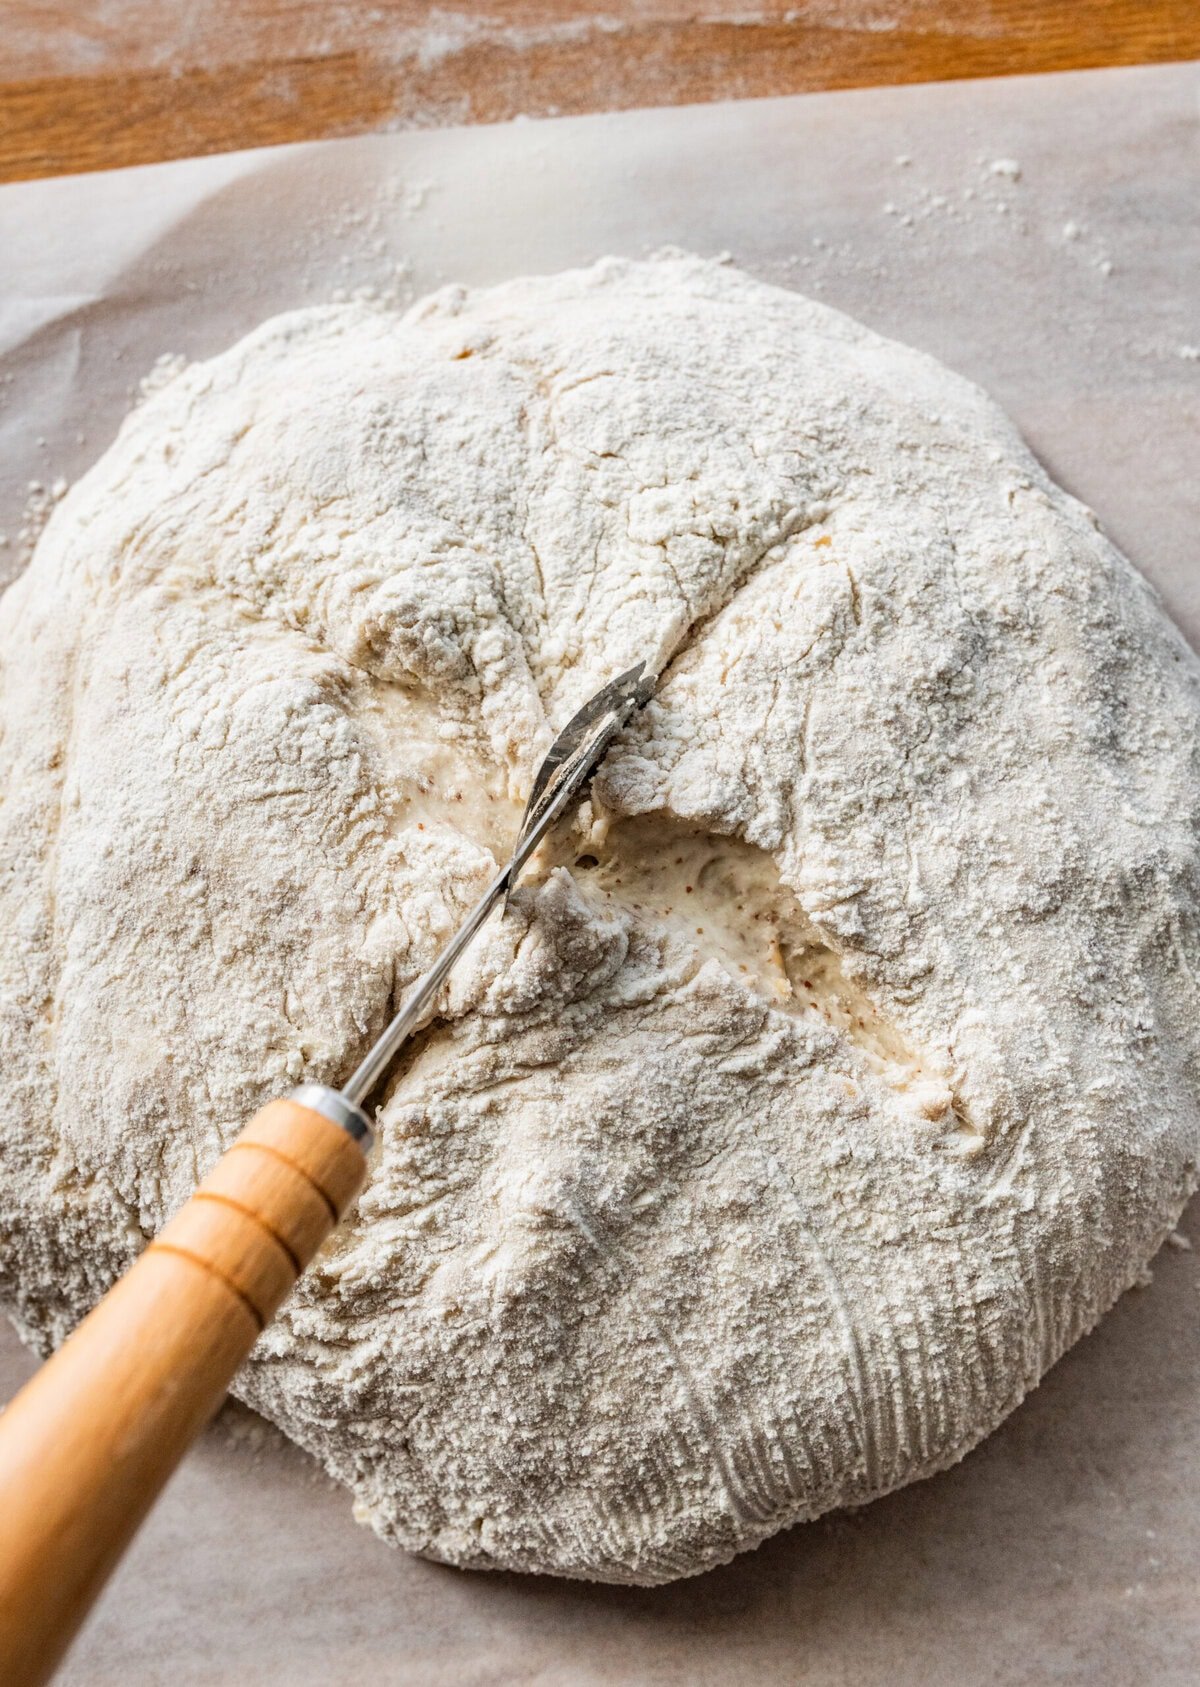
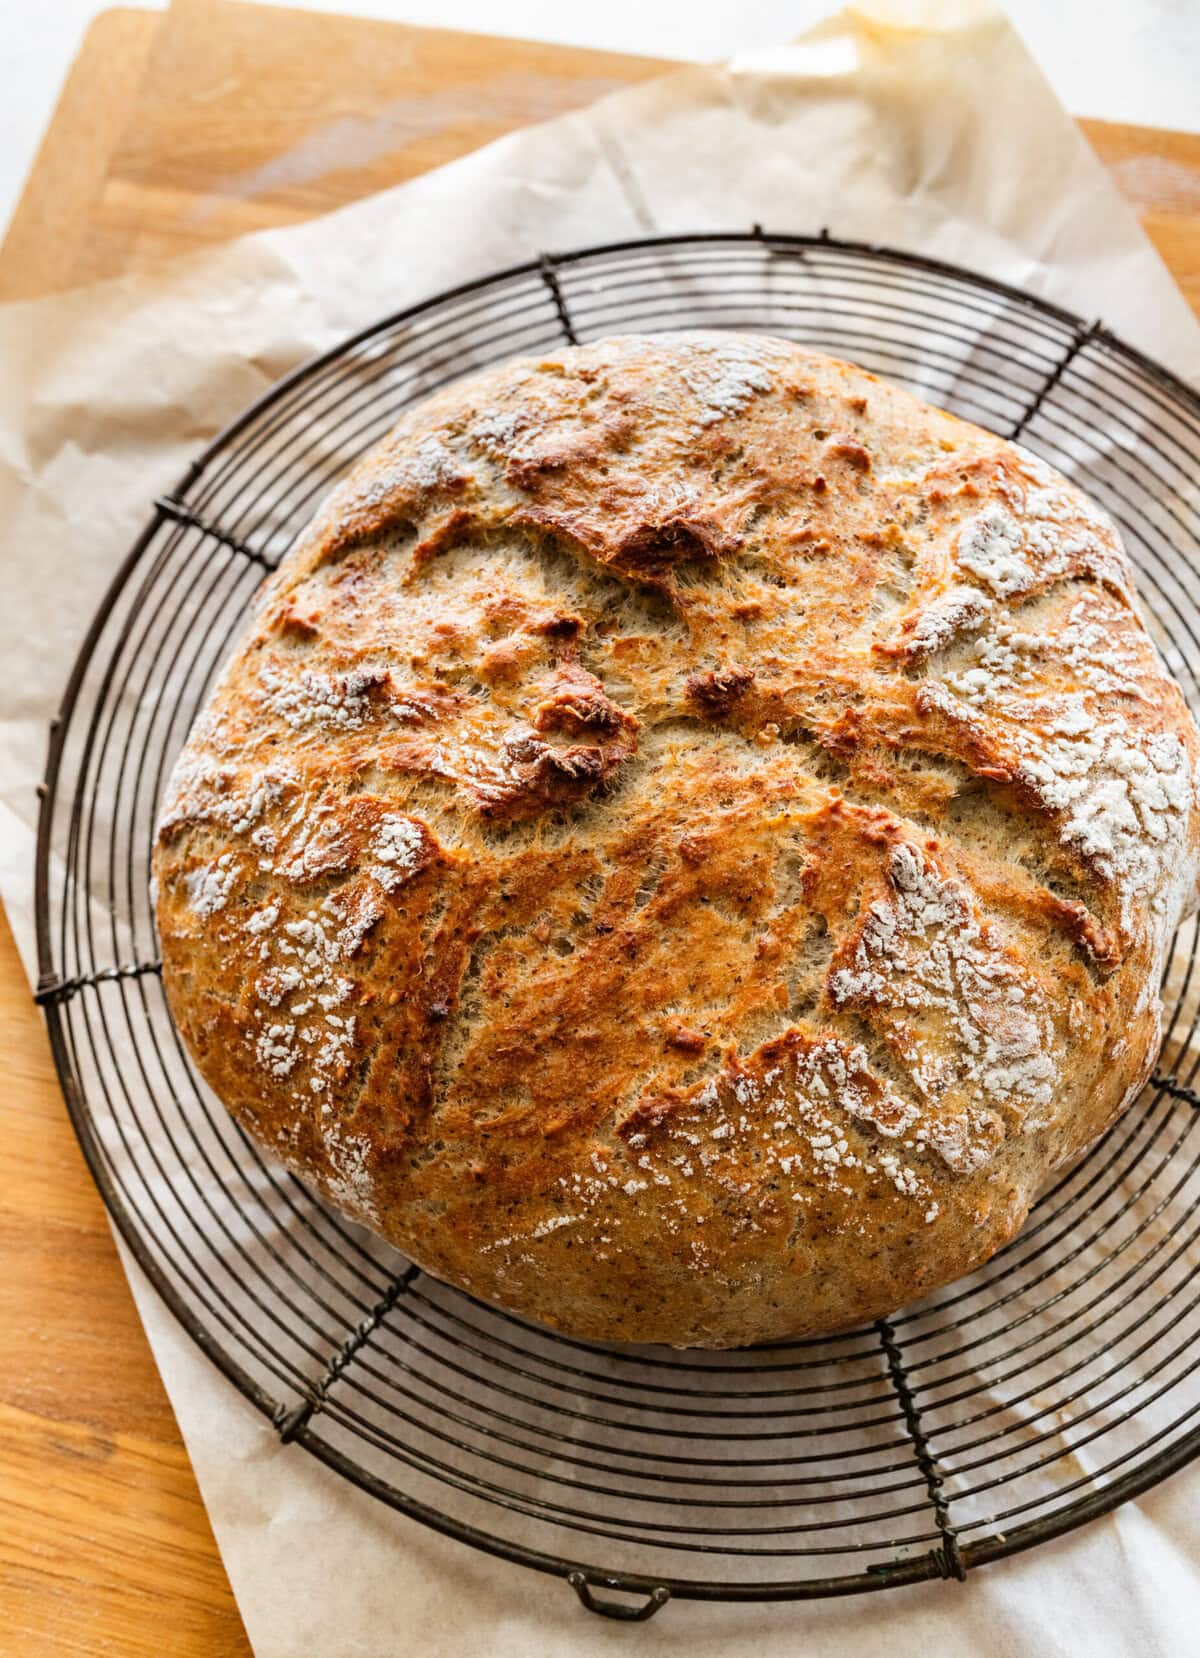
- Transfer the sticky dough to a floured surface and shape it into one large boule or two baguette-shaped logs. Move the bread to a floured piece of parchment paper, and sprinkle additional flour on top. Cover with a kitchen towel and let the loaf rise again for 50-60 minutes. After the rise, use a sharp knife to score the dough with two longitudinal cuts for each baguette OR two scores on top of the large round boule.
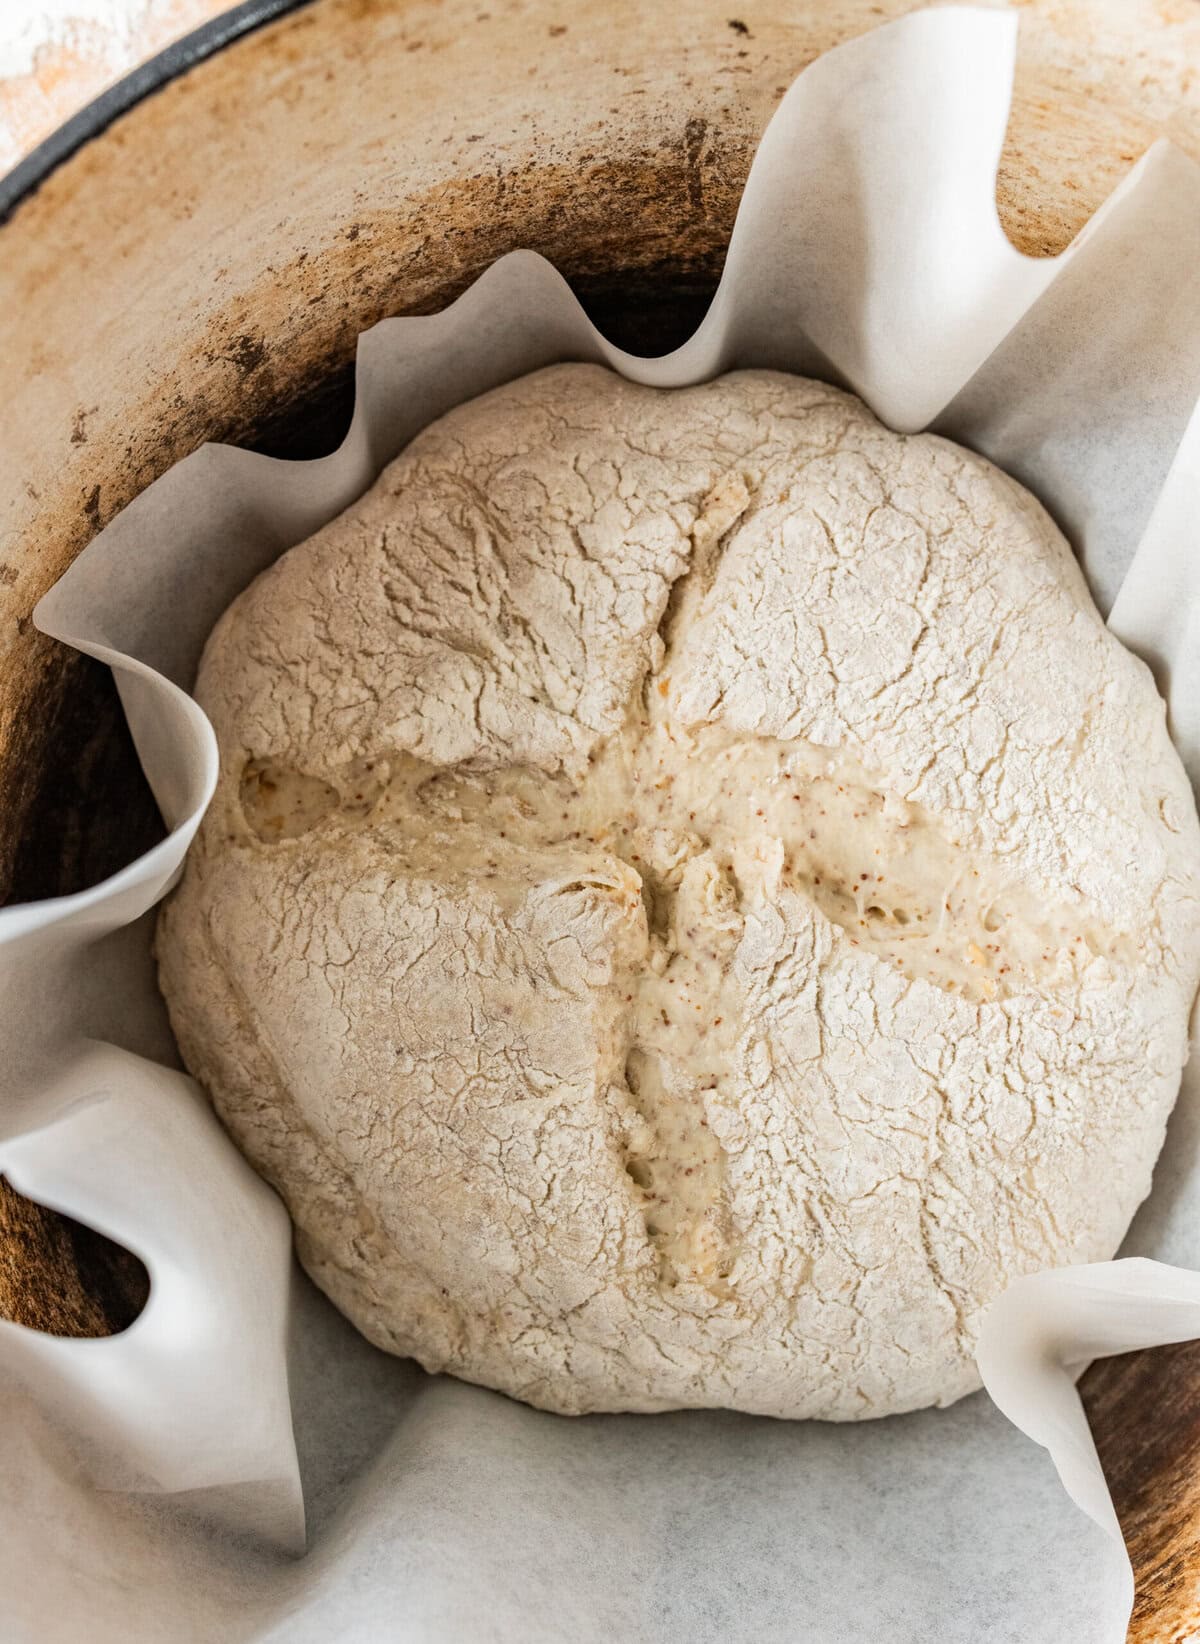
- Preheat the oven to 450°F and place a 6-quart Dutch oven (or heavy cooking pot with oven-safe lid) in the oven as it preheats. When the oven is preheated, take out the Dutch oven and place the baguettes or the large boule inside, along with the parchment paper. Place it back in the oven to bake for 33 minutes with the lid ON. After 33 minutes, check if the top of the bread is golden brown. If you like darker brown, remove the lid and cook for 6-10 minutes.
- Transfer the bread to a cooling rack and let it cool completely. Or, take a slice while still warm, spread it with butter or some Italian pistachio cream for a sweet twist, and enjoy!
No Knead Bread Shaping Options
One of the things I love most about this dough is how versatile it is. You can shape it in several different ways depending on what you’re serving, how you like your crust, or simply what pans you have on hand. Just remember if not baking it in a Dutch oven, reduce the heat to 400°F.
- Classic Round Loaf (Boule): Perfect if you’re baking the loaf in a cast-iron Dutch oven. The enclosed heat creates beautiful steam, giving you that crisp, crackly crust and tender interior. This is the method I use when I want a true rustic, Italian-style round loaf.
- Simple Loaf Pan Bread: If you prefer a more uniform slice that’s great for sandwiches or toast. Shape the dough into a log and place it in a standard loaf pan. The sides support the Italian bread dough as it rises, giving you a higher, softer loaf.
- Baguette-Style Loaves (Our Family Favorite!): My mamma makes this Italian bread recipe every single week, usually shaping it into two long baguette-style loaves for Sunday dinner. We walk into my parents’ home, and the smell of homemade bread fills the air. You know, the kind that makes you drop your bags at the door and head straight for the kitchen. Those loaves disappear between the adults and the grandchildren before the night is over.
- Boule or Batard (Free-Form Rustic Style): For an old-world, bakery look, gently stretch and fold the dough into a free-form round (boule) or oval (batard). Place it directly on a parchment-lined baking sheet. The crumb will be slightly more open and rustic.
- Mini Loaves or Rolls: Divide the dough into small rounds for individual rolls. They’re perfect for dinner parties, kids, or when you want fresh bread throughout the week. Rolls also bake faster, making them great for busy days. Try these St Lucia buns or homemade Italian brioche for another mini bread option.

My Pro Tip
Recipe Tips
Following these tips will give you a beautifully soft yet crusty loaf every time!
- Use quality flour: Great Italian bread starts with great flour. All-purpose flour keeps this no-knead loaf light and soft, while bread flour gives a slightly chewier, more rustic texture. You can use either, but higher-quality flour always yields better flavor and structure.
- Expect a sticky dough: A wetter dough is exactly what gives no-knead bread its beautiful texture. Don’t fight it! The higher hydration helps create natural steam inside the loaf as it bakes, which is what allows the crust to form while the inside stays soft.
- Give it time to rise: A slow, relaxed rise develops the most flavor. Let the dough rest in a warm spot, or refrigerate it overnight for even deeper aroma and a more open crumb. If you refrigerate it, bring the dough to room temperature for about 2 hours before baking. In the winter, or in colder temperatures, you may need to place it in the oven with just the light on.
- Use steam for a crackly crust: Steam is your best friend for creating that classic Italian crust. If you’re not using a Dutch oven (which naturally traps steam), add a shallow pan of hot water to the bottom rack of the oven or mist the oven walls lightly right before baking.
- Don’t rush the bake: This loaf needs enough time in the oven to develop its color and structure. Bake until the crust is deeply golden and sounds hollow when tapped on the bottom. Underbaked bread will be gummy inside.
- Let the loaf cool before slicing: I know — it’s hard to wait. But slicing too early lets steam escape too quickly and can make the crumb gummy. Give it 20–30 minutes to set, and you’ll be rewarded with clean slices and a perfect texture.
Who can resist the smell and taste of hot, chewy, tender bread with a perfect crunchy crust? Not me! Enjoy with a plate of your favorite pasta, like cheese and broccoli pasta bake or Italian pasta puttanesca.
Crusty Italian Bread Recipe FAQs
Italian bread is known for its simple ingredients, rustic texture, and a soft interior with a crisp, golden crust. This loaf follows that tradition with a straightforward, no-knead method and the style of an everyday “pane casalingo” you’d find in many Italian homes. The oats and flax are a small modern twist, but the flavor and texture remain beautifully Italian.
Cool temperatures, inactive yeast, or not allowing it enough time to rise can prevent the dough from lifting properly. Try placing the dough in a slightly warm, draft-free area and allow it to rise slowly. If you used cold water or refrigerated the dough, expect the rise to take longer.
A crisp crust comes from steam and proper baking temperature. If you’re using a Dutch oven, the enclosed environment traps steam naturally. If you’re baking on a sheet pan or in a loaf pan, you can place a shallow pan of hot water on the bottom rack or mist the oven walls right before baking. Always bake until the crust is a deep golden color for the best result. Let the loaf cool on a wire rack so the steam can escape, keeping the crust crisp.
For the best flavor and structure, give the dough enough time to rise until it doubles in size. Depending on your kitchen temperature, this usually takes one to two hours. You can also let the dough rise slowly overnight in the refrigerator. If you refrigerate it, allow it to come back to room temperature for about two hours before baking.
A dense loaf usually means the dough didn’t rise long enough, the yeast was expired or inactive, or the dough was too dry. Make sure your yeast is fresh, give the dough enough time to double in size, and avoid adding extra flour. It’s normal for this no-knead dough to feel sticky.
A sticky dough is normal with no-knead bread and helps create the soft crumb and crusty exterior. If it is excessively wet, add only a tablespoon of flour at a time. If it feels dry or stiff, sprinkle in a bit of warm water. Small adjustments go a long way.
Yes. A Dutch oven creates wonderful steam and a crusty finish, but it’s not required. You can bake the loaf on a parchment-lined sheet pan or in a standard loaf pan. Just add steam to your oven by placing a pan of water on the lower rack to help the crust develop, and reduce the oven to 400°F.

Storing and Reheating
- Storing: Wrap the cooled loaf in parchment paper and place it in a large zip-top bag. This protects the crust while allowing a bit of airflow so the bread doesn’t turn soggy. It stays fresh for about five to seven days. Avoid airtight containers, as they soften the crust too much. Enjoy leftovers with a plate of my Italian beef short rib ragu.
- Freezing: This loaf freezes beautifully. Once completely cooled, wrap it in parchment or plastic wrap and slide it into a freezer-safe bag. It will keep well for up to three months. To thaw, transfer the loaf to the refrigerator overnight or let it sit at room temperature until fully defrosted.
- Reheating: To refresh the crust and bring back that warm, just-baked texture, preheat your oven to 350°F (175°C). Lightly mist the loaf with water or wrap it loosely in foil, then warm it for about ten to twelve minutes, or four to six minutes if you’re reheating individual slices. This restores the crust while keeping the inside soft. A toaster also works well for slices when you’re in a hurry with dishes like our eggs in purgatory.
The Bread Box
This recipe inspired something special in our family that we now call the “bread box”, a little collection of the exact tools and pantry staples to make this loaf at a moment’s notice. My mamma started the tradition years ago after realizing how often we reached for this recipe—sometimes twice a week! Keeping everything together made baking feel effortless, even on the busiest days, so we’d have fresh bread for all kinds of dishes from penne pomodoro to a crunchy toasted caprese sandwich.
Over time, readers began asking for their own version, and now countless kitchens around the world have a bread box tucked away in the pantry. It’s one of my favorite things about sharing this recipe—watching it become part of your routines and memories, too.
If you’d like to create your own, I’ve put together a simple Bread Box Kit with all the basics you need to bake this homemade Italian bread whenever the craving strikes.
Serving Suggestions
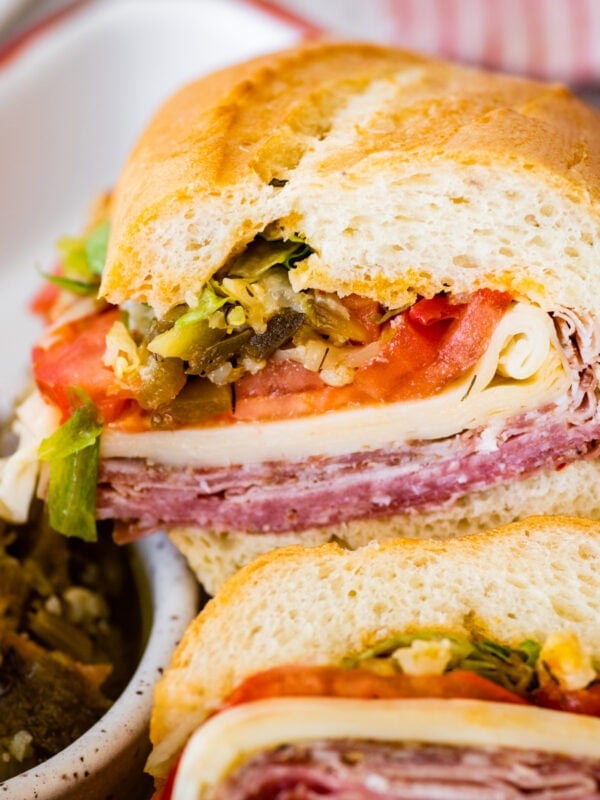
This bread is also delicious with butter and jam for breakfast, as a sandwich bread, or even a plain slice on the go!
Use this bread to soak up this delicious classic Italian tomato sauce or white bean dip. For the holiday, use it to make the best Thanksgiving stuffing!
Pair with a bowl of warm soup like our German goulash soup and zuppa Toscana on a chilly day!

More Homemade Bread Recipes


💙 MADE THIS RECIPE AND LOVED IT? 💙 Please leave a ⭐️STAR rating and COMMENT below- I love connecting with you! Tag me with your creations on Instagram and find me on Pinterest.
Italian Bread Recipe (Rustic and Easy)

Ingredients
- 2 ¼ cups warm water , 500 ml, (might need a little more)
- ¼ teaspoon instant yeast, it’s just a little since there is a long rise
- ¼ cup steel-cut oats, use whole
- ¼ cup ground flax meal, golden or dark
- 4 cups organic all-purpose flour, Italian 00 flour, or Kamut flour, 500 grams
- 2 teaspoons salt
Instructions
- In a large mixing bowl dissolve the yeast in the warm water.
- Add the steel-cut oats and the flax meal and mix well (I use a fork to mix). Add flour and salt to the mix and incorporate well. Mix with a wooden spoon or dough hook for about 2-3 minutes.
- The dough will be sticky and slightly wet. If it seems dry, you may need to add a little more water.
- Cover the bowl with saran wrap and let it rise on the kitchen counter for at least 8-12 hours. The dough will double in size. You can leave it in the refrigerator for up to 24 hours. If you do the long refrigerator rise, set it on the counter and let it come to room temperature for 2 hours before proceeding to step 5.
- After the first rise, transfer the sticky dough to a floured surface and shape it into one large boule or two baguette-shaped logs. Transfer onto floured parchment paper. Sprinkle with additional flour on top. Cover with a kitchen towel. If using mix-ins, see *notes. Also, see the **notes if you bake the bread in a single loaf pan without a lid.
- Let rise again for 50-60 min (on the parchment paper covered with a towel).
- With a sharp knife, score the dough with two longitudinal cuts for each baguette OR two scores on top of the large round boule.
- Preheat oven to 450 F. Meanwhile, place a 6-quart Dutch oven (or heavy cooking pot with oven-safe lid) in the oven as it preheats.
- When the oven is preheated to 450 F, take out the Dutch oven and place the baguettes or the large boule inside (with parchment paper). Place back in the oven to bake for 33 minutes with the lid ON. After 33 minutes, check if the top of the bread is golden brown. If you like darker brown, remove the lid and cook for 6-10 minutes.
- Put the bread on a cooling rack and let it cool completely. Or, take a slice while still warm and enjoy.
Notes
- Adding Mix-Ins: Divide the dough in half and roll each half out on a floured surface into a rectangle. Sprinkle desired toppings evenly on the dough. Then fold the dough over on itself about four times to make two baguettes. Once shaped continue to Step 6 in the instructions for the second rise.
- No Dutch Oven: If you are baking your bread in a traditional single-loaf bread pan. Preheat the oven to 400° F. Place your dough directly into your greased bread pan (or bread pan lined with parchment paper) for the last rise. Once the dough is doubled in size (about 1 hour), bake in the preheated oven for 30-40 minutes until the top is golden brown.
- Make Your Own Bread Box: Here is the link to everything you need for our signature “bread box,” where you can keep everything in one place to make this bread easily!
Nutrition
Nutrition information is automatically calculated, so should only be used as an approximation.


Hi Elena – I have a 4.5 quart Dutch oven. Will that work for this recipe? If not, how much of the dough should I use?
Thank you for your amazing recipes!
Yes, this will work!
I made this bread to go with the dipping oil. It was the first time making any kind of bread. It came out great!
It is our weekly bread for that reason- SO EASY!
step 4 stated to rise 8 to 12 hours. is that correct.
also, can I add sugar?
Yes, that is correct. Yes, you can add sugar if you like. Enjoy!
I was wondering can this be made in a bread maker?
Yes! It will work but I would still do the rising outside in a bowl! Enjoy.
Would this recipe work with active sourdough starter instead of yeast? If so, how much starter would you recommend?
Thanks!
Yes! I know many have made, but I do not know the exact amount :). Let me know when you try it!
I can eat oats. Can I leave out and just increase the flour or flax?
You can actually just leave out and it will still work great.
This bread is delicious. Will definitely be making it weekly. Thank you for sharing it 🙂
You are most welcome! I am happy you loved it!
What kind of instant yeast do you use?
Great question! I use instant yeast (also called rapid-rise)—any good brand works well here. I usually reach for SAF Instant or Red Star Quick Rise.
I love this bread! I’m wondering if adding some honey or maple syrup would work and if so, would I need to adjust the water amount to compensate for the addition of the honey or maple?
Hi, you can actually just add 1 tablespoon of honey and it will work great!
Has anyone tried making it with all purpose gluten free flour?
Yes! Use Cup4Cup and it works great!
Thank you so much! I can’t wait to make an GF version along with your Italian Bread Dipping Oul!
Yes! Enjoy!