This post may contain affiliate links. Please read our disclosure policy.
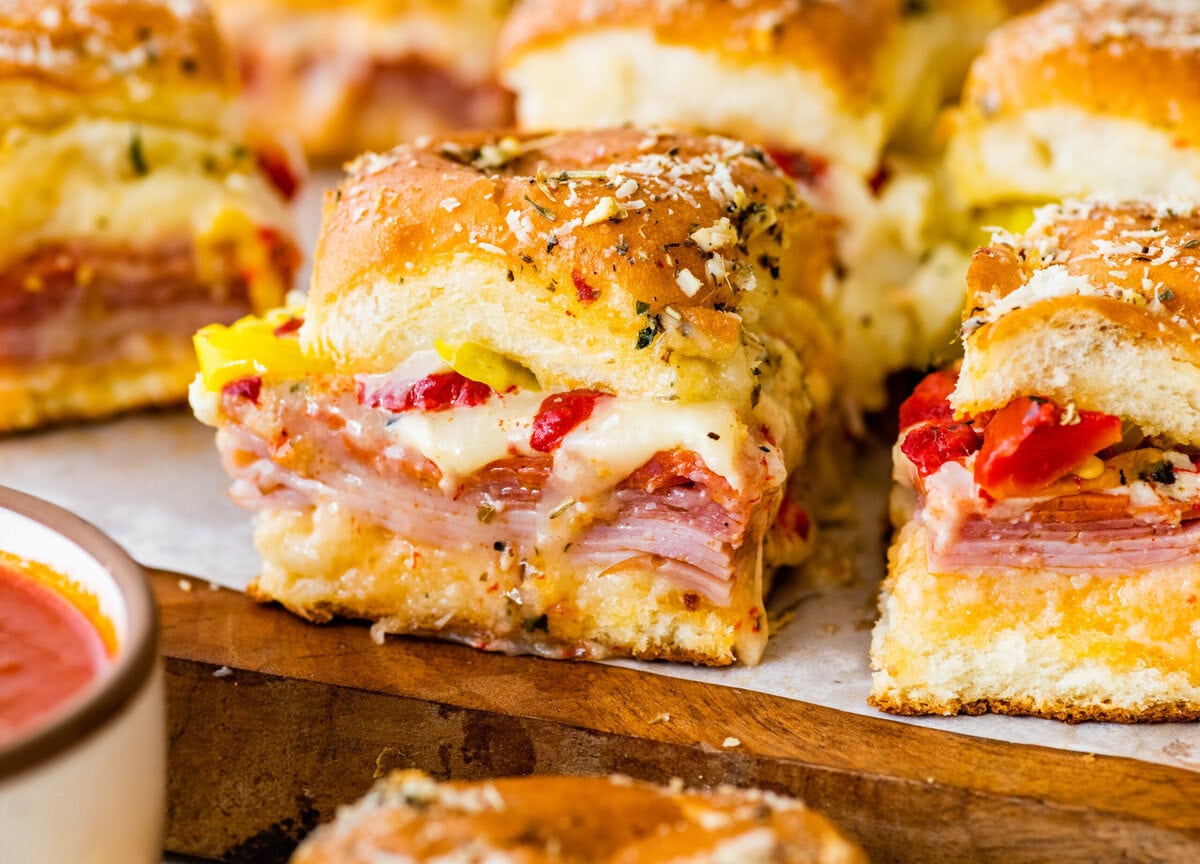
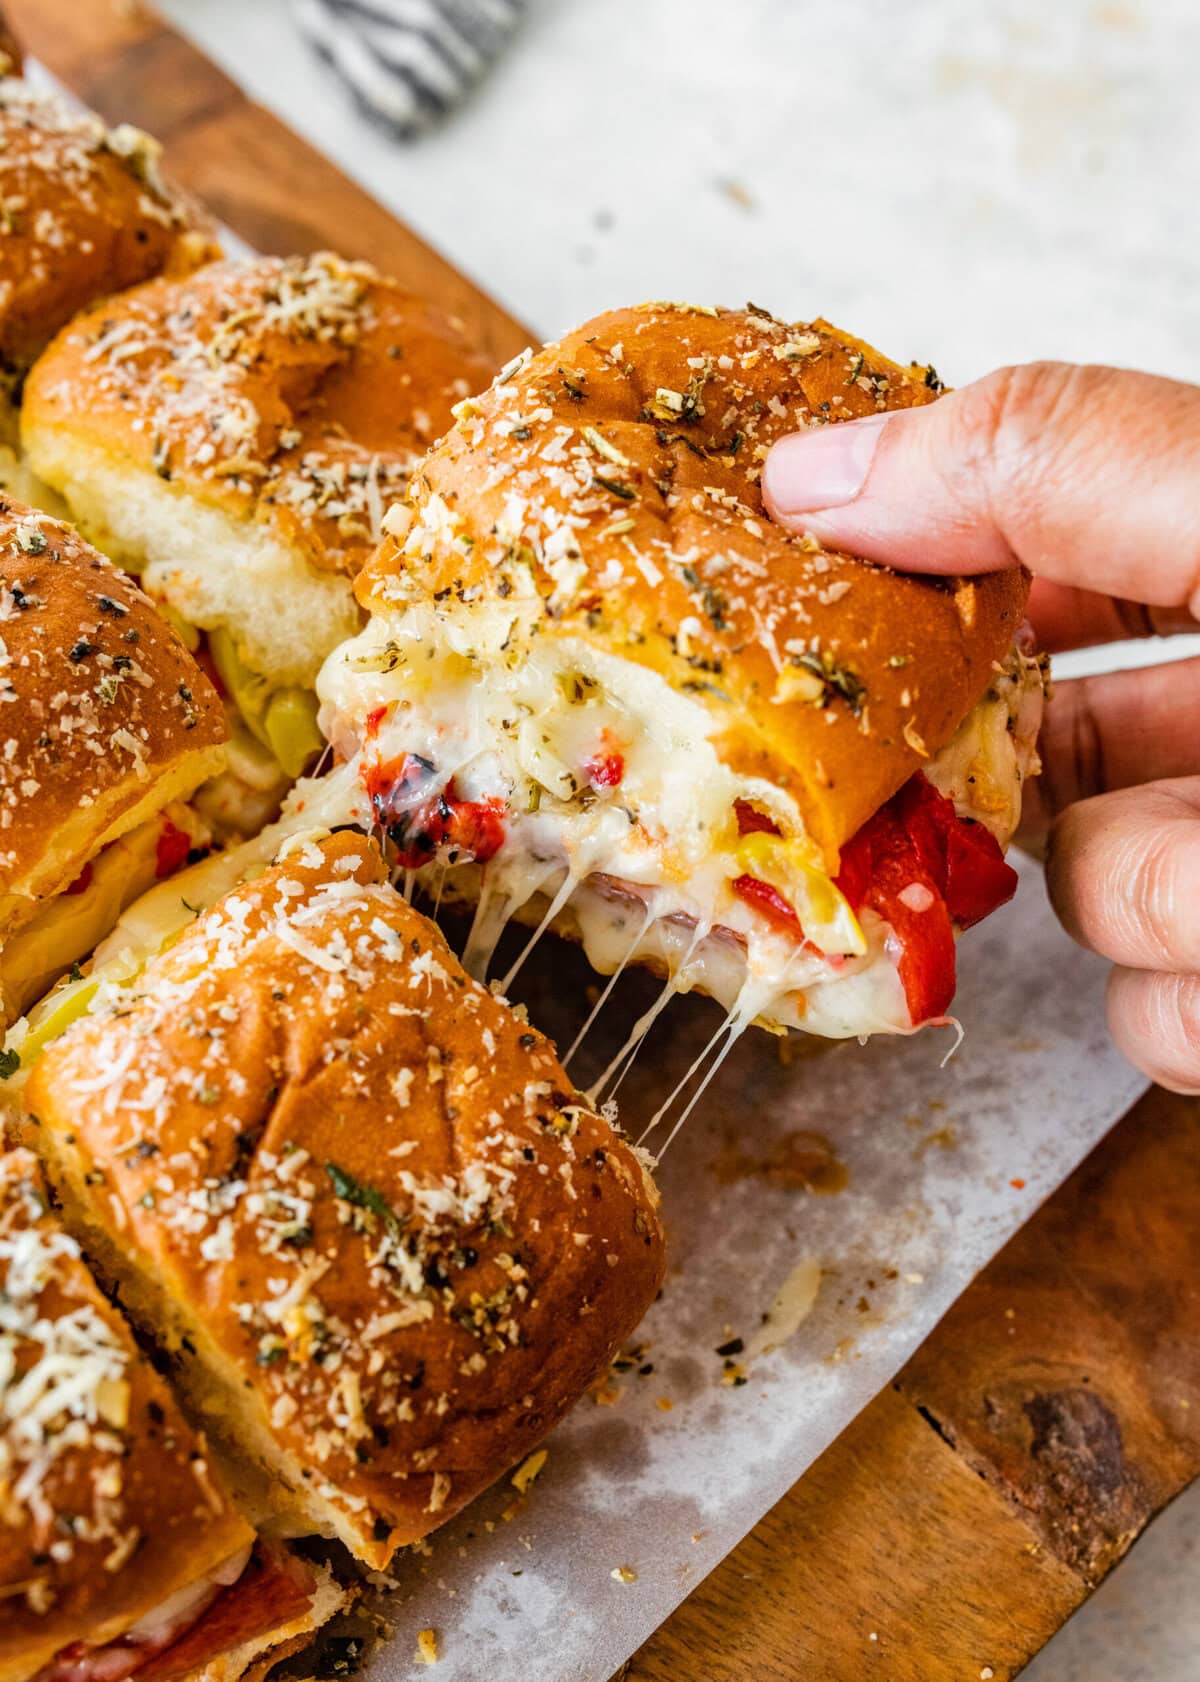
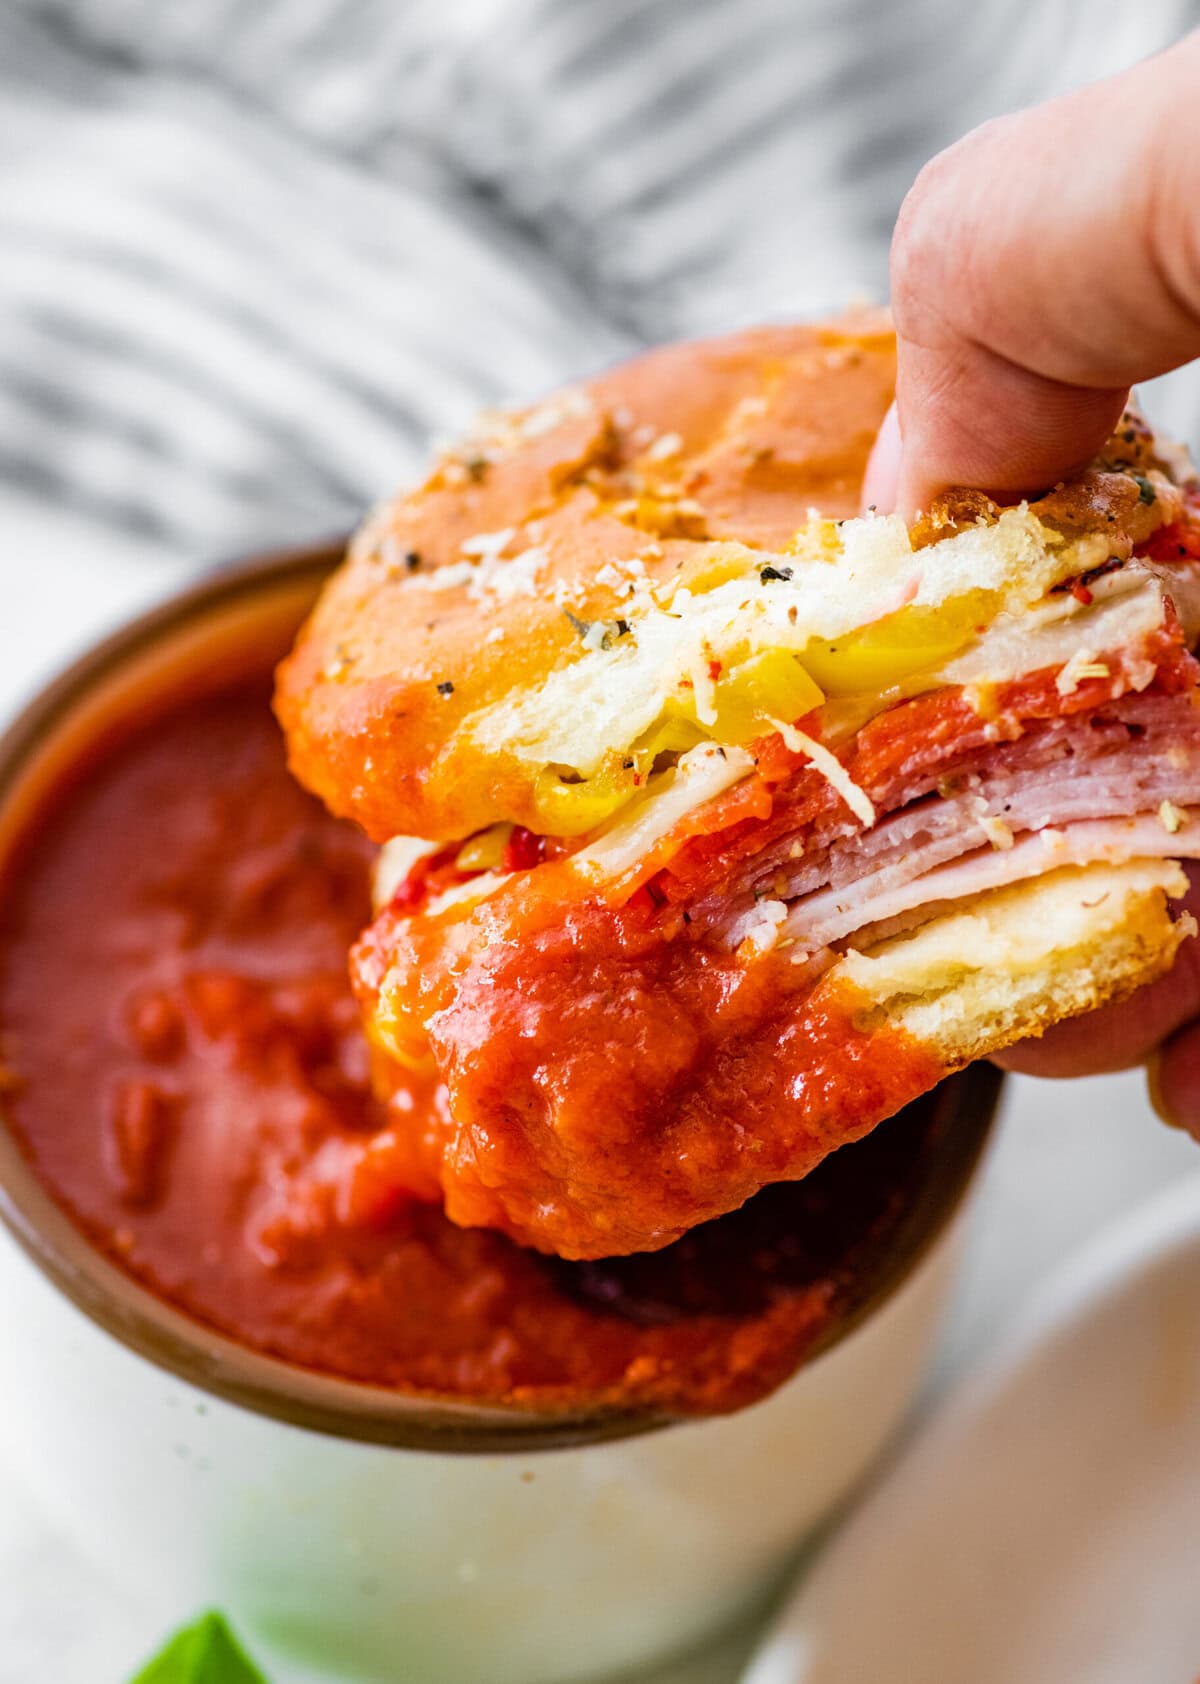
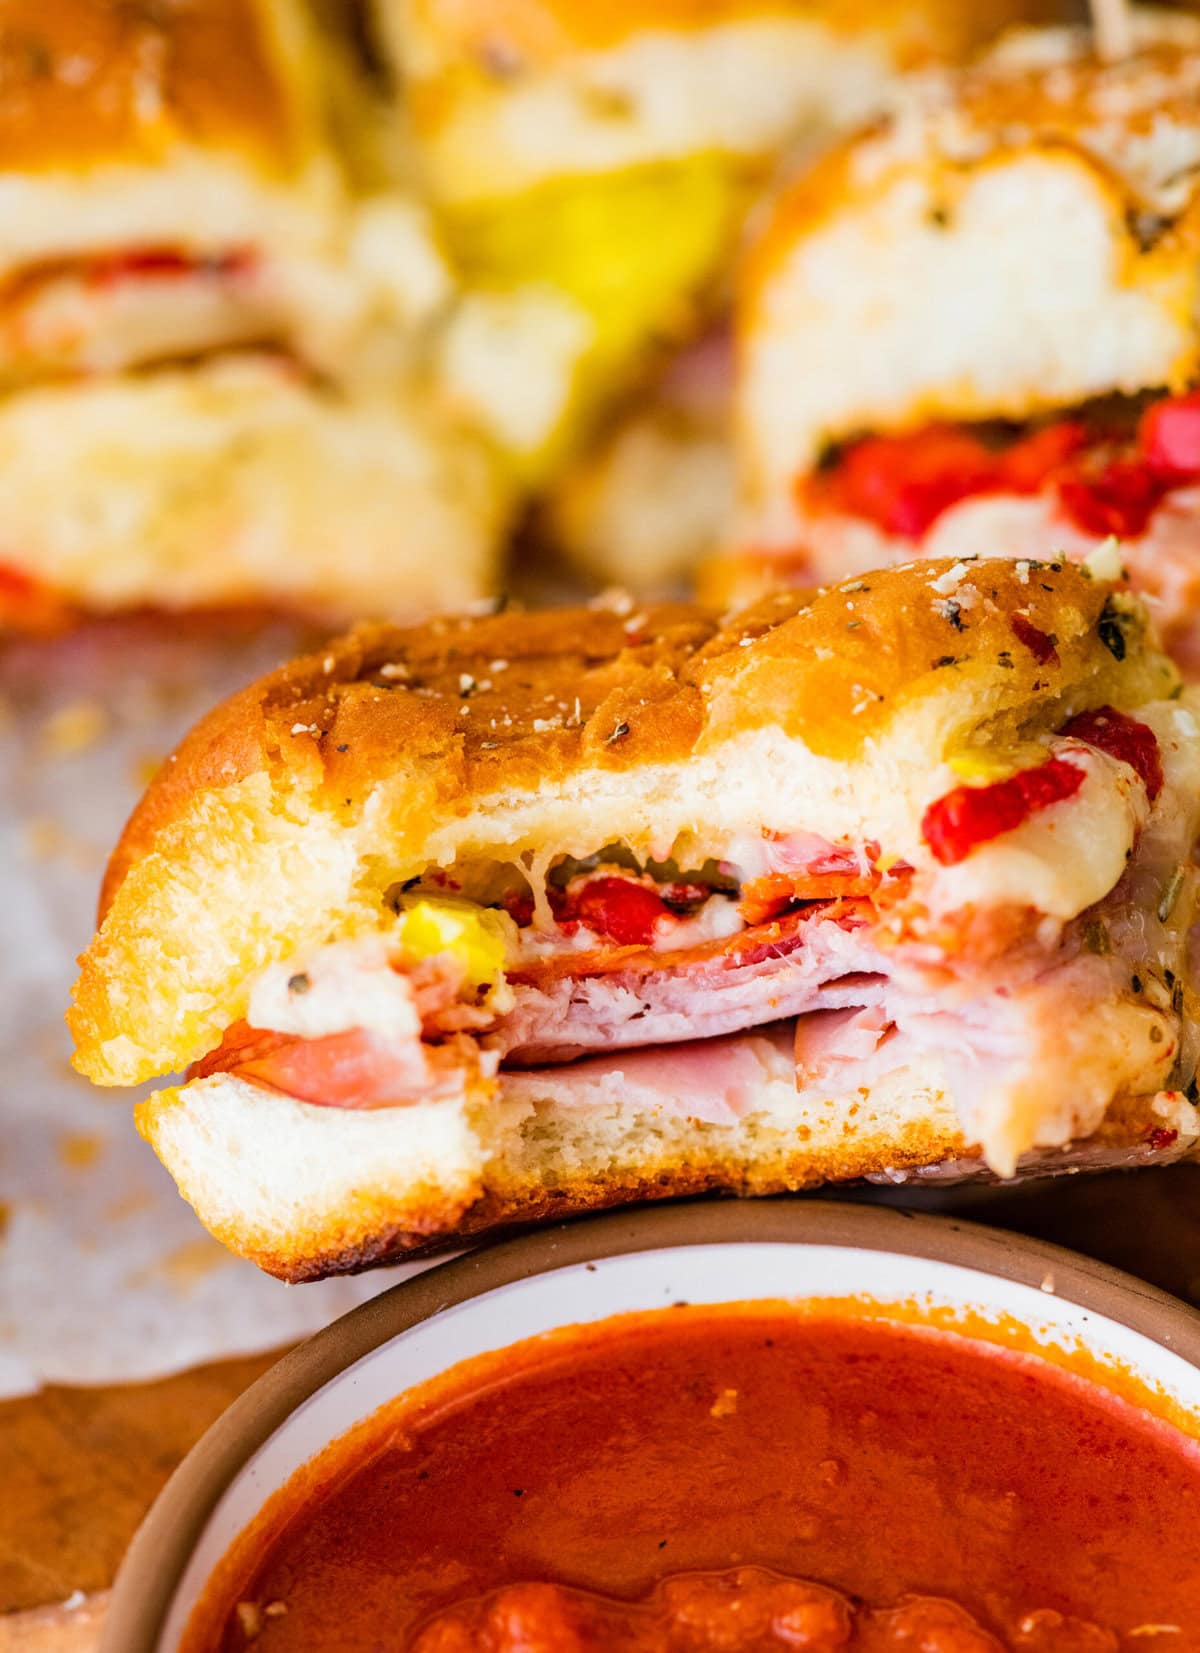
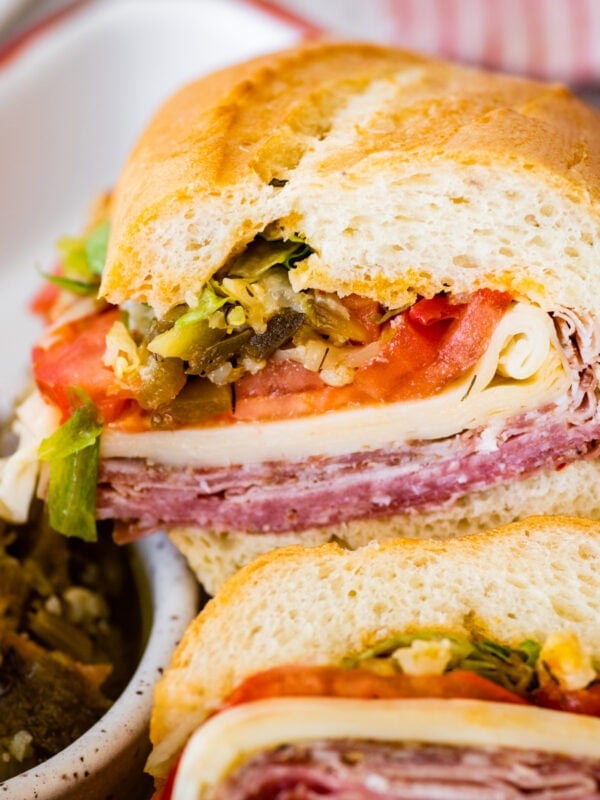
Golden, buttery rolls stuffed with layers of Italian deli meats, melty provolone, and peppers, these Hot Italian Sliders are the ultimate crowd-pleaser in 30 minutes. Baked until gooey in the middle and crisp on top, they’re flavorful and guaranteed to disappear the second they hit the table. You’ll never look at party sliders the same way!
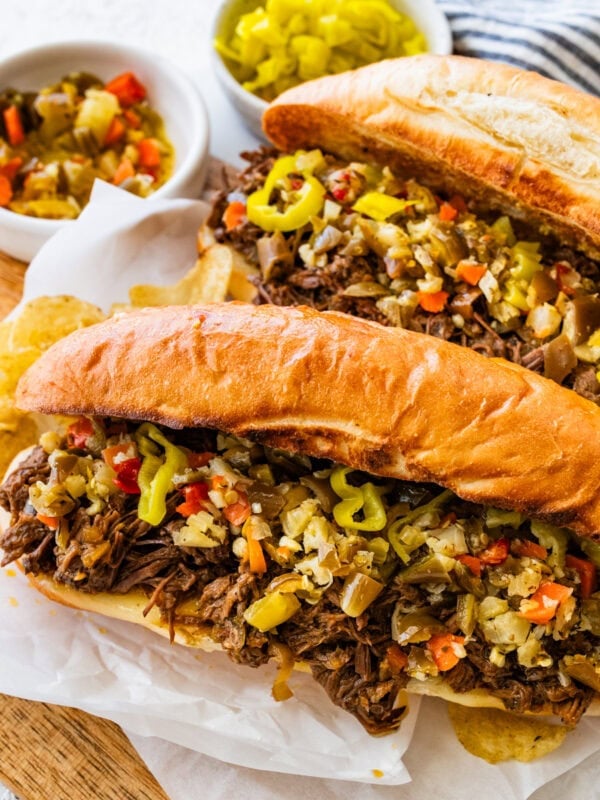
You’ll also love my Italian sub sandwich recipe, Italian beef sandwich, and Italian Mortadella Sandwich.
Why you’ll love this family favorite!

These Hot Italian Sliders are everything I love about Italian comfort food: simple, rustic, and full of flavor. The soft rolls soak up garlicky butter, the layers of Italian meats and provolone melt together beautifully, and the roasted peppers add just the right touch of sweetness and spice.
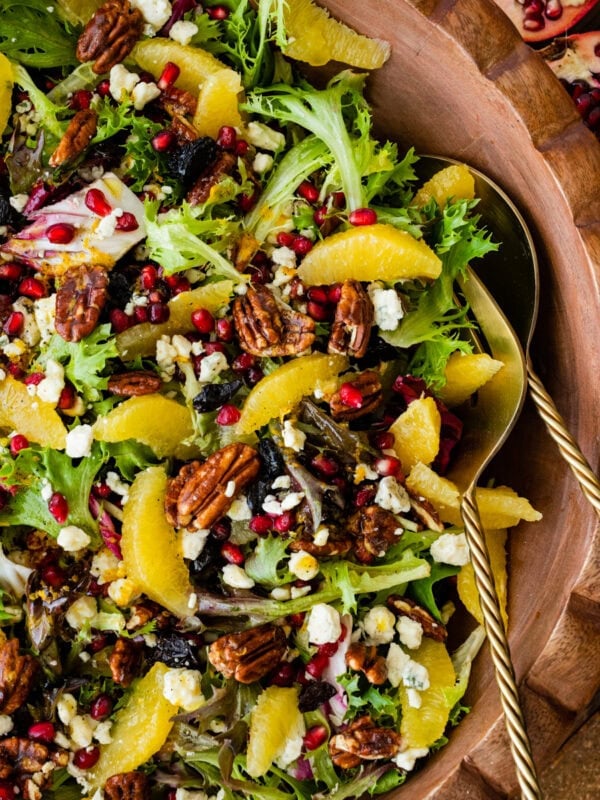
My family requests these mini sandwiches again and again, whether it’s for Sunday dinner, game day, or a quick weeknight meal. I love that they’re easy to prepare but feel special, like a little Italian paninoteca (bread shop) came to your cucina (kitchen). One bite, and you’ll see why these sliders are always a crowd favorite in our home. Try my Italian chopped salad next time!
Made With Amore,

Table of Contents
Simple Ingredients
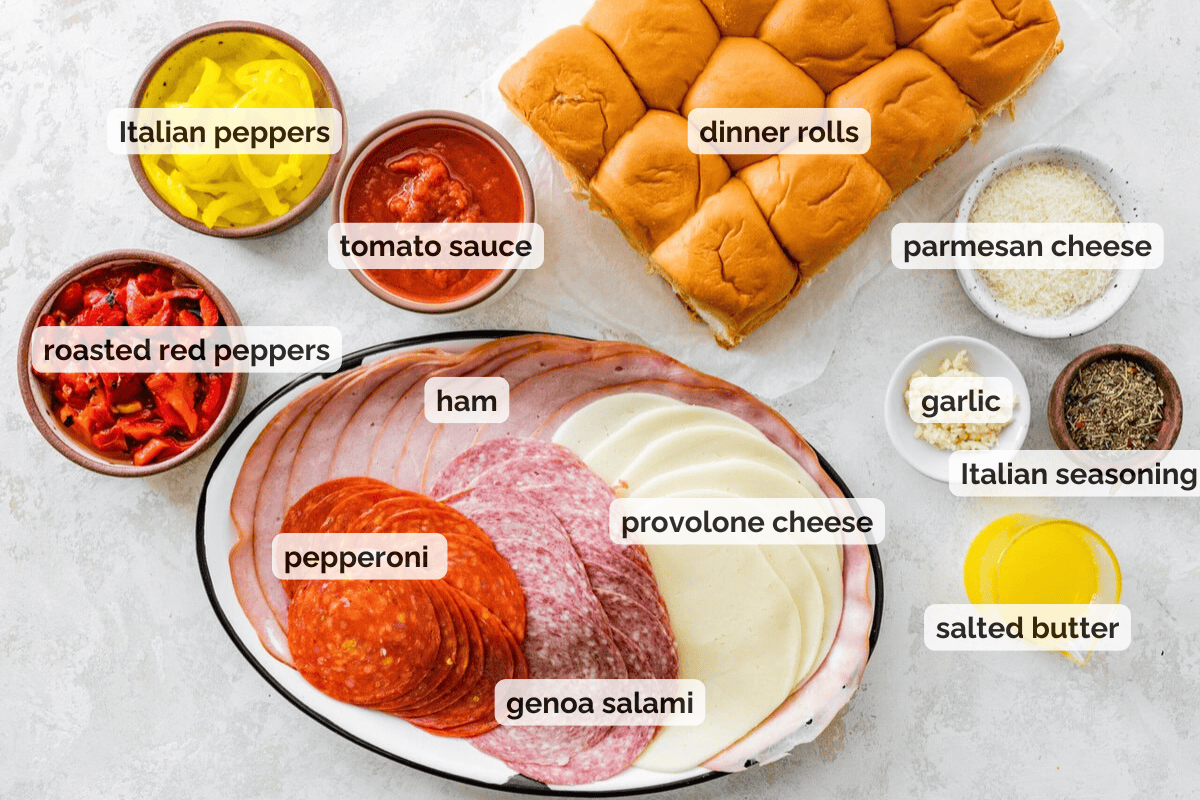
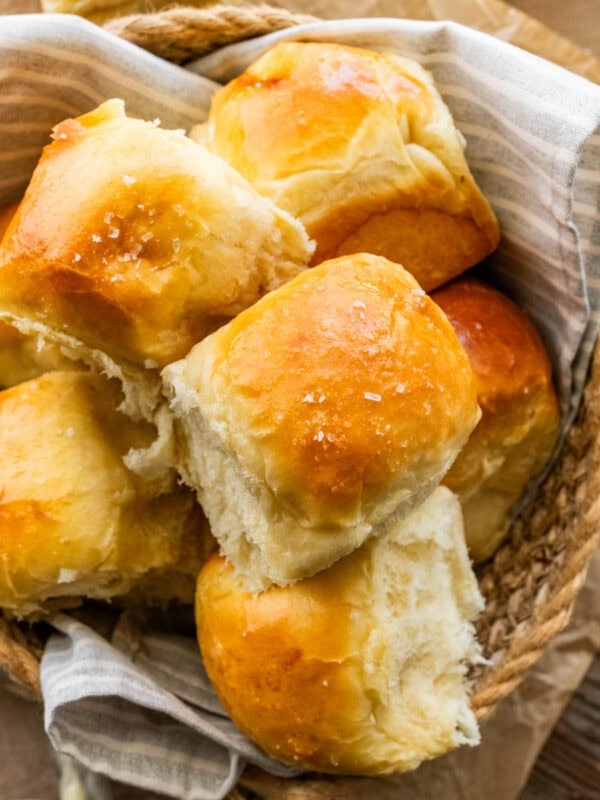
- Soft dinner rolls (slider buns) – fluffy and slightly sweet rolls like King’s Hawaiian hold everything together.
- Ham or prosciutto cotto – mild and savory, adds a delicate layer of Italian flavor. You can also use leftovers from this glazed ham recipe!
- Genoa salami – classic Italian cold cut with a tangy, seasoned taste.
- Pepperoni or capicola – brings a little spice and smoky depth.
- Provolone cheese – melts beautifully with a sharp, nutty flavor.
- Roasted red peppers – sweet and smoky, balancing the salty meats.
- Hot Italian peppers – add a spicy kick (or swap for sweet peppers/pepperoncini for less heat). Try my Italian pickled vinegar peppers.
- Salted butter – melted to brush over the rolls for rich flavor.
- Fresh garlic – finely chopped for aromatic punch.
- Italian seasoning – a blend of dried parsley, oregano, basil, thyme, and rosemary.
- Parmigiano cheese (parmesan cheese)– freshly grated for a salty, nutty finish on top.
- Tomato Sauce Recipe (Sugo Al Pomodoro) or marinara sauce (optional) – served on the side for dipping, like a mini Italian feast.
See the recipe card for exact quantities.
Substitutions and Variations
- Type of meat – swap capicola or pepperoni with mortadella, turkey, or even porchetta roast.
- Cheese – try fresh mozzarella or fontina for extra melty cheese, or sharp gorgonzola for bold flavor. You’ll love my Pear and Gorgonzola salad.
- Peppers – use pepperoncini or red onion for tangy heat, or roasted zucchini (Charred Corn and Zucchini Salad) for a veggie variation.
- Sauce – serve with hoom Genovese pesto or lemon garlic aioli for dipping.
- Rolls – switch Hawaiian rolls for no-knead ciabatta bread.
- Spicy Upgrade – add a smear of Calabrian chili paste.
How To Make Italian Sliders
This is a step-by-step photo overview of the recipe; the full instrcutions are in the recipe card below.

Step #1: Prep the baking sheet
Preheat oven to 350°F (175°C). Lightly grease a 9×13-inch baking dish or line with parchment paper.
Slice the Rolls. Without separating the rolls, slice the entire pack in half horizontally. Place the bottom half in the prepared dish.
Step #2: Layer the Fillings. Add ham (or prosciutto cotto) evenly over the bottom half of the rolls.
Top with salami and pepperoni/capicola.
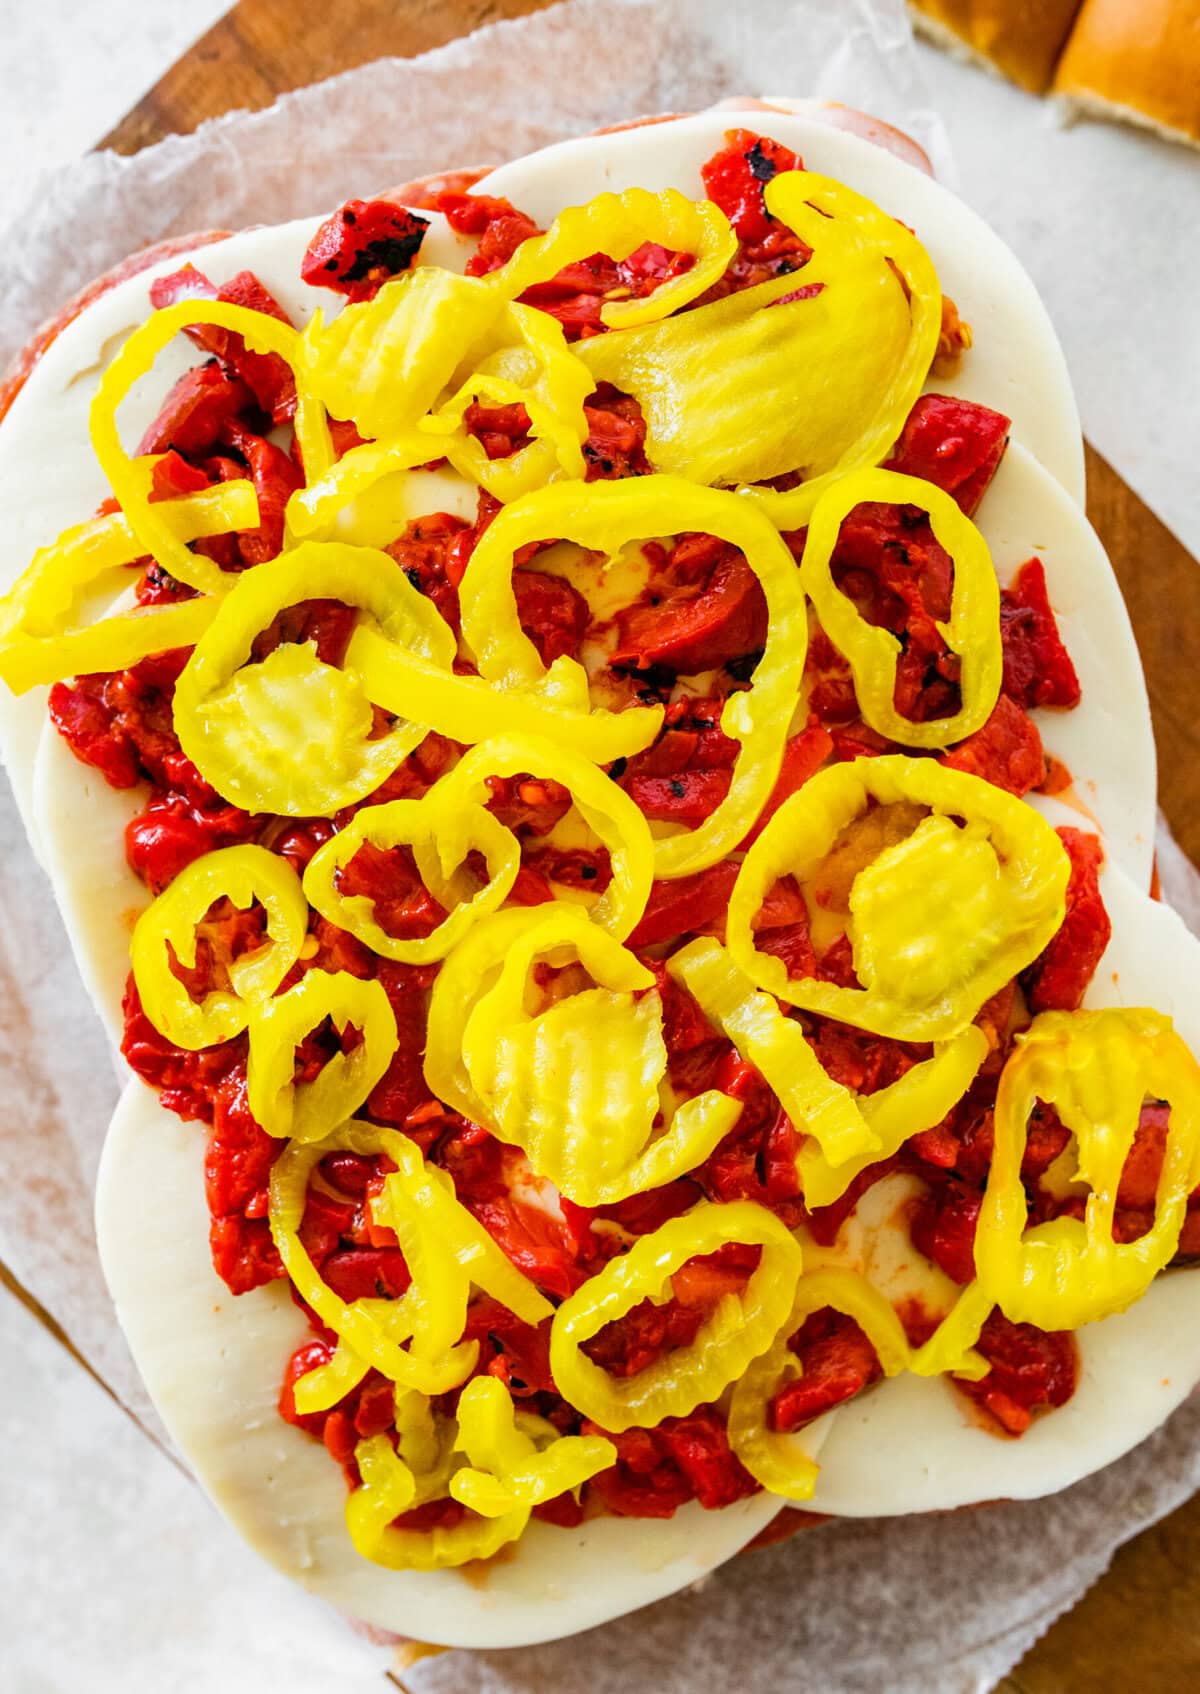
Layer on provolone slices.
Sprinkle roasted red peppers and hot Italian peppers over the top.
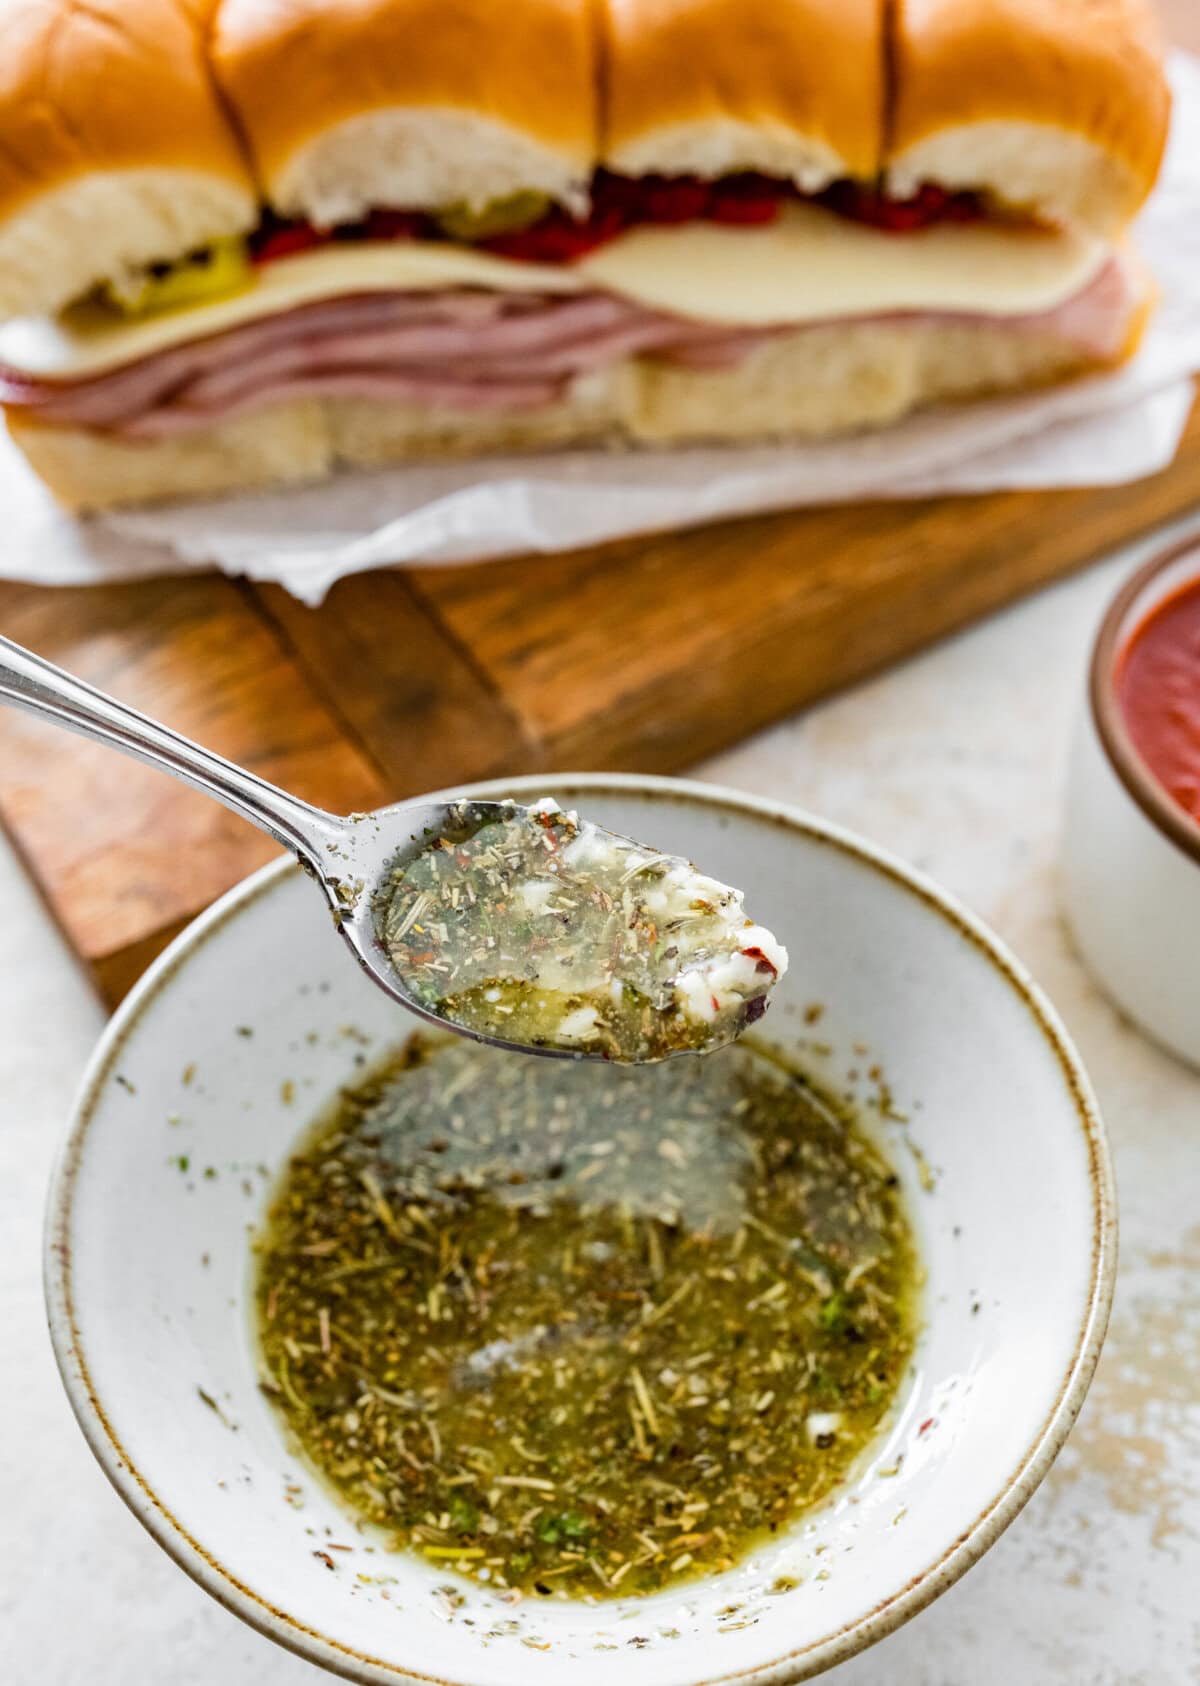
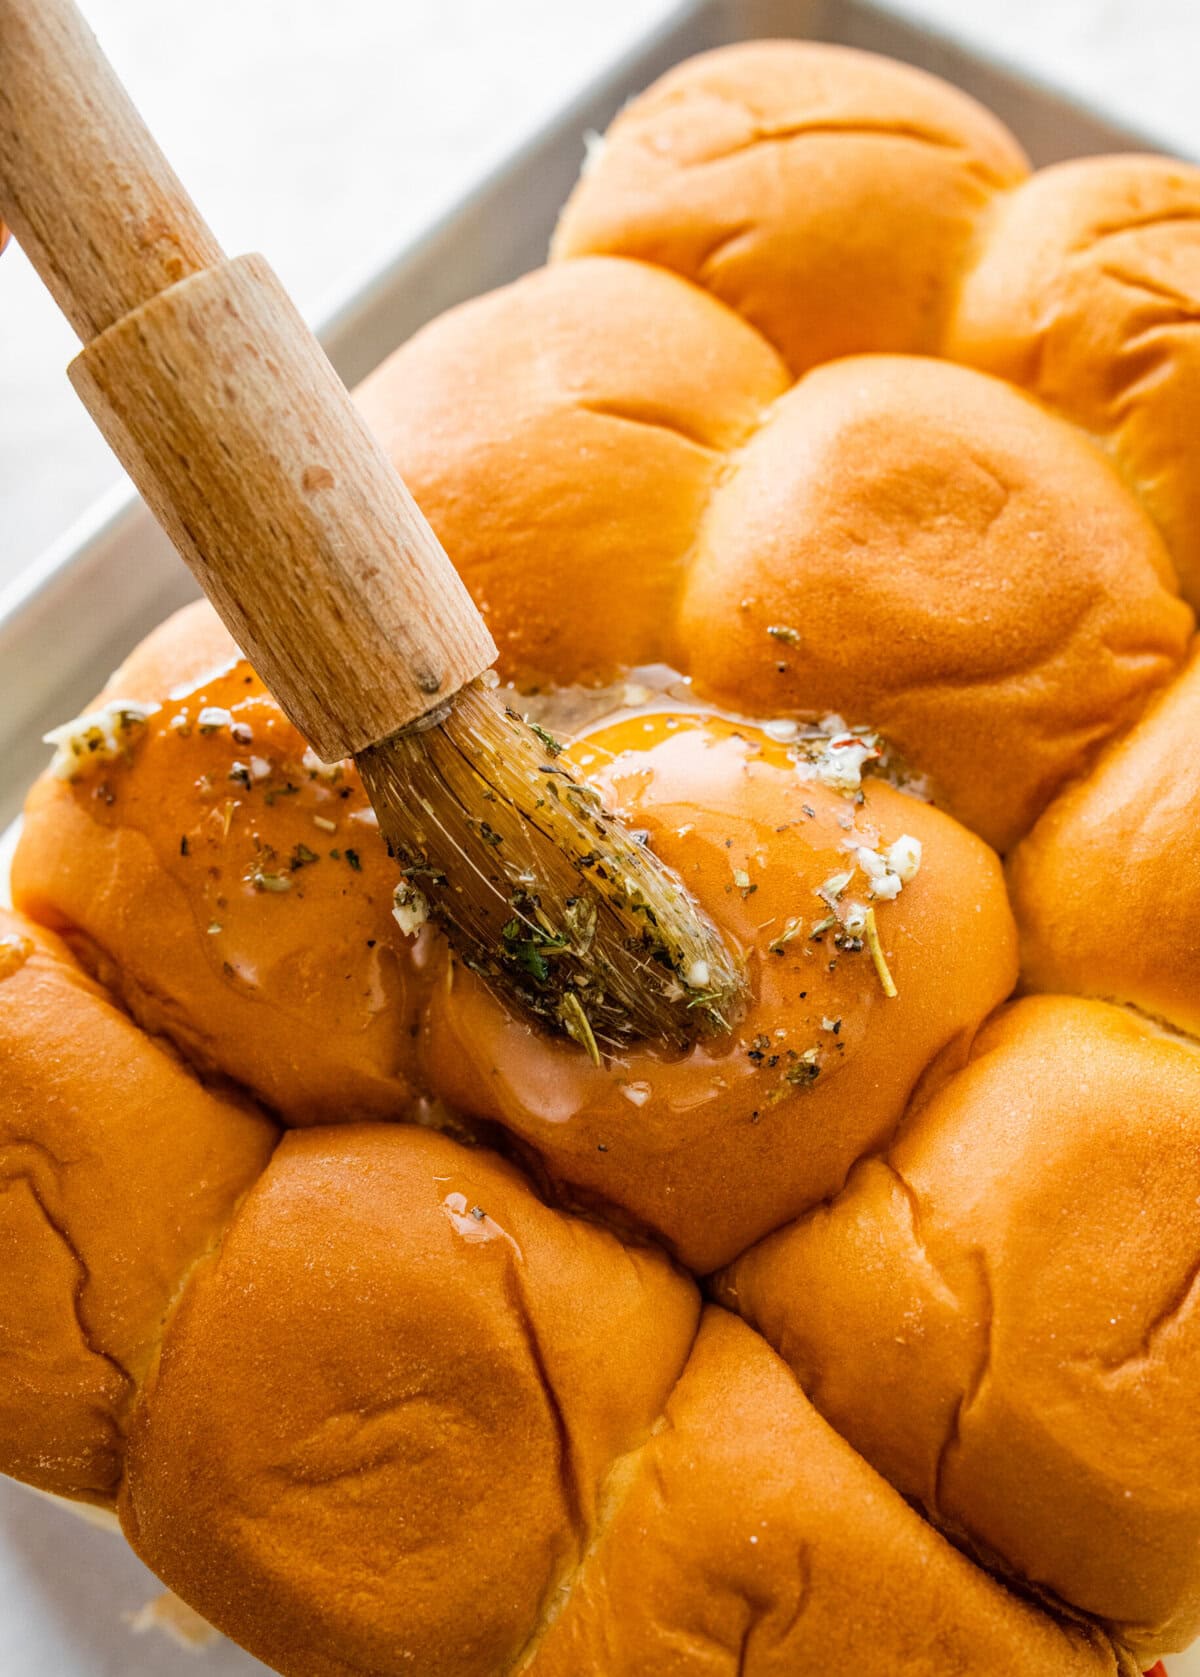
Step #3: Make Garlic Butter.
In a small bowl, stir together melted butter, garlic, and Italian seasoning. Brush generously over the tops of the rolls.
Step #4: Add the Roll Tops. Place the top half of the rolls back on to form one large sandwich. Sprinkle evenly with Parmigiano cheese.
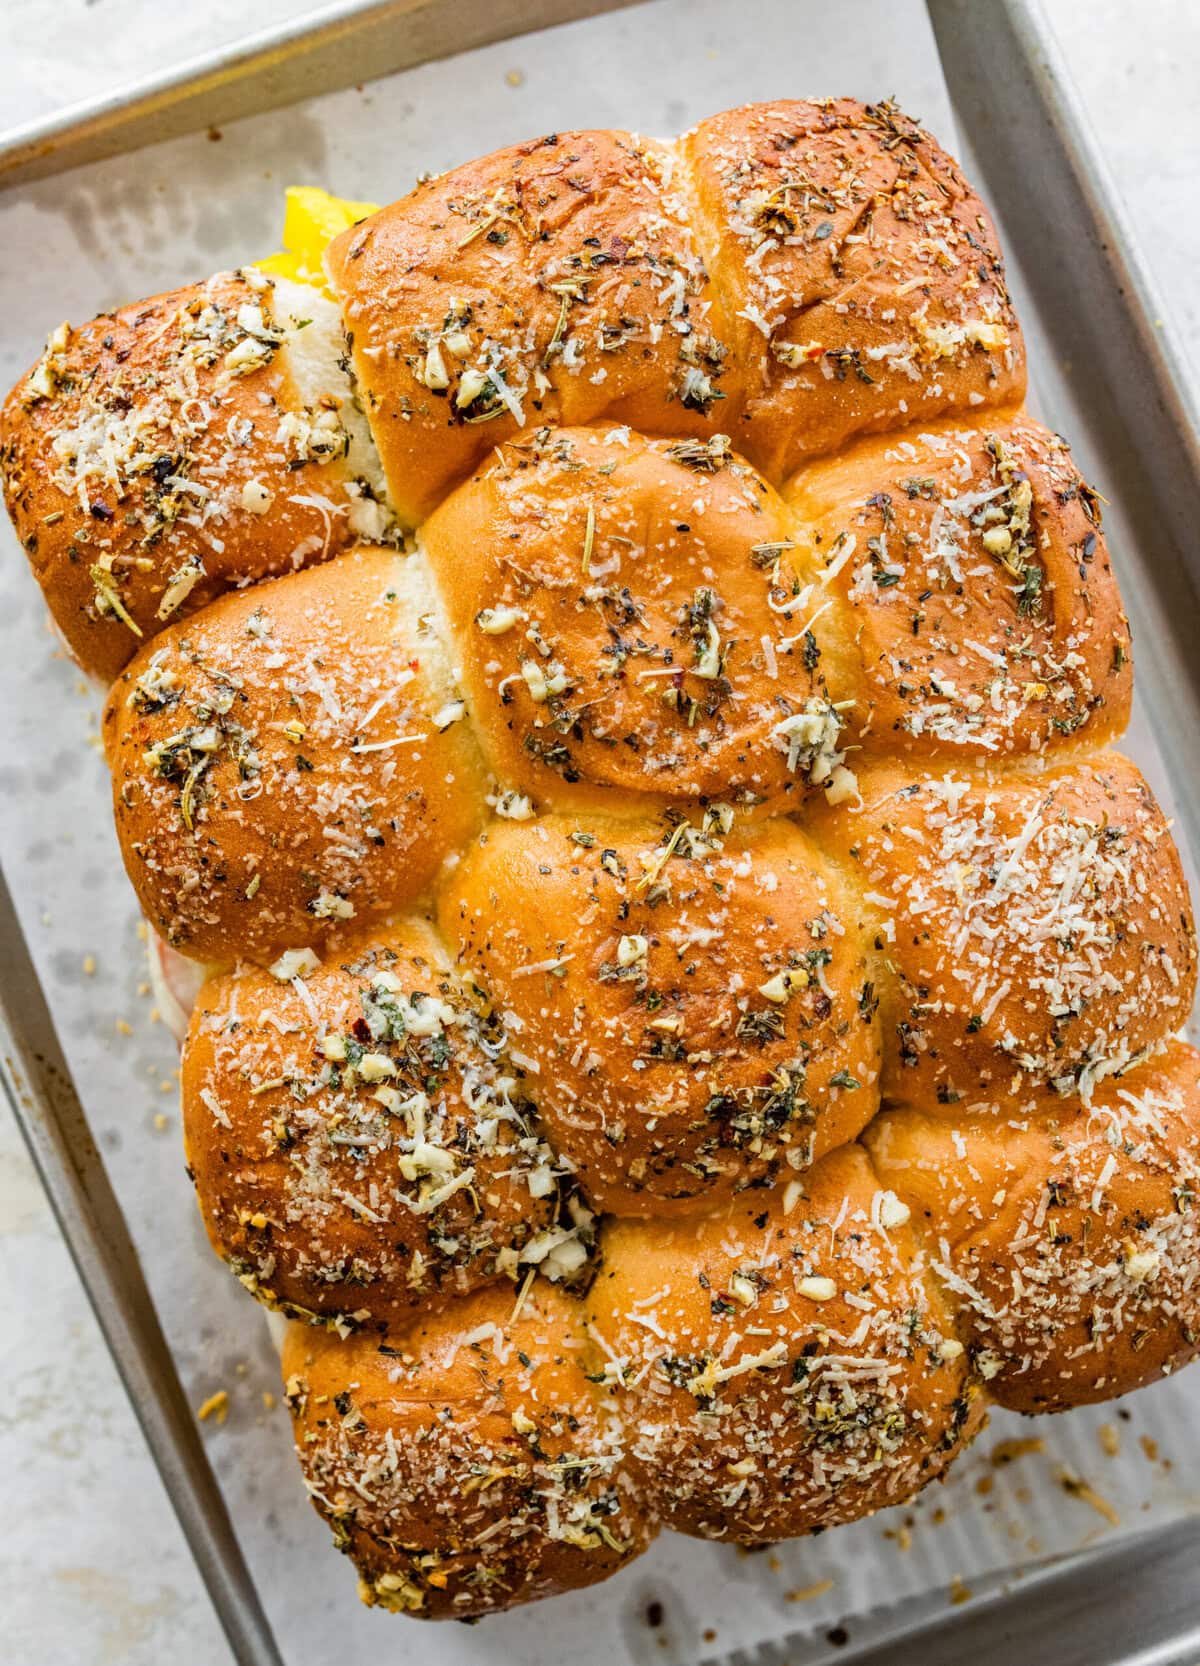
Step #5: Bake the Sliders. Cover loosely with foil and bake for 15-20 minutes. Remove foil and bake an additional 5–7 minutes, until cheese is melted and tops are golden.
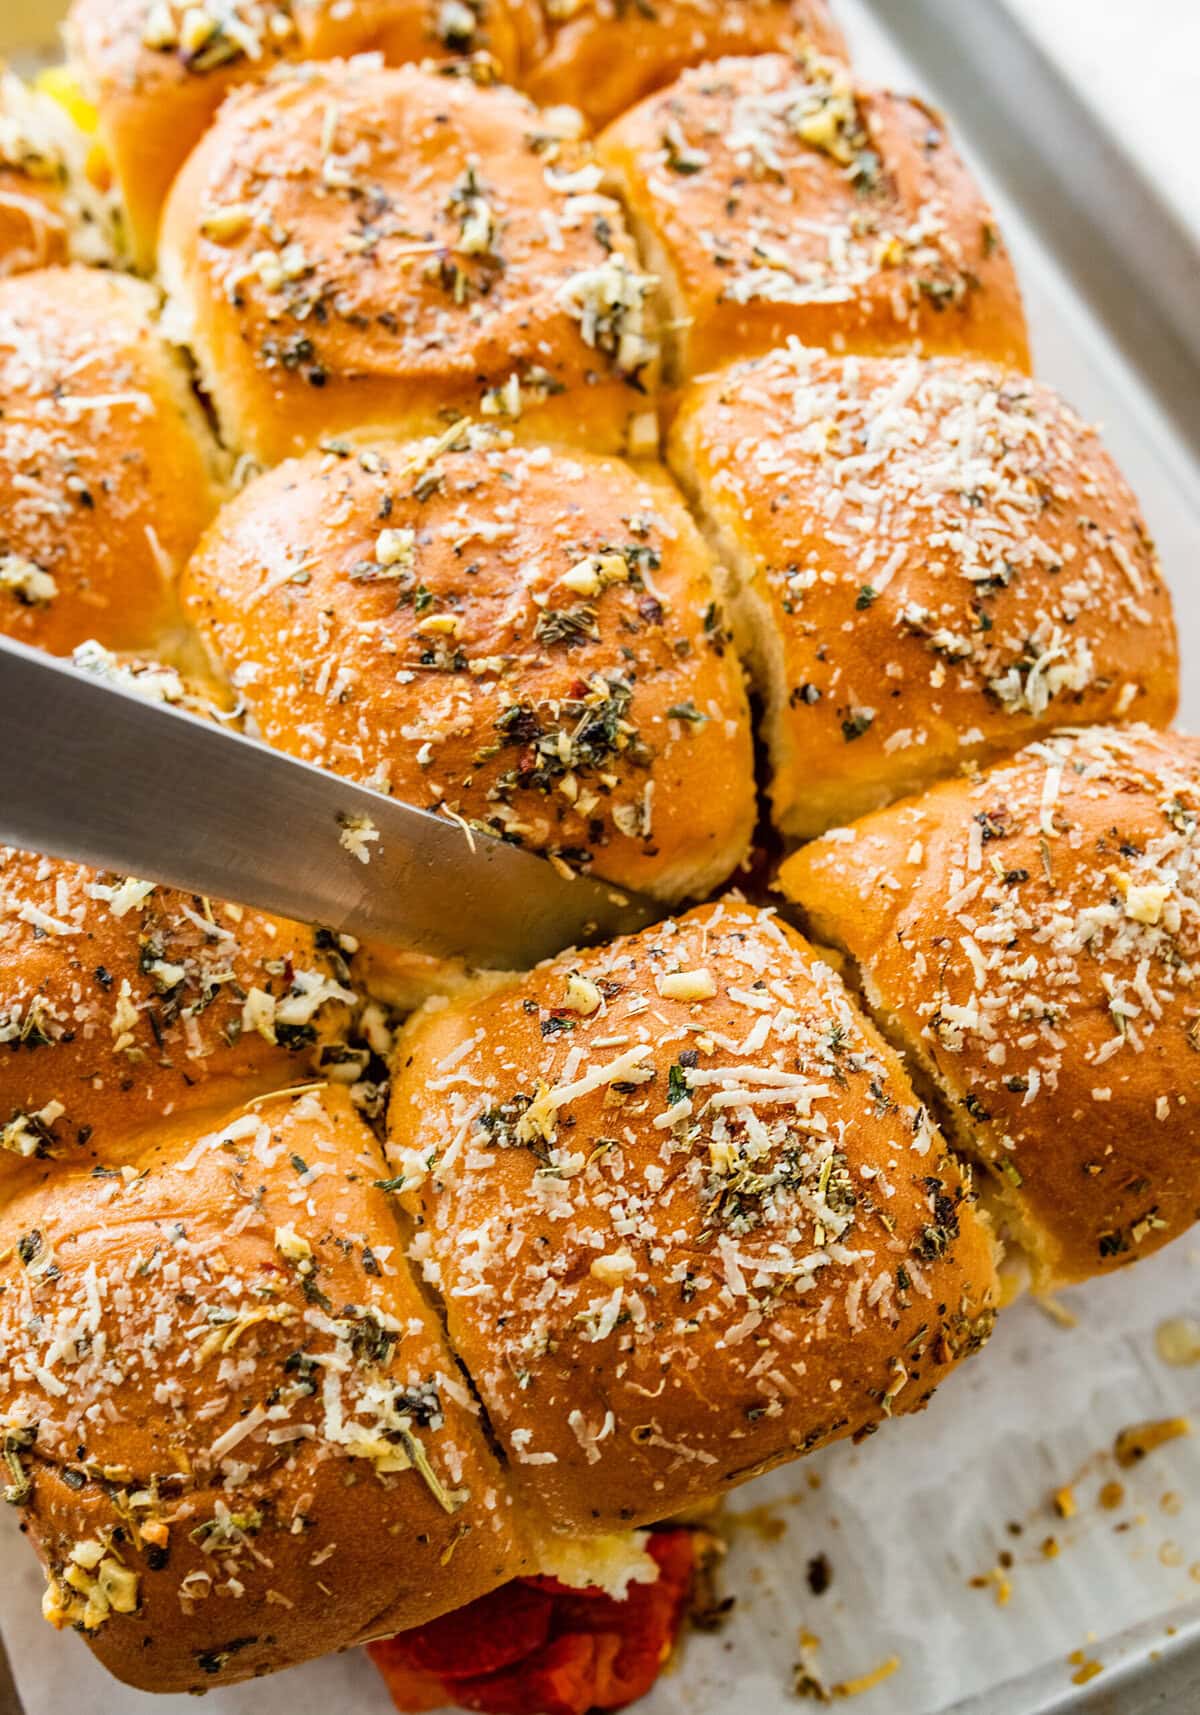
Step #6: Slice & Serve. Let rest 5 minutes before slicing into individual sliders with a serrated knife. Serve warm with tomato sauce for dipping, if desired.
My Pro Tip
Recipe Tips
- Layer strategically – start with meat, then cheese, then peppers so the cheese melts into the meat and locks in flavor.
- Don’t skimp on the butter topping – brushing garlic-herb butter generously over the rolls is what gives that golden, bakery-style finish.
- Press before baking – gently press the assembled sliders with your hand or a flat spatula before covering with foil. This helps the layers stick together and makes slicing easier.
- Bake covered, then uncovered – covering keeps everything melty and gooey, then uncovering gives the tops that irresistible golden crust.
- Use fresh-grated Parmigiano – it melts into the butter topping and adds nutty, salty depth you won’t get from pre-shredded cheese.
- Rest before slicing – wait 5 minutes after baking so the cheese sets slightly, preventing fillings from sliding out when cutting.
FAQ’s
After baking, keep them covered with foil in a warm (200°F) oven until serving. This keeps them melty and soft without drying out.
Yes, you can freeze slider subs- assemble, wrap tightly in foil, then freeze before baking. When ready, bake straight from frozen, adding 10–15 extra minutes.
Make-Ahead, Storage, and Reheating
- Make Ahead – Assemble up to 24 hours in advance, cover tightly, and refrigerate. Bake just before serving.
- Storage – Keep leftover sliders in an airtight container in the fridge for up to 3 days.
- Reheating – Wrap sliders in foil and warm in a 325°F oven until heated through. Avoid microwaving to keep rolls from getting soggy.
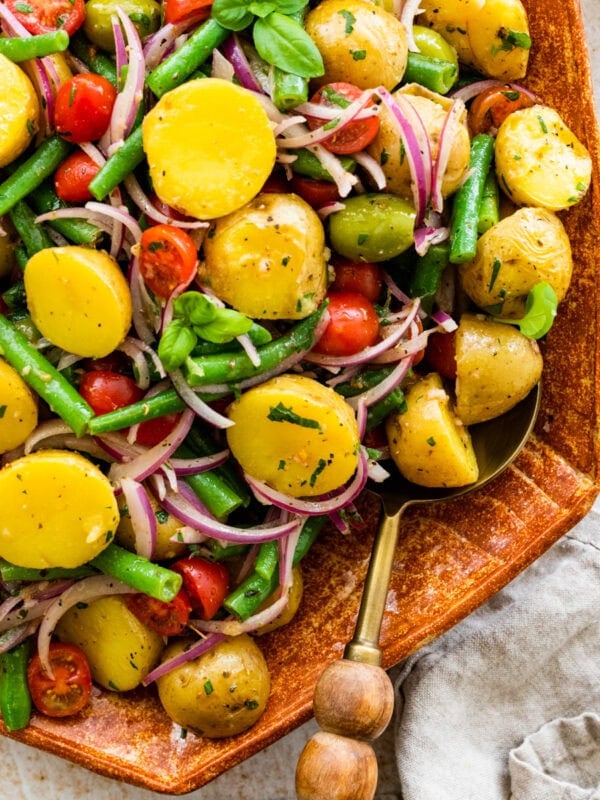
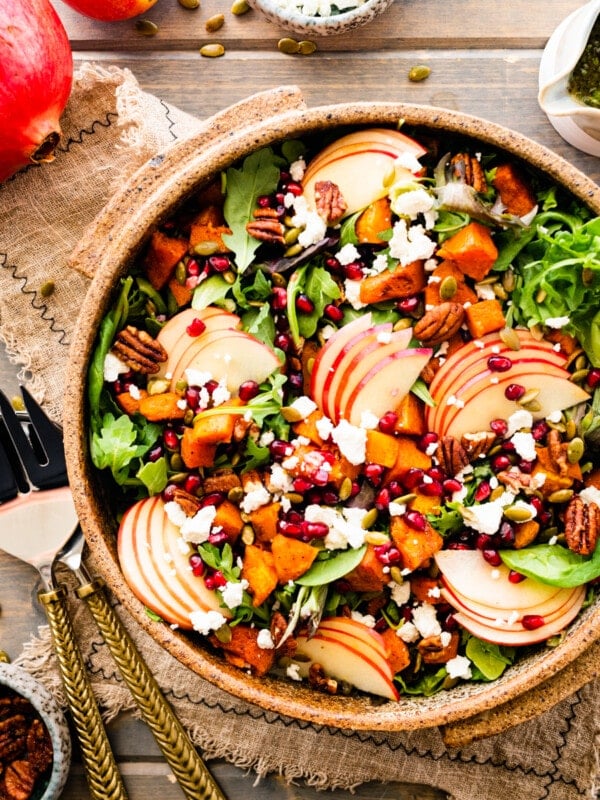
What Sides Go Best With Italian Sliders?
These are my favorite dishes to serve with these warm sandwiches.

💙 MADE THIS RECIPE AND LOVED IT? 💙 Please leave a ⭐️STAR rating and COMMENT below- I love connecting with you! Tag me with your creations on Instagram and find me on Pinterest.
Italian Sliders Recipe

Ingredients
Sliders
- 12- pack soft rolls, I recommend King’s Hawaiian rolls, halved lengthwise
- 12 slices ham or prosciutto cotto, thinly sliced
- 12 slices Italian Genoa salami, thinly sliced
- 12 slices pepperoni or capicola
- 6 slices provolone cheese, cut in half
- ½ cup roasted red peppers, chopped
- ½ cup sliced hot Italian peppers, or sweet peppers, banana peppers, or pepperoncini—use a mix if you like!
Garlic Butter Topping
- ¼ cup salted butter, melted
- 1 –3 cloves fresh garlic, finely chopped
- 1 tablespoon homemade Italian seasoning, or a mix of oregano, basil, and thyme
- ¼ cup freshly grated Parmigiano cheese
To Serve (optional)
- 1 cup homemade tomato sauce, warm (for dipping)
Instructions
Prep the Pan
- Preheat oven to 350°F (175°C). Lightly grease a 9×13-inch baking dish or line with parchment paper.
Slice the Rolls
- Without separating the rolls, slice the entire pack in half horizontally. Place the bottom half in the prepared dish.
Layer the Fillings
- Add ham (or prosciutto cotto) evenly over the bottom half of the rolls.
- Top with salami and pepperoni/capicola.
- Layer on provolone slices.
- Sprinkle roasted red peppers and hot Italian peppers over the top.
Add the Roll Tops
- Place the top half of the rolls back on to form one large sandwich.
Make Garlic Butter
- In a small bowl, stir together melted butter, garlic, and Italian seasoning. Brush generously over the tops of the rolls. Sprinkle evenly with Parmigiano cheese.
Bake the Sliders
- Cover loosely with foil and bake for 15-20 minutes. Remove foil and bake an additional 5–7 minutes, until cheese is melted and tops are golden.
Slice & Serve
- Let rest 5 minutes before slicing into individual sliders with a serrated knife. Serve warm with tomato sauce for dipping, if desired.
Notes
- Layer strategically – start with meat, then cheese, then peppers so the cheese melts into the meats and locks in flavor.
- Don’t skimp on the butter topping – brushing garlic-herb butter generously over the rolls is what gives that golden, bakery-style finish.
- Press before baking – gently press the assembled sliders with your hand or a flat spatula before covering with foil. This helps the layers stick together and makes slicing easier.
- Bake covered, then uncovered – covering keeps everything melty and gooey, then uncovering gives the tops that irresistible golden crust.
- Use fresh-grated Parmigiano – it melts into the butter topping and adds nutty, salty depth you won’t get from pre-shredded cheese.
- Rest before slicing – wait 5 minutes after baking so the cheese sets slightly, preventing fillings from sliding out when cutting.
- Make Ahead – Assemble up to 24 hours in advance, cover tightly, and refrigerate. Bake just before serving.
- Storage – Keep leftovers in an airtight container in the fridge for up to 3 days.
- Reheating – Wrap sliders in foil and warm in a 325°F oven until heated through. Avoid microwaving to keep rolls from getting soggy.
Nutrition
Nutrition information is automatically calculated, so should only be used as an approximation.


Loved this for a snack-y day of sports! Super easy but delicious. The dipping sauce is a must!
Yes, the sauce takes it over the top. I am happy everyone loved it.
These were delicious! I had put together a charcuterie board and had leftover meats and cheese so we made this recipe with the leftovers and it turned out amazing! so easy to do and very satisfying.
Yay! So happy you loved this easy and tasty recipe. It is loved by many for those reasons.
Big hit every time! ❤️
Yay! So happy everyone loved!
This sandwich was such a big hit with my family, they asked me to make it again 2 nights in a row. Even my very picky 12 year old granddaughter loved it.
Yay! I am so happy that you loved this easy and yummy recipe. It is always a bonus when picky eaters love a meal!
WOW WOW WOW!! I can’t even describe to you how tasty this super easy recipe is to make! I hope you love!