Homemade Italian Ladyfinger Recipe (Savoiardi)
This post may contain affiliate links. Please read our disclosure policy.
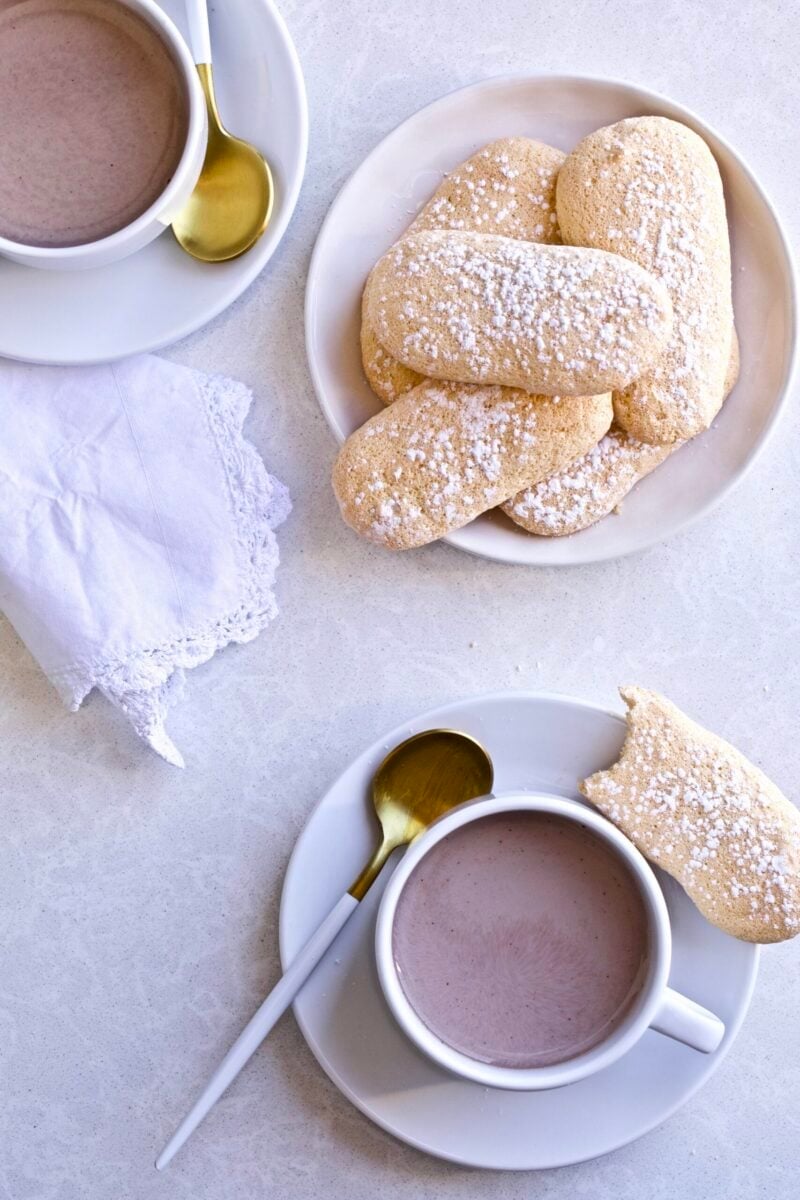
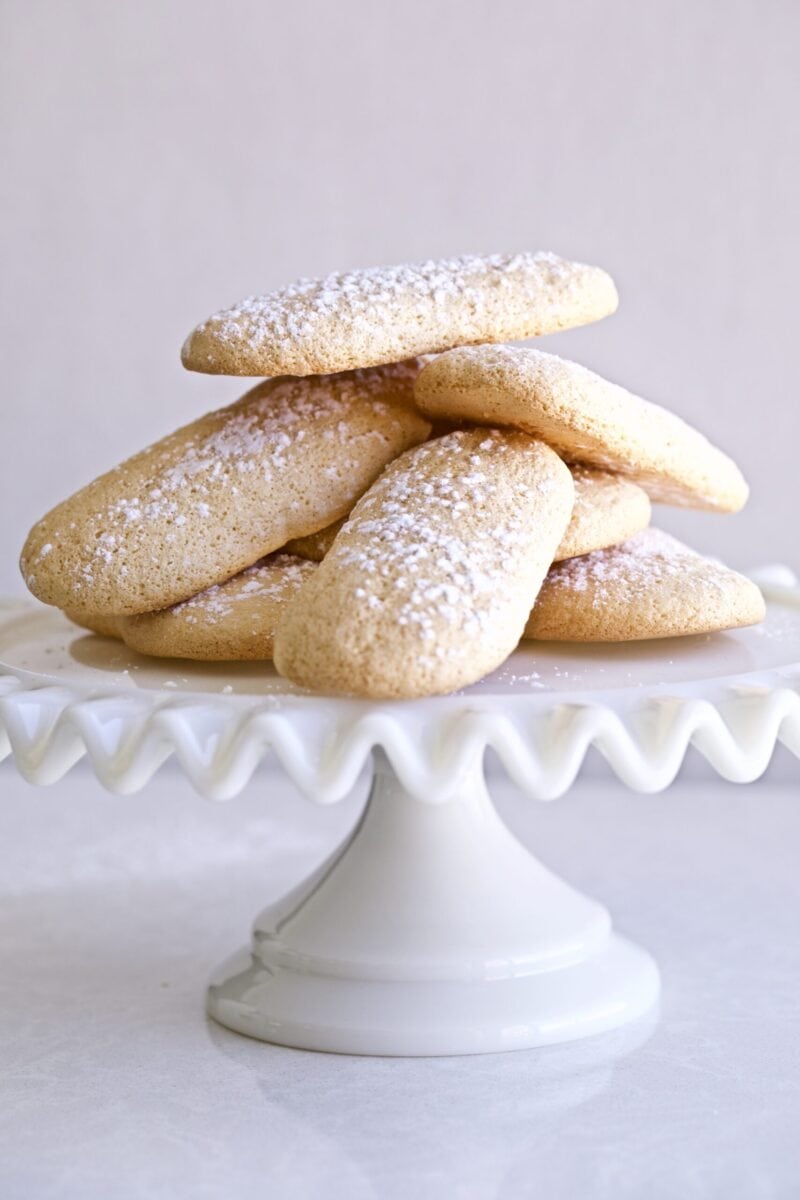
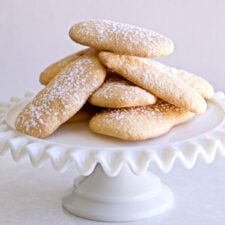
This is the best Homemade Italian Ladyfinger Recipe (Savoiardi), straight from my hometown in Sardinia! These delicate cookies are spongy, airy, light, and just a touch crisp on the outside, exactly the way Italian families have enjoyed them for generations. Whether you’re making tiramisu or simply want a classic treat to dip in coffee, these authentic savoiardi bring a taste of real Italian baking right into your kitchen.
For more Italian cookies, try these Italian butter cookies and pizzelle cookies next!

Quick Look at This Recipe
- Prep Time: 20 minutes
- Cook Time: 15 minutes
- Total Time: 35 minutes + time to cool
- Servings: 24 ladyfingers
- Dietary Info: Naturally nut-free; easily gluten-free with a 1:1 gluten-free flour blend.
- Method: Simple sponge cookie made by whipping egg whites, folding in yolks and dry ingredients, piping, and baking.
- Technique: Gentle folding, properly whipped stiff peaks, and sifted dry ingredients keep the batter light and airy.
- Flavor & Texture: Lightly sweet, delicate, airy, and sponge-soft with a lightly crisp exterior—classic Italian savoiardi!
Why you’ll love this family favorite!

I grew up eating homemade Italian ladyfingers in Italy, and they’re still one of my absolute favorite treats.
They’re a little different from the crisp store-bought version you may know. Fresh savoiardi are soft, airy, and sponge-like, with the delicate texture you only get from whipping the eggs by hand. That softness makes them wonderful for snacking, dipping, and baking, and they become even better the next day as they dry slightly.
I always make a batch for my authentic tiramisu recipe. In Italy, it’s common to use slightly stale homemade savoiardi so they soak up the espresso without falling apart.
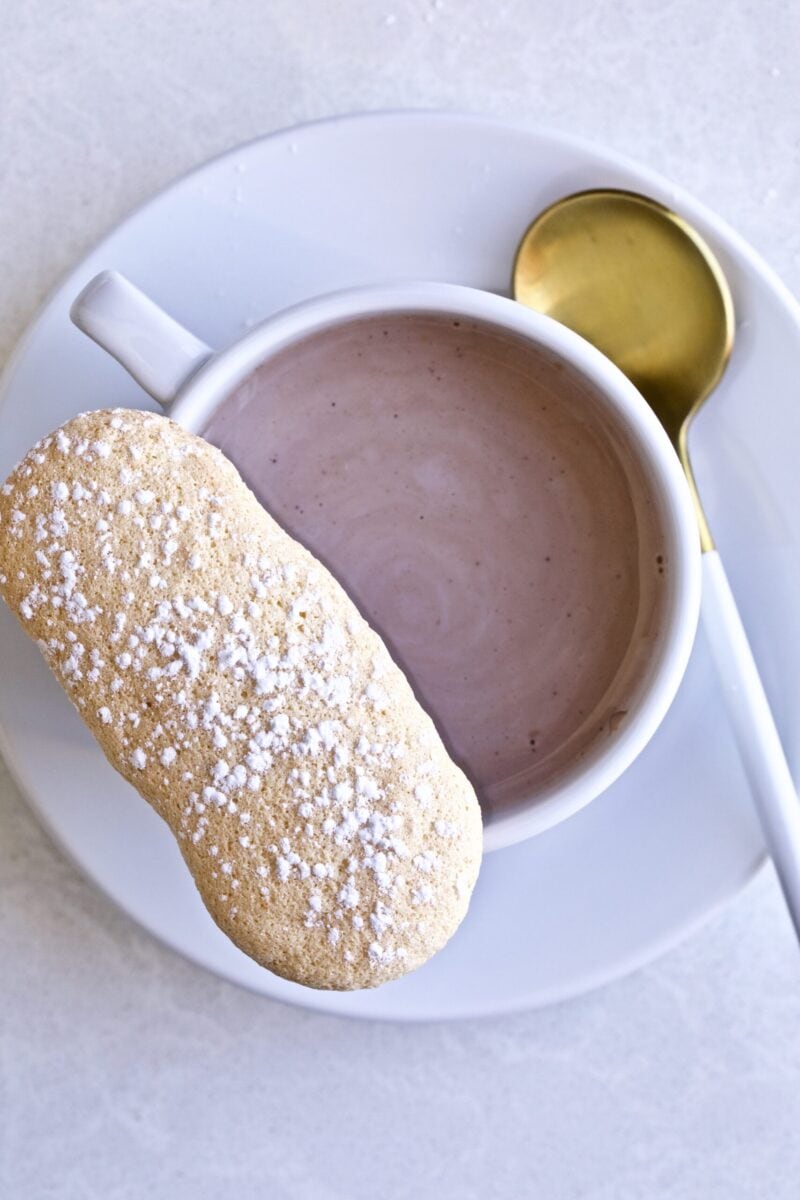
Enjoy these classic Italian cookies any time of day: with an afternoon cup of tea, paired with Italian hot chocolate, tucked into a dessert platter with anginetti cookies.
Made With Amore,

Great recipe! Used them it in a tiramisu cheesecake I made at work for a special! Def will be using again anytime I make tiramisu!
– Toemas
Table of Contents
- Quick Look at This Recipe
- Why you’ll love this family favorite!
- What are Ladyfingers?
- Simple Ingredients
- Variations
- How To Make This Ladyfingers Recipe
- Tips & Troubleshooting
- Ladyfingers Recipe FAQ’s
- How to Use Homemade Savoiardi in Tiramisu
- Serving Suggestions
- More Classic Italian Cookies
- Homemade Italian Savoiardi (Ladyfingers) Recipe
What are Ladyfingers?
Ladyfingers, known in Italy as savoiardi, are classic, lightly sweet Italian sponge cookies with an airy, delicate texture. They’re the traditional biscuits used in many Italian desserts, especially tiramisu (including my pistachio tiramisu), and their simple flavor makes them perfect for soaking in coffee, liqueur, or fruit syrups.
Their long, slender shape inspired the English name “ladyfingers,” though you may also hear them called sponge fingers. The texture is similar to a very light angel food cake, but with a firmer surface that helps them hold their shape once baked. Homemade savoiardi are usually softer and more tender than the crisp packaged version, giving them a lovely, melt-in-your-mouth quality.
Simple Ingredients
Homemade Italian ladyfingers require a few basic ingredients you most likely already have at home!
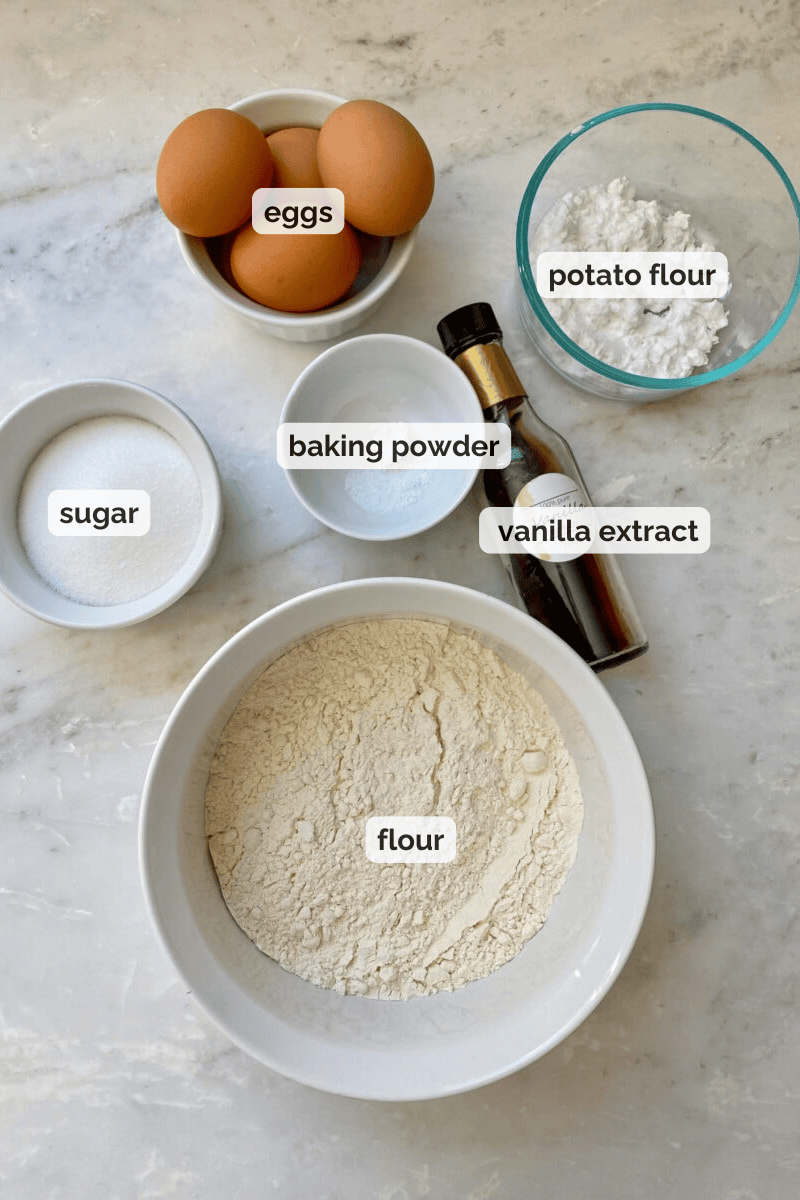
- All-Purpose Flour: Provides the structure for the ladyfingers. Sift before using to avoid lumps.
- Large Eggs: Eggs are the backbone of authentic savoiardi. The whipped whites create the signature light, sponge-like texture, while the yolks add richness and color. Make sure no yolk gets into the whites so they whip to full volume.
- Granulated Sugar: Sweetens the batter and stabilizes the whipped eggs. Adding sugar gradually while beating the whites helps create a glossy, sturdy meringue that holds its shape during piping and baking.
- Potato Starch: Lightens the texture and softens the crumb. Starch absorbs some moisture and keeps the ladyfingers tender rather than cakey. Potato starch gives the most delicate finish, but cornstarch works well too.
- Vanilla Extract: Adds warm, aromatic flavor to the otherwise simple batter. Use a good-quality vanilla to elevate the subtle sweetness of the cookies.
See the recipe card for quantities and the full list of ingredients.
Variations
This recipe is classic and simple. It is perfect for making my chocolate tiramisu! If you want to change up the taste, try these variations.
- Extracts: Swap or combine flavorings by adding a splash of almond, lemon, orange, or anise extract to the batter. Start with ¼–½ teaspoon so the flavor stays delicate.
- Citrus Zest: Fold in a little fresh lemon or orange zest for a bright, fragrant twist. This pairs especially well with desserts that include fruit or mascarpone. For more citrus zing, try these lemon crinkle cookies!
- Chocolate Finish: Drizzle the cooled cookies with melted dark, milk, or white chocolate for a bakery-style touch. Let the chocolate set before storing. If you’re a chocolate lover, I recommend baking up a batch of these chocolate sprinkle cookies.
- Nut Topping: Sprinkle sliced almonds over the piped batter before baking for a lightly toasted, crunchy finish.
- Gluten-Free Option: If you’d like to make these ladyfingers gluten-free, simply replace the all-purpose flour with your favorite gluten-free flour blend.
For another light, airy Italian-style dessert, try my homemade angel food cake.
How To Make This Ladyfingers Recipe
Homemade sponge finger cookies. The sponge interior of the cookies and the crisp exterior make this lady-finger recipe delightful! Simple and easy preparation. To get started, separate the egg yolk from the egg whites.
⭐️ Egg Separating Tip: For easy egg separation, crack each egg into your clean hand and let the whites slip through your fingers. This keeps the whites free of any yolk, which is essential for whipping them into stiff, stable peaks. Even a small amount of yolk can prevent the whites from reaching full volume, and that airy meringue is what gives ladyfingers their light texture.
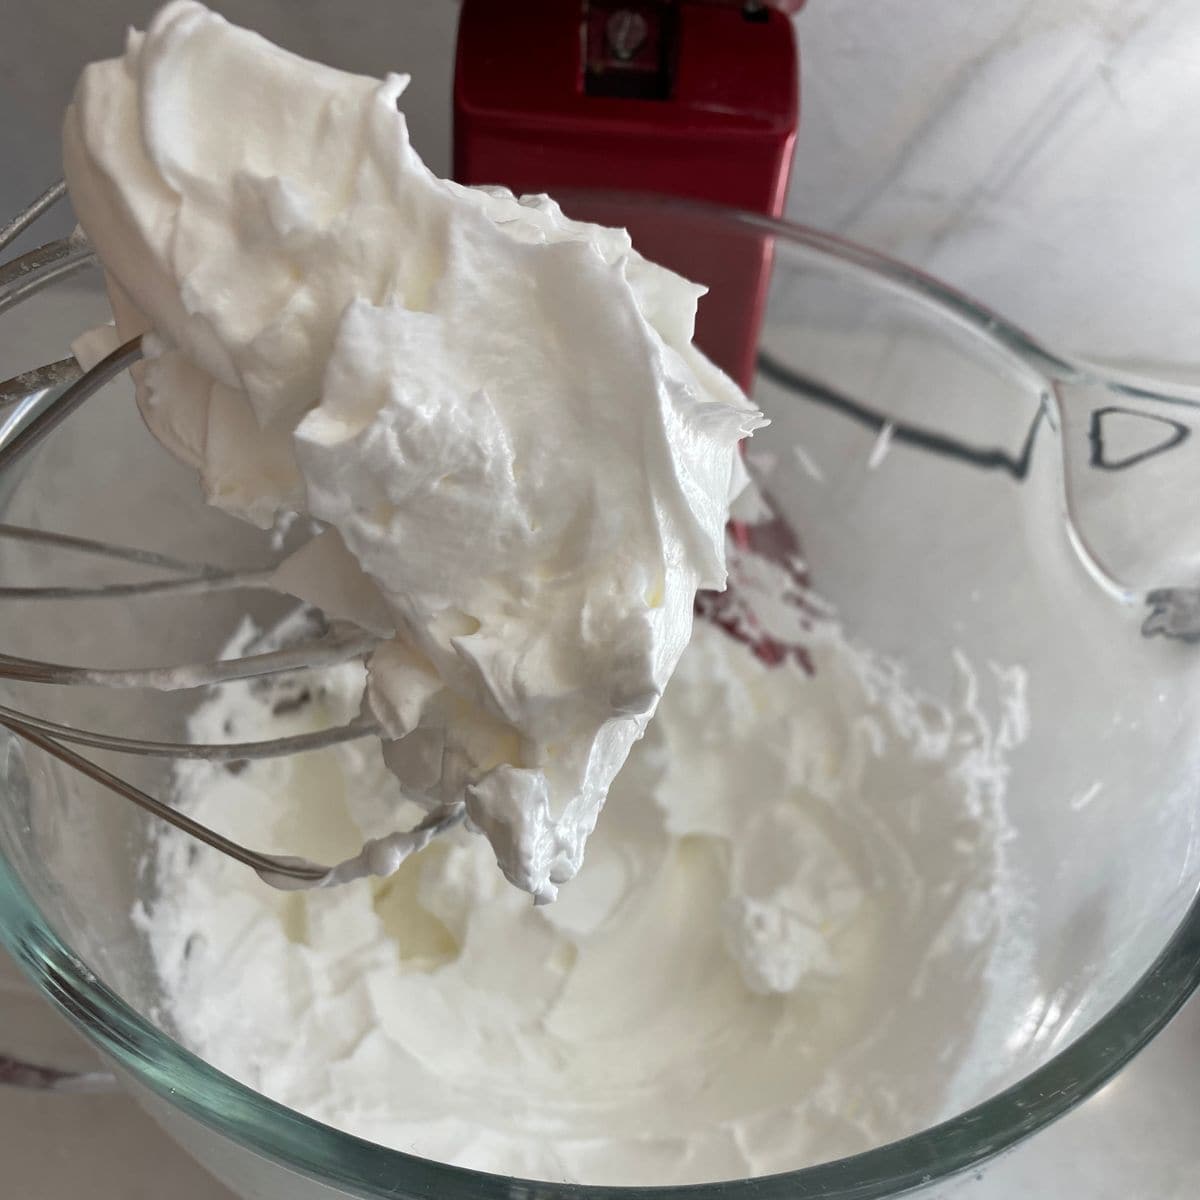
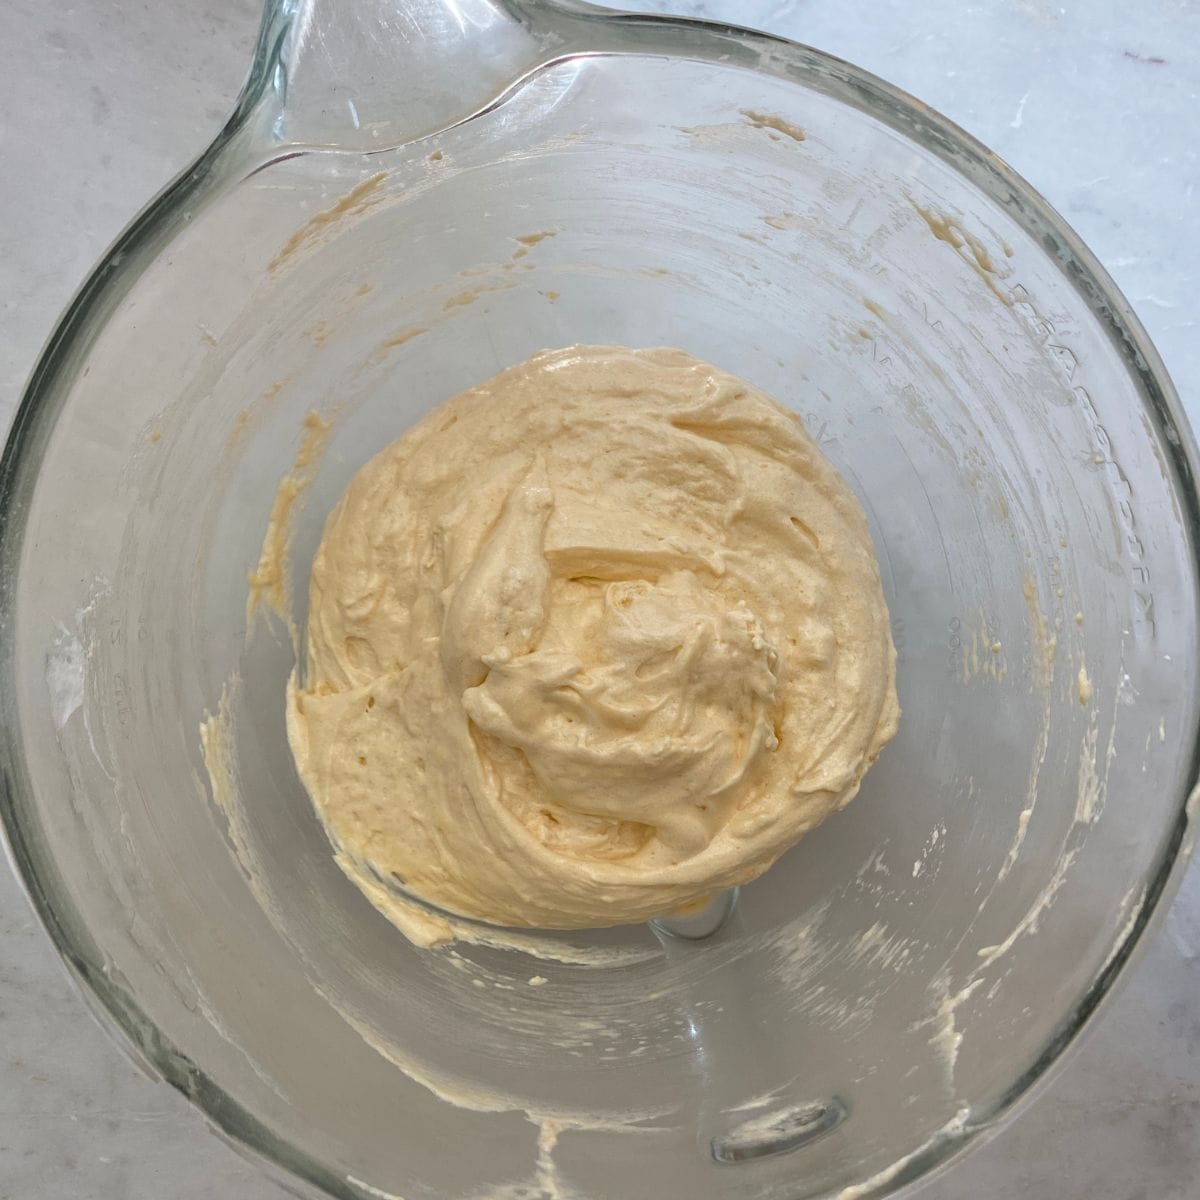
- Place the egg whites and half of the sugar in a stand mixer with a whisk attachment (or a bowl with a hand mixer). Start mixing on medium speed until soft peaks form. At this stage, the whites should look glossy and hold a loose shape. Gradually increase to high speed and continue beating until stiff peaks form, meaning the meringue stands straight up without drooping when you lift the whisk. This stable, airy structure is what gives the ladyfingers their light texture.
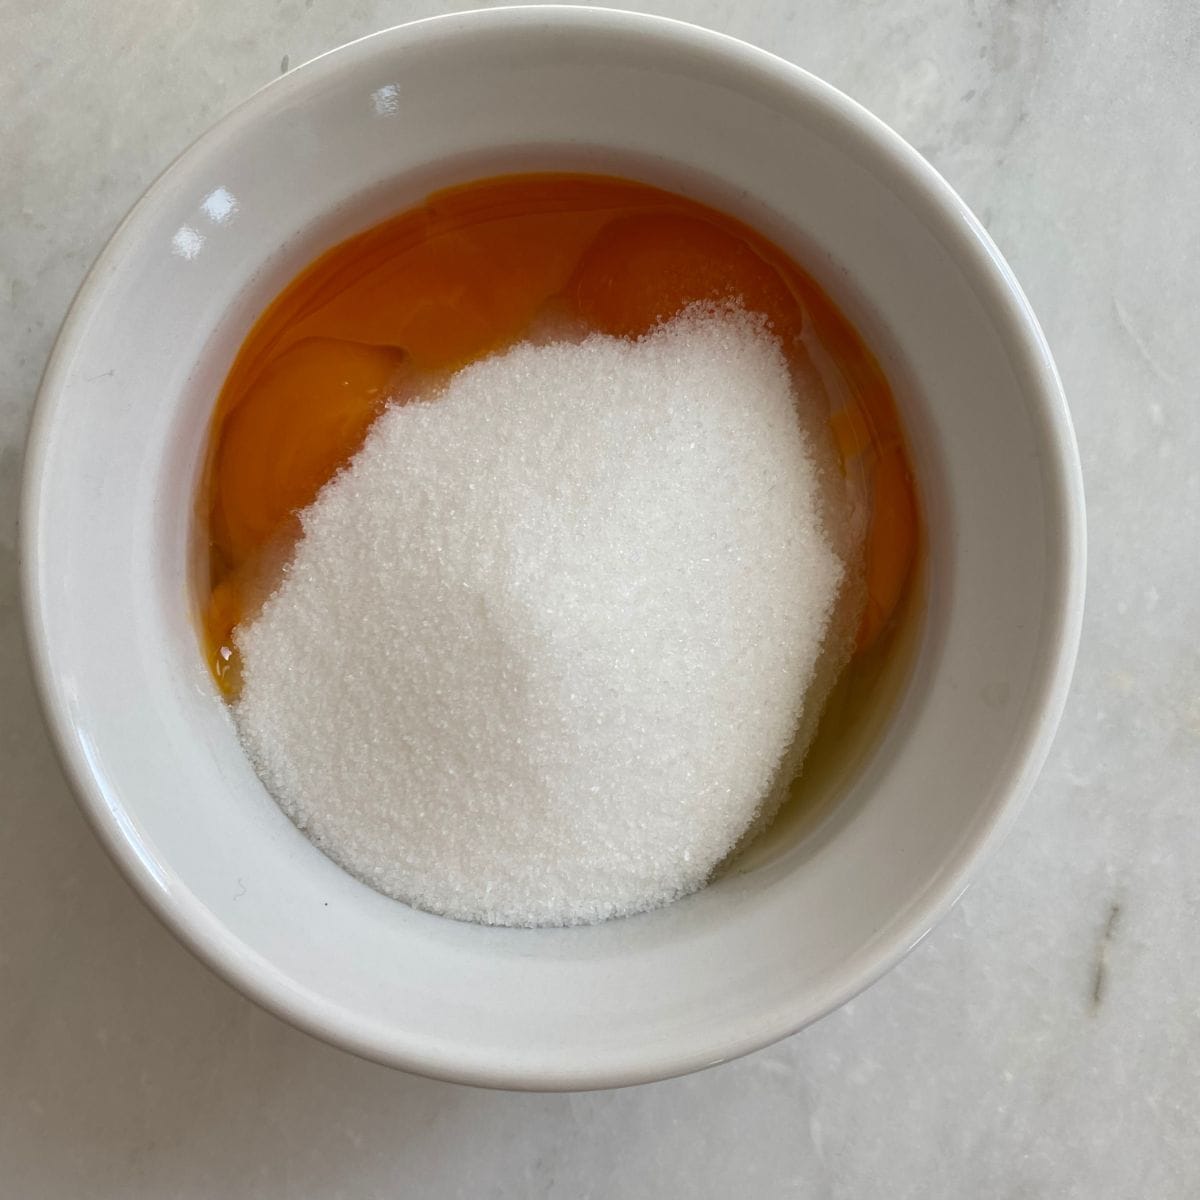
- Combine the egg yolks, vanilla, and remaining sugar in a separate bowl.
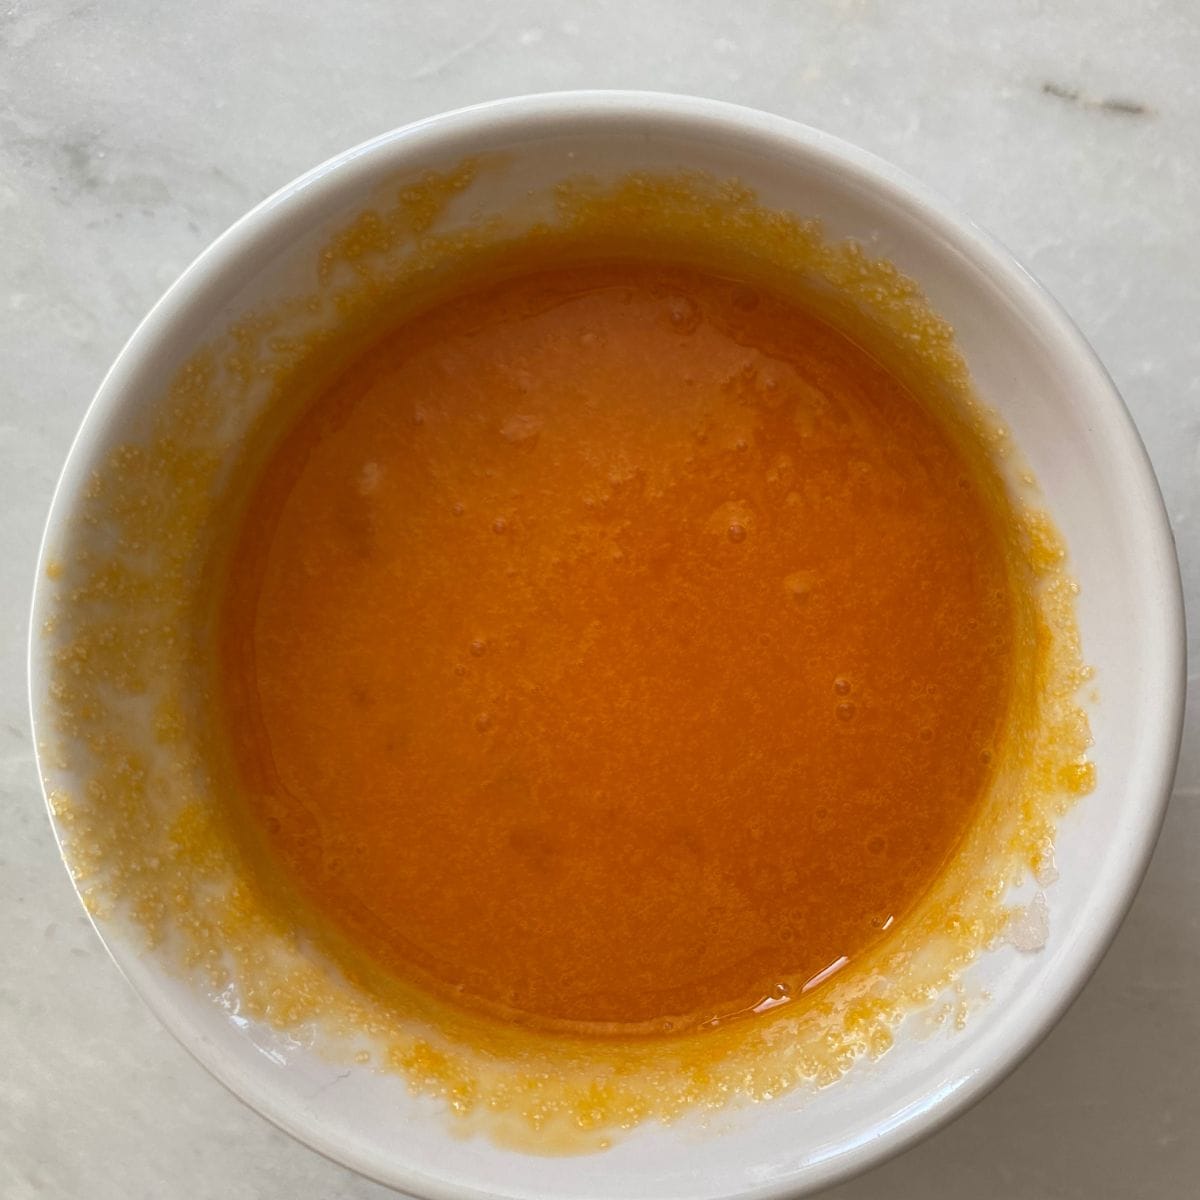
- Mix together until they are fully combined.
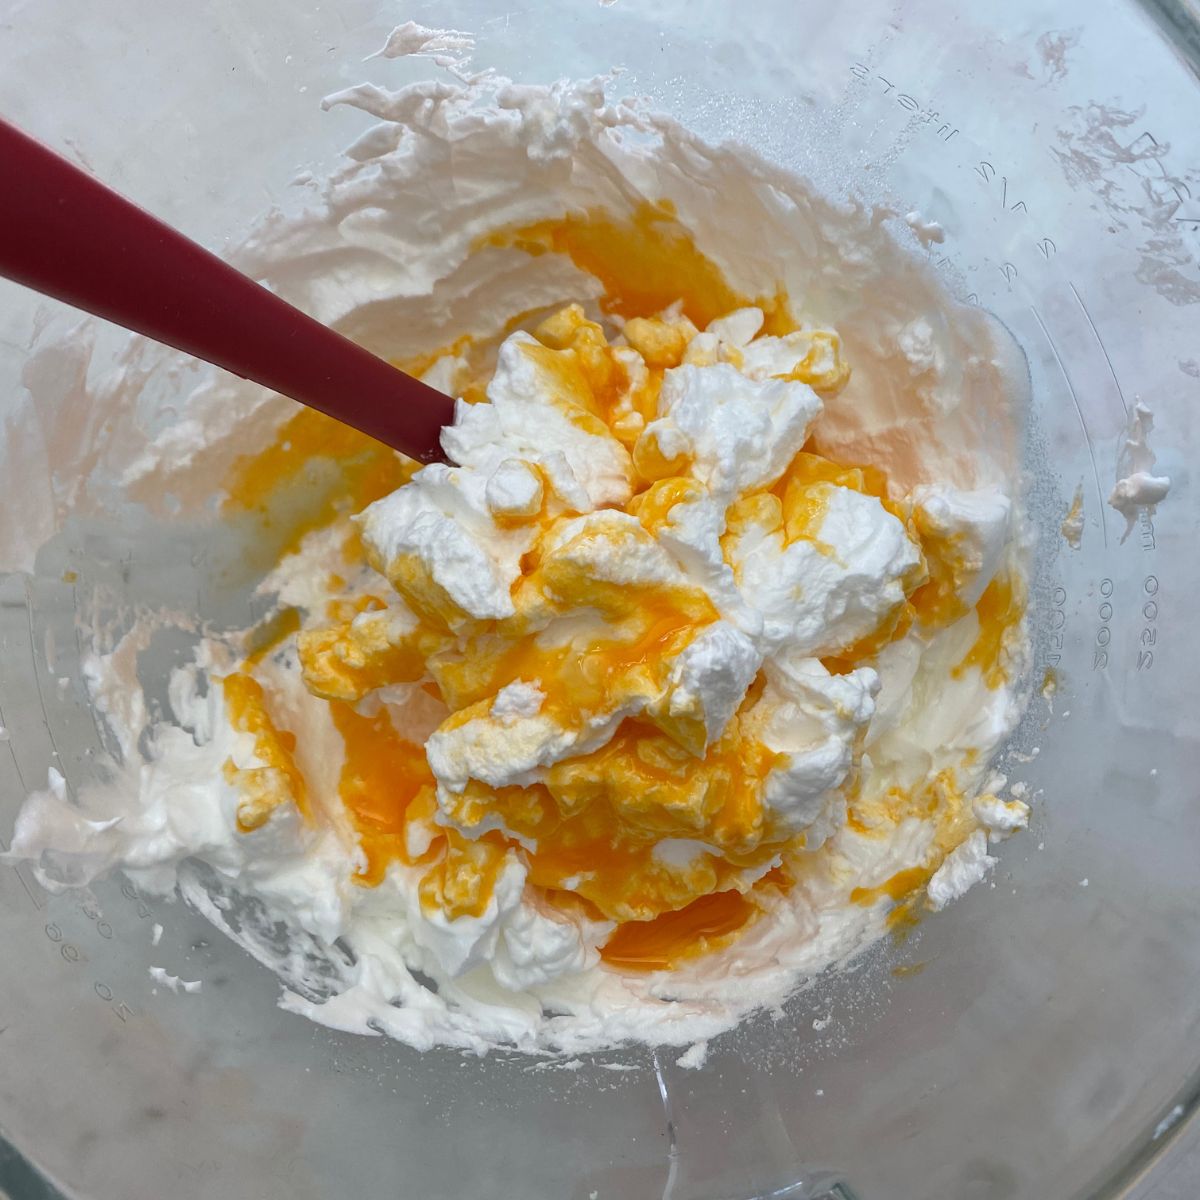
- Add the egg yolk mixture to the whipped egg whites a little at a time, gently folding it in with a spatula. This helps preserve the air you’ve beaten into the whites, which is essential for achieving light, airy ladyfingers.
- Fold just until the mixture is fully combined and no streaks remain. Avoid overmixing, as excessive stirring can deflate the batter and yield flat, dense cookies.

- Gently sift the dry ingredients into the egg mixture.
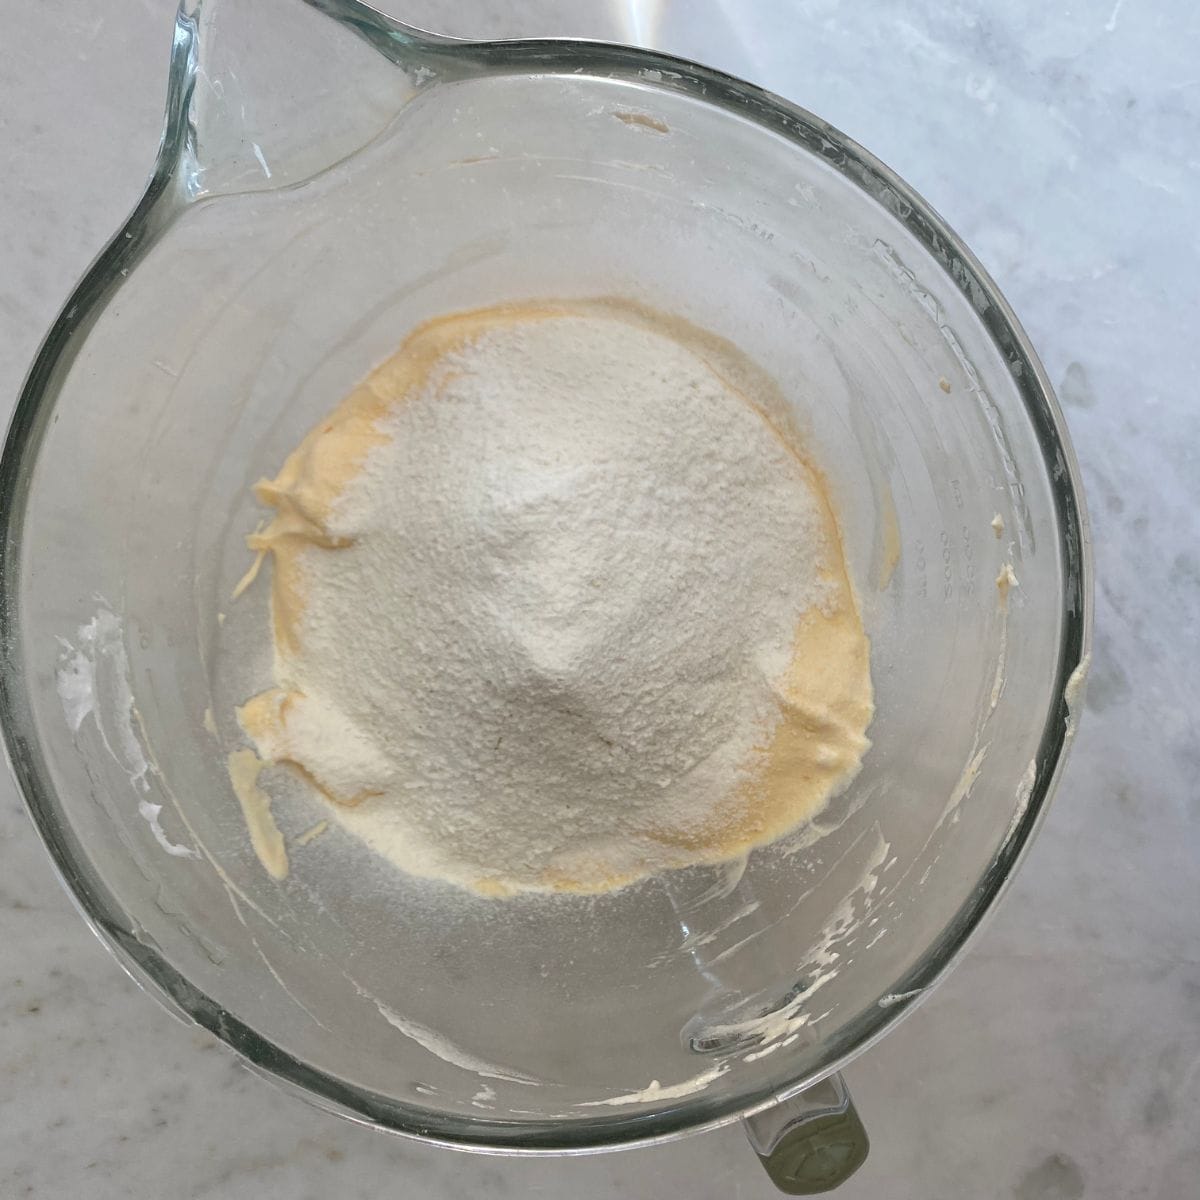
- Sifting the flour (and starch) removes any lumps and aerates the mixture, helping it fold more easily into the whipped eggs without deflating them. This keeps the batter light and smooth, which is key to achieving the delicate, airy texture of classic ladyfingers.
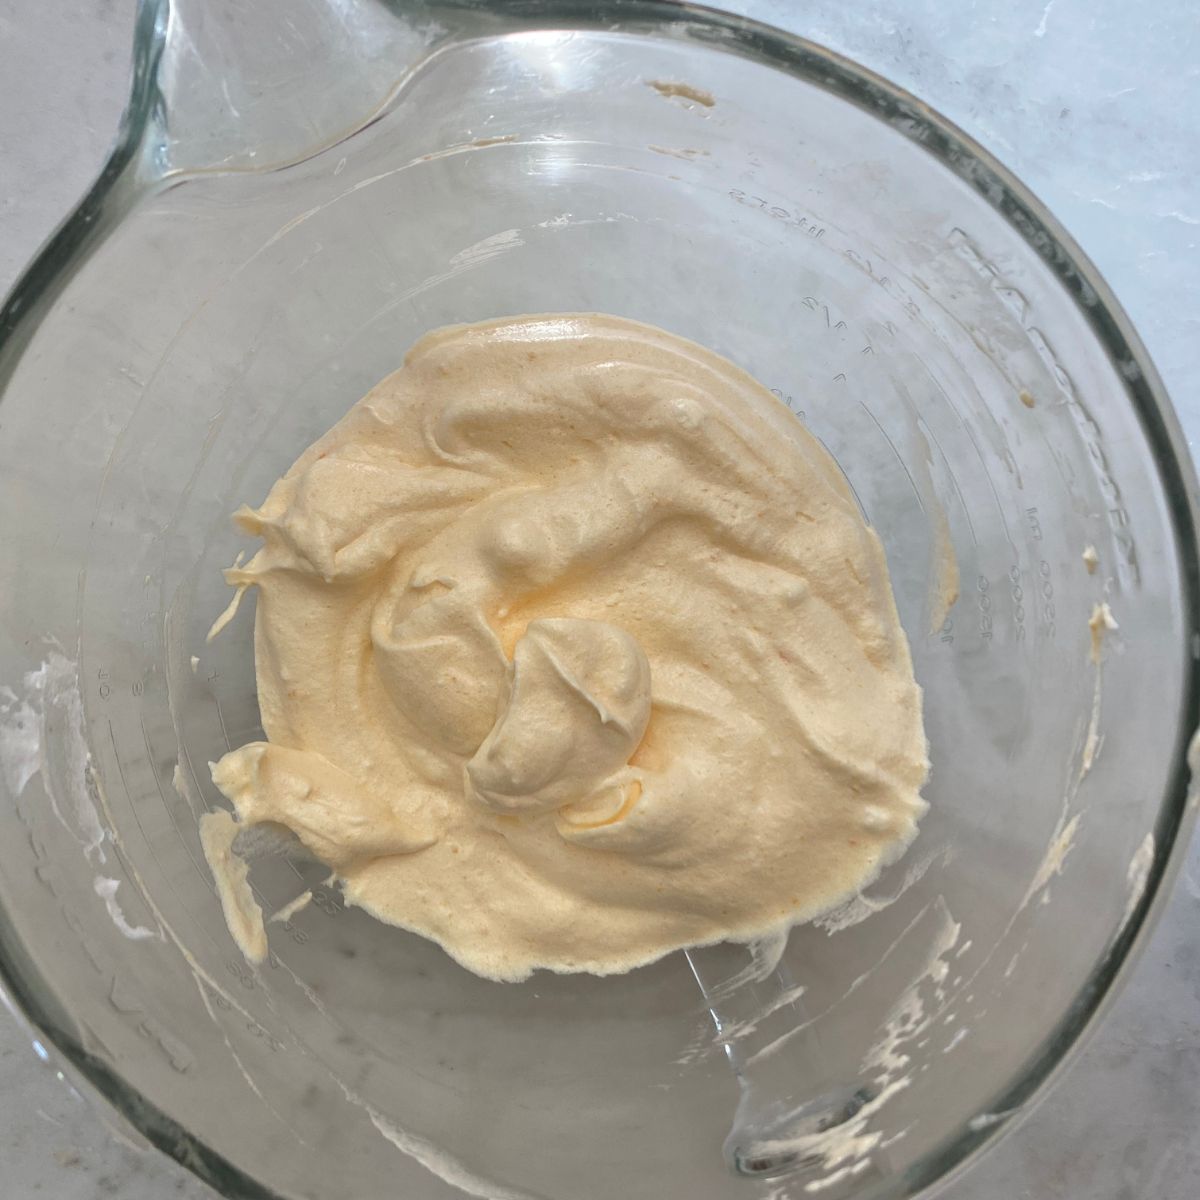
- Mix gently to incorporate the sifted flour into the egg mixture. The batter should stay light and airy, with a smooth, billowy texture. Be careful not to over-mix — too much stirring will deflate the whipped egg whites and make the ladyfingers dense.
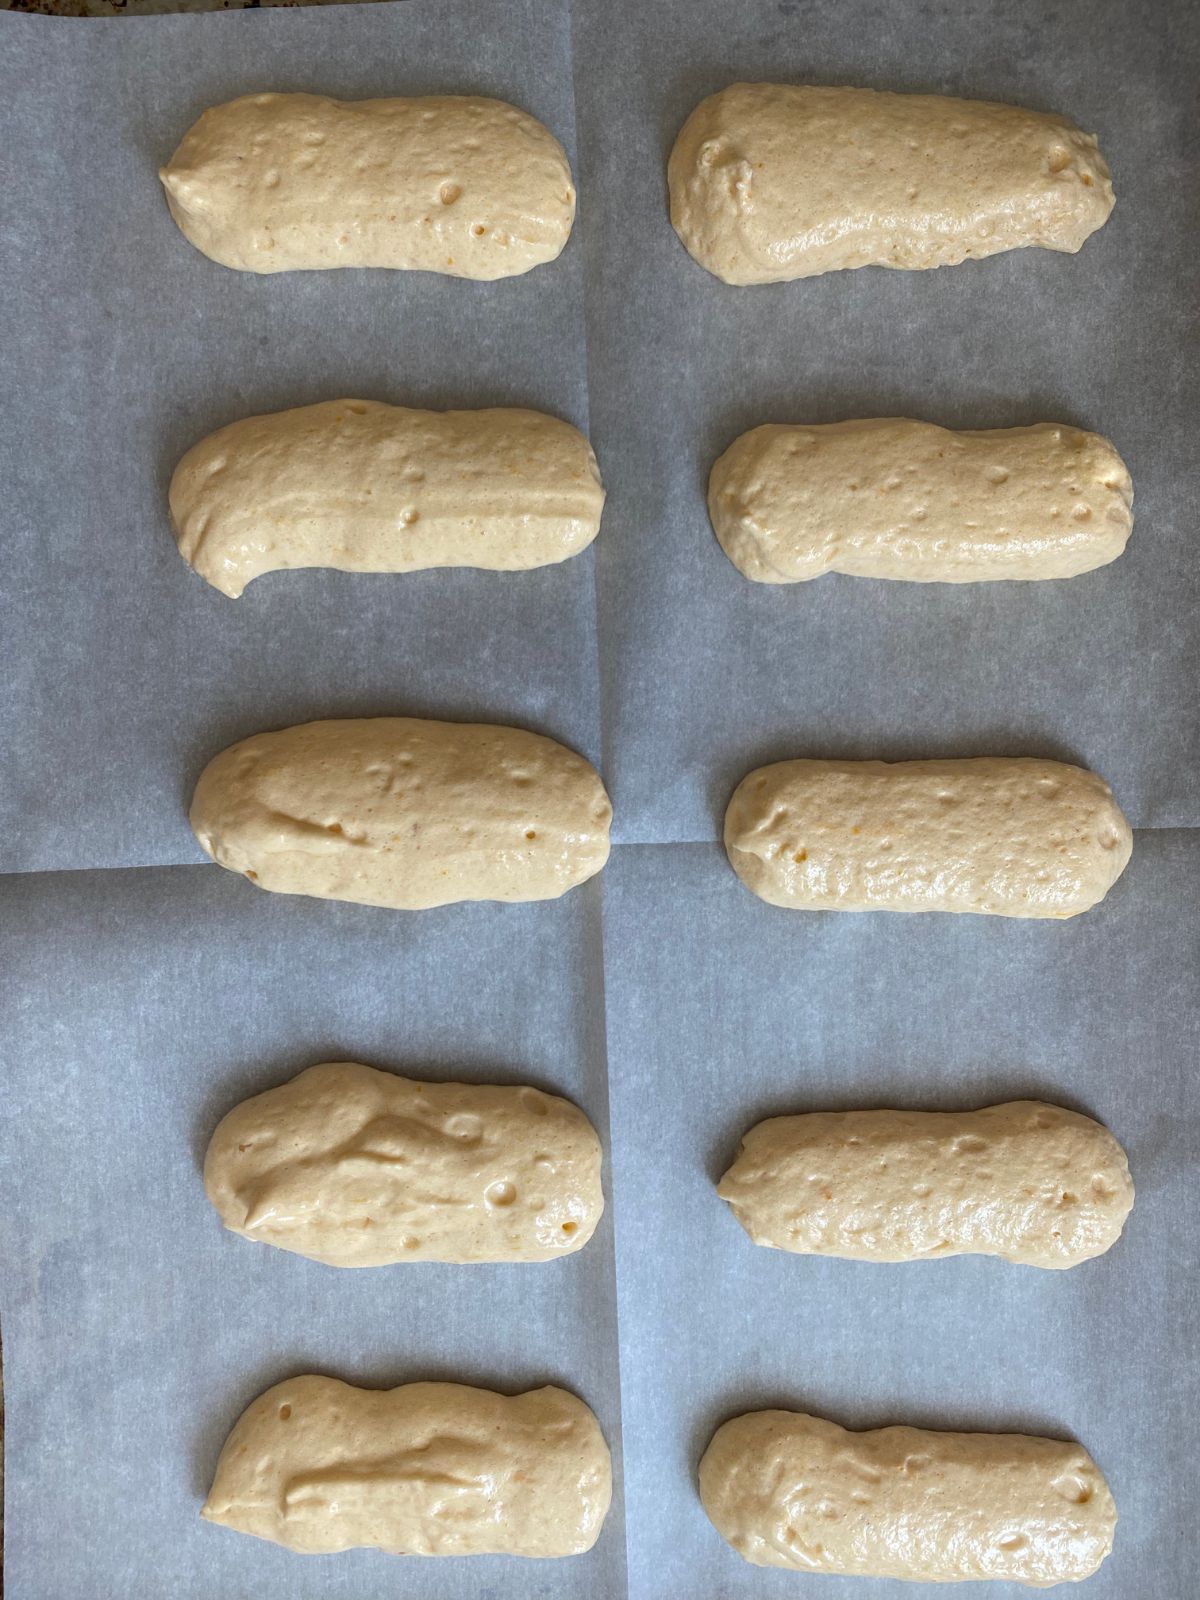
- Spoon the sponge cake batter into a piping bag or pastry bag with a wide tip. Pipe the batter onto prepared baking sheets lined with parchment paper. Aim for 4″/8 cm strips, keeping them a few inches apart.
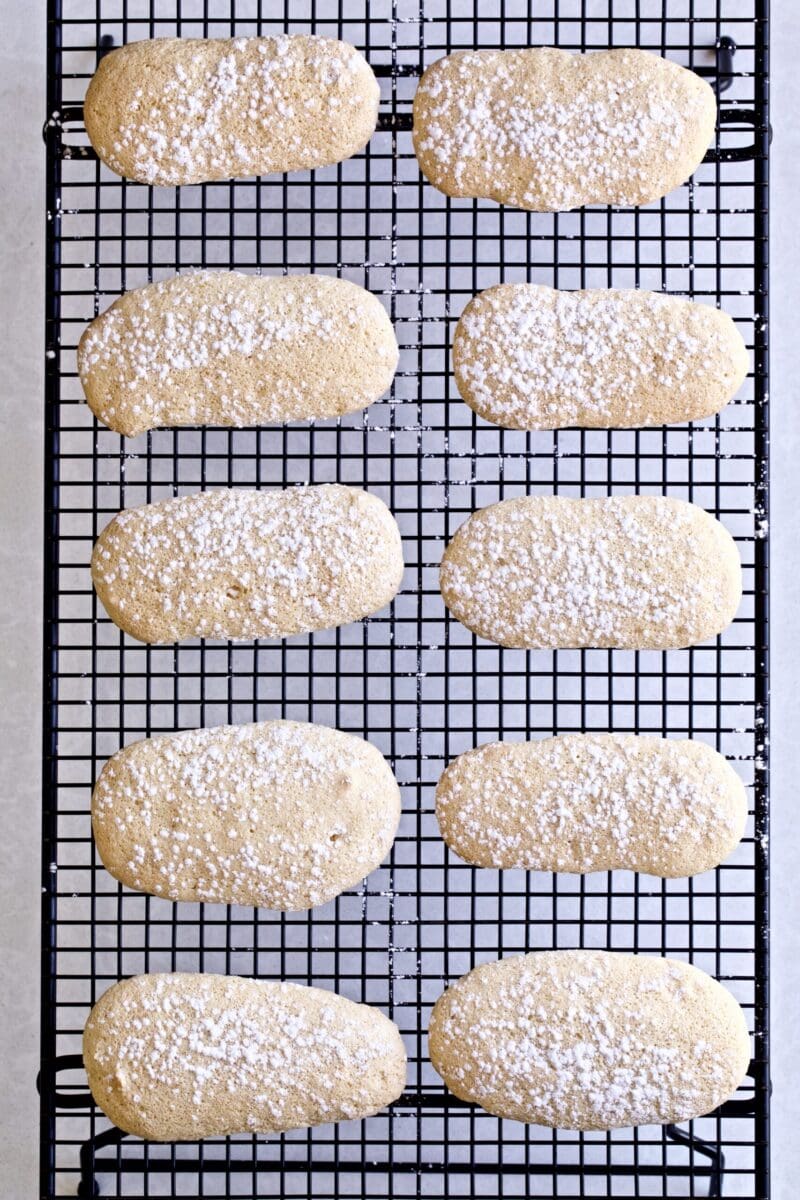
- Bake for about 15 minutes until well-risen and golden. Remove from the oven and let cool on a cooking rack. Mangia! (eat!)
💡 Hint: Don’t worry about getting the shapes perfect; ladyfingers are very forgiving. Pipe the batter in steady, even strokes, and keep the tip slightly above the surface so the batter doesn’t spread too much. You can make the “fingers” as slim or as thick as you like; just aim for consistent sizes so they bake evenly. If you want cleaner edges, give the piping bag a gentle squeeze before you start each strip to release any trapped air pockets.
My Pro Tips
Tips & Troubleshooting
These Homemade Savoiardi Biscuits are a true taste of Italy in a classic cookie! They are a little crisp to bite in and soft and airy inside.
- Weigh your ingredients: For the most consistent results, weigh your flour and sugar. Precise measurements help prevent dry, dense cookies and keep the batter light.
- Start with a clean bowl: Any trace of grease or soap will keep the egg whites from whipping properly. Use a spotless metal or glass bowl for the best volume.
- Don’t over-mix: Gently fold the egg yolks into the whipped whites, then fold in the dry ingredients with a light hand. Over-mixing deflates the batter and leads to flat, dense ladyfingers.
- Avoid opening the oven: A blast of cool air can cause the delicate cookies to collapse. Let them bake undisturbed until set.
- Batter deflated? This usually means the yolks were mixed in too aggressively. Fold more gently next time to preserve the air in the meringue.
- Ladyfingers spreading too much? The batter may be too warm or you may have piped too slowly. Work quickly and bake right away for clean, defined shapes.
- Too soft after baking? Increase drying time by leaving them uncovered.
- Sticking to the parchment? They’re slightly underbaked. Add 1–2 more minutes next time, or allow them to cool completely before removing.
❤️ For more Italian cookies to satisfy your sweet tooth cravings, try these thumbprint cookies with jam and Italian butter cookies.
Ladyfingers Recipe FAQ’s
Ladyfingers are best fresh, eaten the same day you make them. You can store homemade ladyfingers in an airtight container at room temperature for 2-3 days. You may also freeze the cookies in an airtight container for up to 2 months. Thaw them at room temperature before eating or using them in your favorite tiramisu recipe.
Both textures are correct, depending on the recipe. Homemade savoiardi are naturally soft, light, and sponge-like, while store-bought ladyfingers are typically dry and crisp. If you’re using homemade ones for tiramisu, let them dry out a bit before using, and give them only a quick dip in the espresso because they absorb liquid much faster.
To mimic the firmer texture of packaged ladyfingers, either leave them uncovered overnight or dry them in a low oven at about 200°F (95°C) for 8–12 minutes. Let them cool completely before using or storing.
Yes! Fill a large zip-top bag and snip off one corner to create a makeshift piping bag. You can also spoon the batter into thick strips, though the cookies may look more rustic. As long as the sizes are consistent, they’ll bake beautifully.
How to Use Homemade Savoiardi in Tiramisu
Homemade savoiardi make an incredibly tender and flavorful base for tiramisu, but they behave a little differently than the crisp, store-bought variety. Because they’re softer and more sponge-like, they absorb liquid very quickly — which can be a good thing if you handle them with a light touch.
- Dry them out for more structure. If you want a firmer texture similar to packaged ladyfingers, you can leave your homemade savoiardi uncovered overnight or dry them in a low oven before assembling your tiramisu. This helps them hold their shape and gives cleaner layers.
- Give them only a quick dip. A brief touch into the espresso mixture (about ½ second per side) is all the homemade savoiardi need. Anything longer and they’ll become oversaturated, causing the layers to turn mushy.
- Use them in classic or flavored tiramisu. These homemade ladyfingers work beautifully in any tiramisu variation. Try them in my authentic Italian tiramisu, fruity strawberry tiramisu, or bright and refreshing lemon tiramisu.
Serving Suggestions
Other than tiramisu, ladyfingers are also a component used in many trifle recipes or to make Zuppa Inglese.
They’re great dipped in hot chocolate with homemade chocolate syrup or espresso, similar to Italian biscotti.
Add them to a cookie tray with Italian chocolate spice cookies and pistachio cookies.

More Classic Italian Cookies
💙 MADE THIS RECIPE AND LOVED IT? 💙 Please leave a ⭐️STAR rating and COMMENT below- I love connecting with you! Tag me with your creations on Instagram and find me on Pinterest.
Homemade Italian Savoiardi (Ladyfingers)
Equipment
Ingredients
- 120 grams sugar
- 4 eggs, separated
- 110 grams all purpose flour
- 40 grams potato flour, or corn starch
- ½ teaspoon vanilla extract
- ⅛ teaspoon baking powder
- ⅛ teaspoon salt
- powdered sugar for dusting
Instructions
- Preheat oven to 340 degrees F. Line two baking sheets with parchment paper and set aside.
- Start by separating the egg yolk from the egg whites. Place the egg whites and half of the sugar in a stand mixer (or hand mixer) with a whisk attachment. Start on medium speed until soft peaks form. Gradually increase to high speed. Beat the egg whites until stiff peaks form.
- Mix the egg yolks, vanilla, and remaining sugar until combined. Add egg yolk mixture to the egg whites, a little at a time, until completely incorporated. Do not over mix.
- Sift in the dry ingredients to the egg mixture and incorporate well. Careful not to over mix the batter.
- Then, spoon the sponge cake batter to a piping bag or pastry bag with a wide tip. Pipe the batter onto prepared baking sheets lined with parchment paper. I use a standard cookie sheet.
- Squeeze out 4″/8 cm strips onto the baking tray, keep them a few inches apart. Bake about 15 minutes until well risen and golden. Remove from oven and let cool on a cooking rack. Mangia! (eat!)
Notes
- Weigh your ingredients: Using a kitchen scale keeps the flour and sugar perfectly balanced, preventing dry or dense cookies.
- Use a clean mixing bowl: Any trace of grease can prevent the egg whites from whipping. A spotless metal or glass bowl gives the best volume.
- Fold gently: Lightly fold the yolks into the whipped whites, then fold in the dry ingredients. Over-mixing deflates the batter and leads to flat ladyfingers.
- Don’t open the oven: Ladyfingers are delicate. Keep the oven closed while baking to prevent collapsing.
Nutrition
Nutrition information is automatically calculated, so should only be used as an approximation.


I made these day and they were perfect! They are so light.
I love all your recipes and follow you religiously. Ive made your carrot cake, pignoli cookies, angenettis, pistachio cookies, chocolate crinkles, lemon crinkles, biscotti, lemon biscotti, easter bread, and pistachio crema—all insanely delish.
This bake however was a killer. Others say this is awesome, and I believe it but this is just my experience. I made two different batches and they both failed. Wanted to make tiramisu but it all went to hell. 🙂
They came out sticky. The first time i dont think i made them fat enough. Some burned at 12 minutes. Then i tried a new batch which were thicker for 12 minutes; they didnt burn but they were also sticky. I baked them again super fast to dry them out. Seemed to work so I left the house came back and they were sticky yet again.
Elena, please help. What could have happened?
Hi Lee! I am thrilled you love all the recipes. This one is also tried and true! Although, I didn’t see your process my guess is that the egg whites weren’t whipped enough, or they were whipped too much into a stiff meringue. I would also watch them closely in your oven as oven temperatures vary greatly per oven type and age, etc. If your oven runs hot, etc. I would start looking at them with the light on in the oven at 8 minutes. I hope this helps as this is a wonderful recipe.
Let me know! Elena.
Above it reads to use stale lady fingers for Tiramisu. Do you leave them out (to harden) or wait until the next day to use them (or both)?
If you are using these homemade ladyfingers for tiramisu it is best if you let them harden a bit. The store-bought ones are already hard. You can leave them out on the counter until the next day and use them! Enjoy.
This is an excellent recipe!!!!!!! Easy to follow. Came out incredibly well.. light, soft in the middle, and not overly sweet. I rebaked them for a few minutes to make them more like a crunchy cookie.. either way awesome!!!!!!! I had to stop myself from eating the entire batch!!!!!Thank you Elena!
Happy you loved them! An Italian classic!
Great recipe! Used them it in a tiramisu cheesecake I made at work for a special! Def will be using again anytime I make tiramisu!
Love the idea of a tiramisu cheesecake! Happy you loved the recipe.
I finally had a chance to make this and love it!!! It is so light and very tasty. Not so sweet and has just the right amount of sugar.
My daughter kept eating it. It was a good thing she didn’t eat before I used them for Tiramisu! It would not have been enough left if she ate before I made Tiramisu!
Happy you loved the recipe they are a favorite from my childhood!
Can I add Amaretto Disaronno to the batter? If so, how much? I can’t use almond extract because of a nut allergy & the amaretto is nut-free. Thanks!
I haven’t tested it with that, so I am not sure of the exact amount! You can use it and it will taste great. You can also use vanilla extract.
I can’t believe hardly anyone has commented on this recipe! I made these today and they were perfection! I’m planning to make your tiramisu tomorrow – can’t wait! Thanks for sharing! 🙂
They really are the best savoiardi recipe! I hope you love the tiramisu as well. It is a family favorite.
This is a recipe loved by the entire family! We love these cookies in our tiramisu, eat them plain, or dip them in a warm drink! Must make recipe!